


Solution
Charging the Battery PackInserting the Battery Pack and Memory Card
Setting the Date and Time
Shooting Still Images
Follow the steps below to get started with your new camera.
Charging the Battery Pack
Before use, charge the battery pack with the included charger. Be sure to charge the battery pack initially, because the camera is not sold with the battery pack charged.
1. After aligning the 


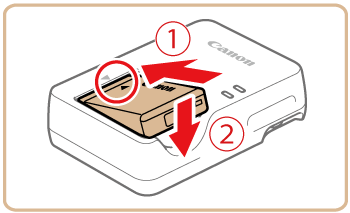
2. Charge the battery pack.
CB-2LH: Flip out the plug (
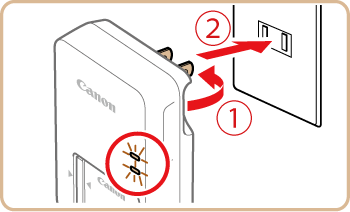
CB-2LHE: Plug the power cord into the charger, then plug the other end into a power outlet.
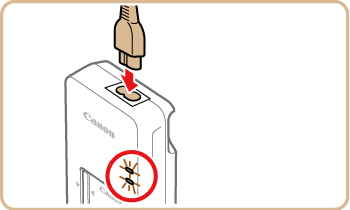
3. After unplugging the battery charger, remove the battery pack by pushing it in (

Caution
Caution
Inserting the Battery Pack and Memory Card
Insert the included battery pack and a memory card (sold separately).
Caution
Note that before using a new memory card (or a memory card formatted in another device), you should format the memory card with this camera.
1. Open the cover
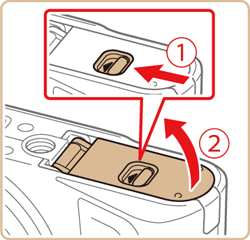
and open the cover .2. Insert the battery pack.
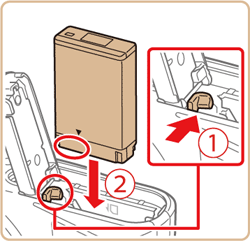
and insert the battery pack toward until the lock clicks shut.Caution
If you insert the battery pack facing the wrong way, it cannot be locked into the correct position. Always confirm that the battery pack is facing the right way and locks when inserted.
3. Check your card’s write-protect switch and insert the memory card.
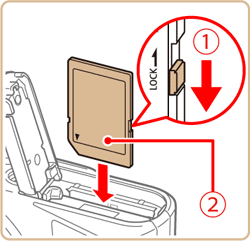
. facing as shown until it clicks into place.Caution
Make sure the memory card is facing the right way when you insert it. Inserting memory cards facing the wrong way may damage the camera.
4. Close the cover.
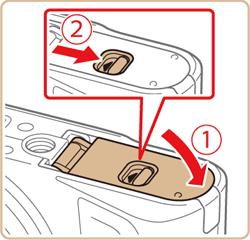
and hold it down as you slide the switch, until it clicks into the closed position .Setting the Date and Time
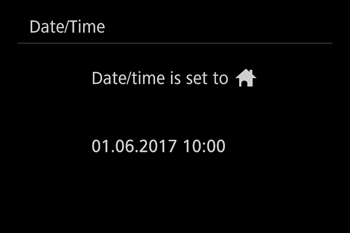
If the [Date/Time] screen is displayed when you turn the camera on, set the current date and time correctly as follows. Information you specify this way is recorded in image properties when you shoot, and it is used when you manage images by the shooting date or print images showing the date.
You can also imprint the shooting date and time on images.
Caution
1. Press the power button to turn the camera on.
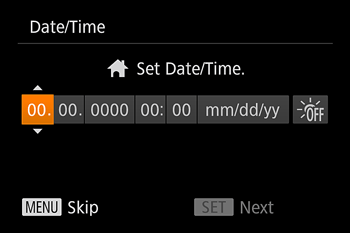
2. Press the [ 


 ] button.
 3. The [Time Zone] screen appears.
Press the [
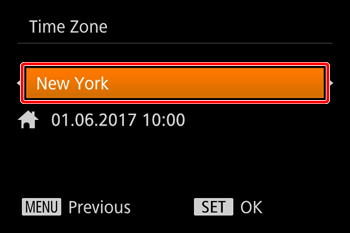
4. Press the [
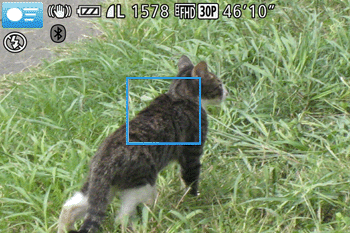
Shooting Still Images
1. Set the mode dial to [AUTO].

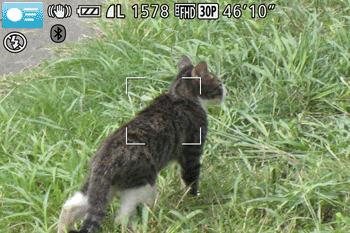
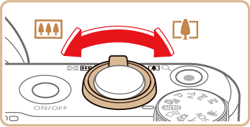
2. Compose the shot.
To zoom in and enlarge the subject, move the zoom lever toward [ 

3. Focus.

 ] switch to raise the flash. It will fire when shooting. If you prefer not to use the flash, push it down with your finger, into the camera.
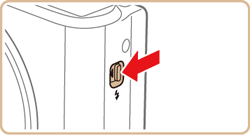
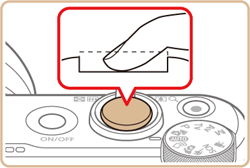
4. Press the shutter button all the way down.
This completes the procedure for shooting the camera for the first time immediately after purchase.