

Issue
Cause and solution
Check 1: If the Power lamp is off, make sure that the power plug is plugged in, then turn the machine on
While the Power lamp is flashing green, the machine is initializing. Wait until the Power lamp stops flashing and remains lit green.
Cause and solution
Check 2: Make sure that the printer port is configured appropriately in the MP Drivers
* In the following instructions, "XXX" signifies your machine's name.
1.Log on as a user account with administrator privilege.
2.Click Control Panel, then Printer under Hardware and Sound.
In Windows XP, click Control Panel, Printers and Other Hardware, then Printers and Faxes.
In Windows 2000, click Control Panel then Printers.
3.Right-click the Canon XXX Printer icon, then select Properties.
4.Click the Ports tab to confirm the port settings.
Make sure that a port named USBnnn (where "n" is a number) with Canon XXX Printer appearing in the Printer column is selected for Print to the following port(s).
If the port setting is not correct, reinstall the MP Drivers or change the port setting according to the interface you are using.
Cause and solution
Check 3: Make sure that the USB cable is securely plugged in to the machine and the computer
Cause and solution
Check 4: Make sure that the MP Drivers are installed correctly
Uninstall the MP Drivers following the procedure described in [ Uninstalling the MP Drivers ] and reinstall them following the procedure described in your setup manual.
To use the machine by connecting it to a computer, software including the drivers needs to be copied (installed) to the computer's hard disk.
The screens below are based on Windows Vista operating system Ultimate Edition (hereafter referred to as "Windows Vista") and Mac OS X v.10.5.x.
Caution
Windows
Caution
If the Found New Hardware or Found New Hardware Wizard dialog box appears:
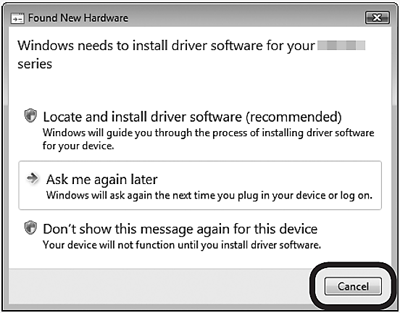
(1)Remove the USB cable connected to your computer.
The dialog box may close. In this case, proceed from 1.
(2)Click Cancel to quit the dialog box.
(3)Proceed from 1.
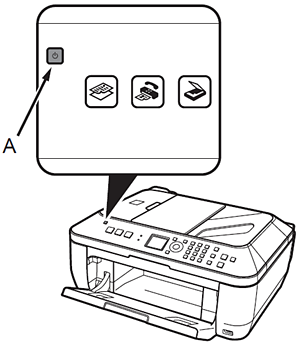
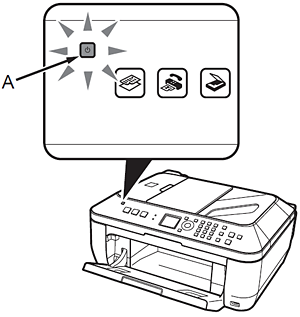
1.TURN OFF THE MACHINE (A).
Caution
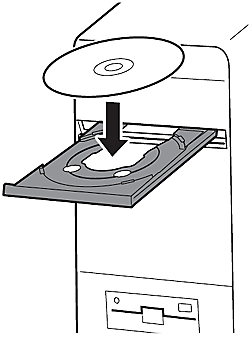
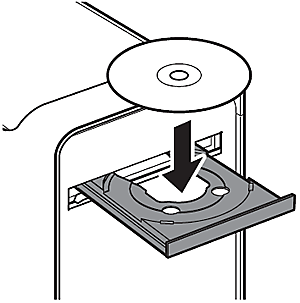
2.Turn on the computer, then insert the Setup CD-ROM into the CD-ROM drive.
The setup program should start automatically.
Windows Vista -⋗ Go to Step 3.
Windows XP/2000 -⋗ Go to Step 5.
Caution
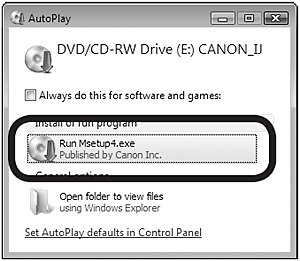
3.Widows Vista
AutoPlay screen appears, click Run Msetup4.exe.
4.Windows Vista
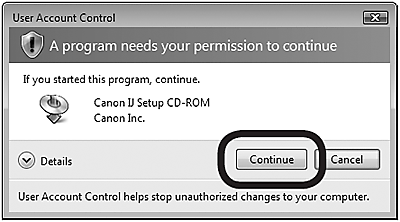
User Account Control dialog box appears, click Continue.
If the same dialog box reappears in subsequent steps, click Continue.
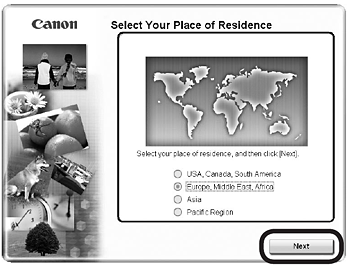
5.Select your place of residence, then click Next.
Caution
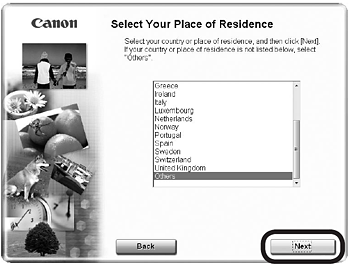
6.Select a country or region, then click Next.
Caution
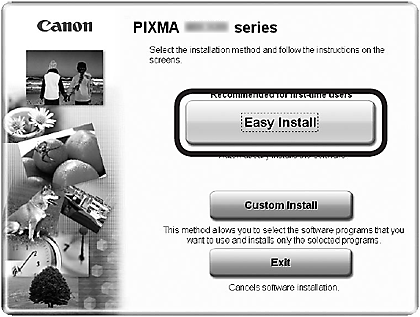
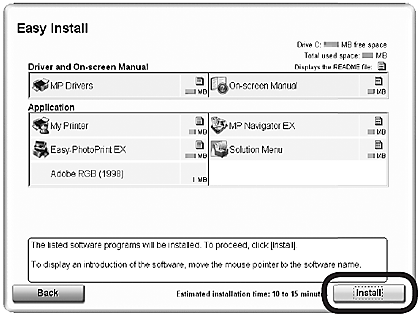
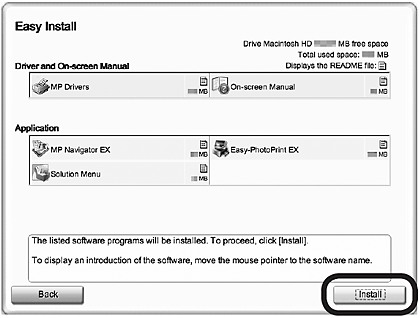
7.Click Easy Install.
Drivers, application software, and on-screen manuals are installed automatically.
Caution
8.Click Install.
Caution
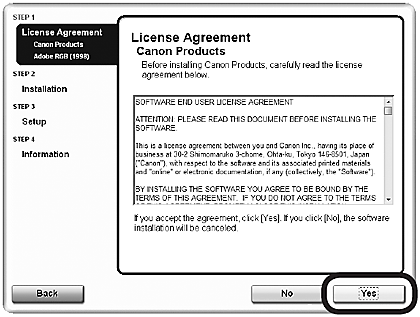
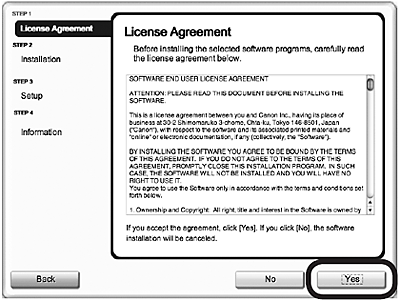
9.Read the License Agreement screen carefully and click Yes.
Caution
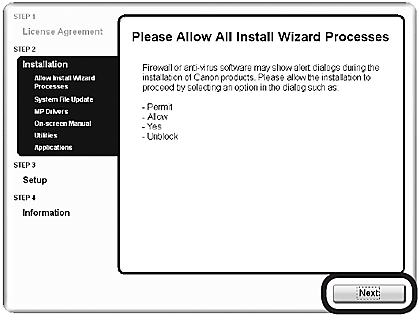
10.When the Please Allow All Install Wizard Processes screen appears, click Next.
Installation starts.
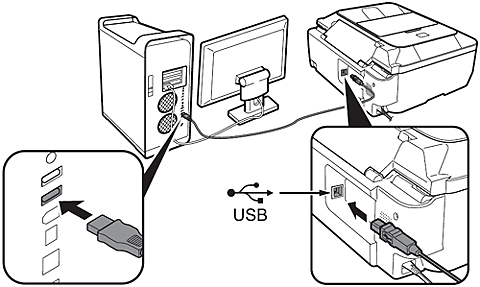
11.When the Printer Connection screen appears, connect the machine to the computer with a USB cable.
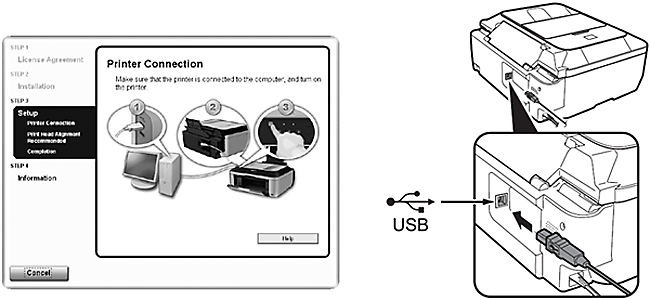
Caution
12.Turn on the machine (A).
When the machine is recognized by the computer, a message appears on the screen.
Caution
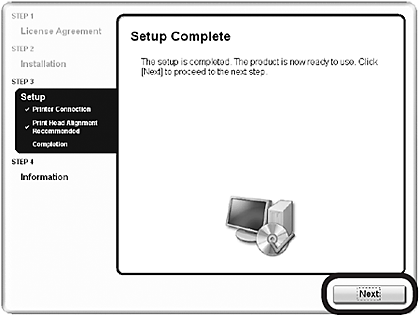
13.Click Next.

Caution
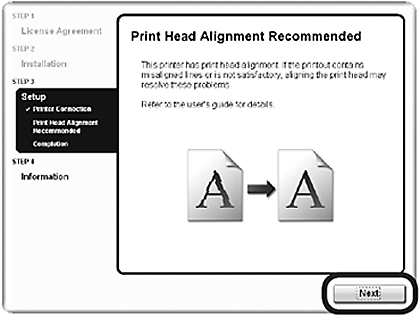
-⋗ [ Aligning the Print Head ]
14.Click Next.
It may take a while for the next screen to appear.
Click Next only once.
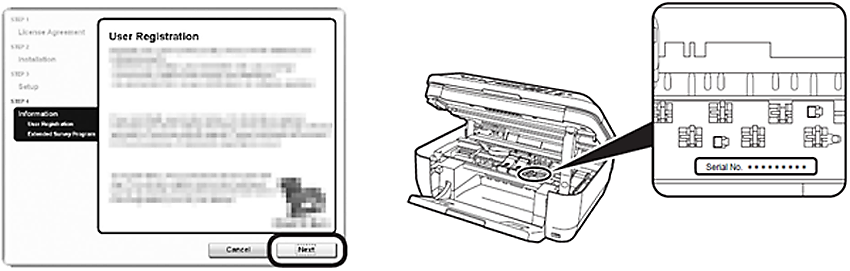
15.Click Next.
If connected to the Internet, the user registration page appears. Follow the on-screen instructions to register your machine. You will need your product serial number, which is located on the inside of the machine.
Caution
Caution
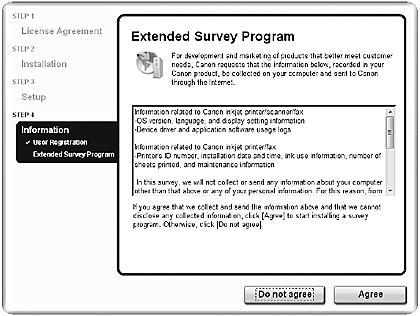
16.When the Extended Survey Program screen appears, confirm the message.
If you can agree, click Agree. If you click Do not agree, the Extended Survey Program will not be installed.
(This has no effect on the machine's functionality.)
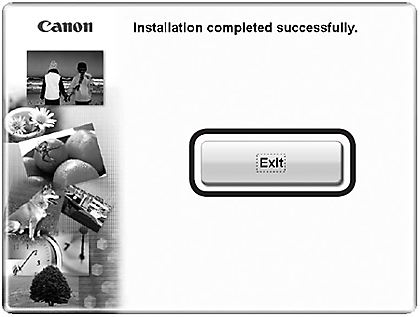
17.Click Exit.
If Restart is displayed, make sure that the Restart the system now (recommended) check box is selected, then click Restart.
After restarting the computer, remove the Setup CD-ROM and keep it in a safe place.
Macintosh
1.Connect the machine to the computer with a USB cable.
Make sure the machine is turned on.
Caution
2.Turn on the computer, then insert the Setup CD-ROM into the CDROM drive.
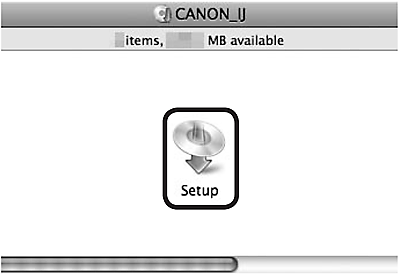
3.Double-click the Setup icon.
If the CD-ROM folder does not open automatically, double-click the CANON_IJ icon on the desktop.
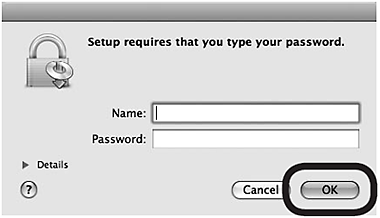
4.Enter your administrator name and password.
Click OK.
If you do not know your administrator name or password, click Help, then follow the on-screen instructions.
5.Select your place of residence, then
click Next.

Caution
6.Select a country or region, then click Next.

Caution
7.Click Easy Install.
Drivers, application software, and on-screen manuals are installed automatically.
Caution
8.Click Install.
Caution
9.Read the License Agreement screen carefully and click Yes.
Installation starts.
Caution
10.Click Next.
Caution
-⋗ [ Aligning the Print Head ]
11.Click Next.
12.Click Next.
If connected to the Internet, the user registration page appears. Follow the on-screen instructions to register your machine. You will need your product serial number, which is located on the inside of the machine.
Caution
Caution
13.When the Extended Survey Program screen appears, confirm the message.
If you can agree, click Agree. If you click Do not agree, the Extended Survey Program will not be installed.
(This has no effect on the machine's functionality.)
Caution
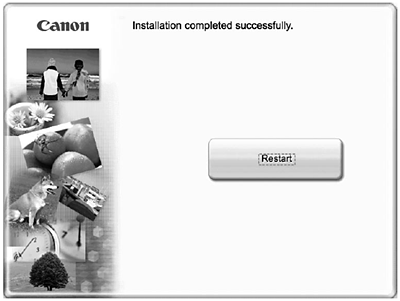
14.Click Restart.
After restarting the computer, remove the Setup CD-ROM and keep it in a safe place.
Caution
Cause and solution
Check 5: Check the status of the device on your computer
Follow the procedure below to check the status of the device
1.Click Control Panel, Hardware and Sound, then Device Manager.
If the User Account Control screen is displayed, follow the on-screen instructions.
In Windows XP, click Control Panel, Performance and Maintenance, System, then click Device Manager on the Hardware sheet.
In Windows 2000, click Control Panel, System, then Device Manager on the Hardware sheet
2.Double-click Universal Serial Bus controllers then USB Printing Support.
If USB Printing Support is not displayed, make sure that the machine is correctly connected to the computer.
see -⋗ "Check 3: Make sure that the USB cable is securely plugged in to the machine and the computer"
3.Click the General tab and make sure that there is no indication of a problem with the device.
If a device error is displayed, refer to Windows help to resolve the error.