

Solution
PreparationRemove the Protective Material
Connect the Telephone Line
Turn the Power On
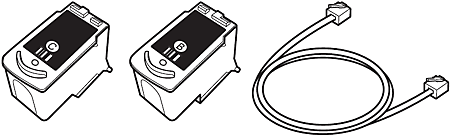
Install the FINE Cartridges
Set Up for Fax Reception
Loading Paper
Preparation
Before turning on the machine, remove all the orange tapes and the protective sheets.
Caution
A USB cable is necessary to connect the machine with your computer.
Caution
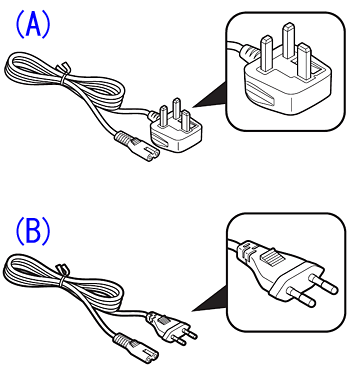
Power Cord
Caution
Choosing a Location
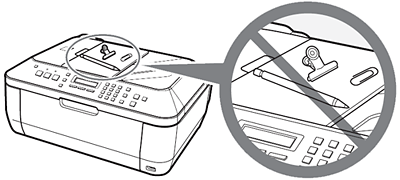
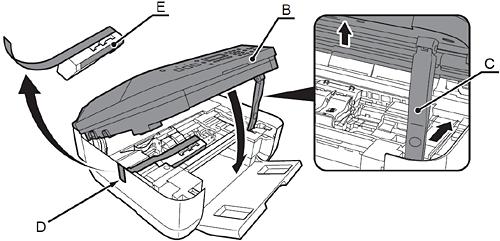
Remove the Protective Material
1.Open the Paper Output Tray (A).
2.Lift the Scanning Unit (Cover) (B) until it locks into place.
The Scanning Unit Support (C) is fixed automatically.
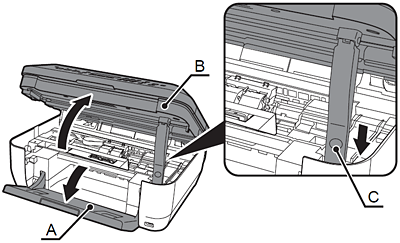
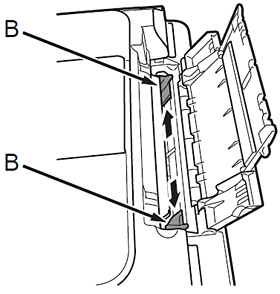
3.Pull the orange protective tape (D) and remove the protective material (E).
4.Then, lift the Scanning Unit (Cover) (B) slightly and fold the Scanning Unit Support (C), then gently close the Scanning Unit (Cover) (B).
Connect the Telephone Line
To use the machine as a fax, a telephone
line needs to be connected.
This section describes the basic method of telephone line connection.
When not using as a fax: -⋗ Go to "4 Turn the Power On"
When using as both a fax and telephone: -⋗ 1. 2.
When using as a fax only: -⋗ 1 only
Caution
If you cannot send faxes after installing the machine, check the telephone line type. For details, refer to [ Confirming the Telephone Line Connection ]
1.Connect the machine with a telephone line using the supplied telephone line cable (A).
When using as a fax only: -⋗ Go to "Turn the Power On"
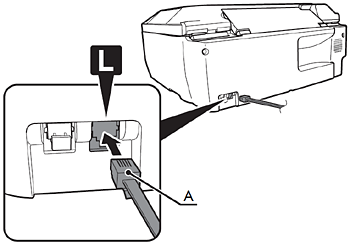
Caution
Users in Europe: If you prepare your own phone cable, be sure it is a 6-wire phone cable.
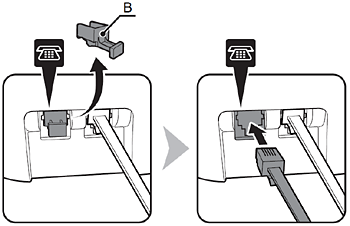
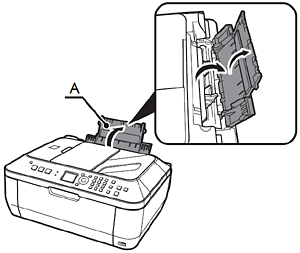
2.Only when connecting a telephone:
Remove the telephone connector cap (B), then connect a telephone with the telephone line cable.
Caution
Turn the Power On
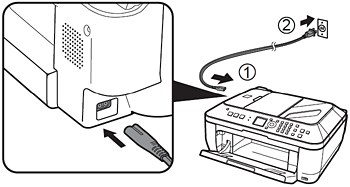
1.Plug the power cord into the left side of the machine, then connect the other end to the wall outlet.
Caution
2.Turn on the machine (A).
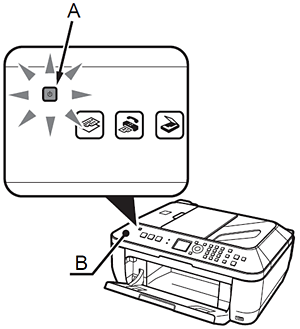
Caution
3.Use the 

Caution
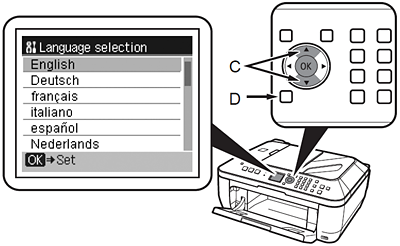
4.Use the
Caution
The Country select screen may not be displayed depending on the country or region of purchase.
5.The standby screen is displayed.
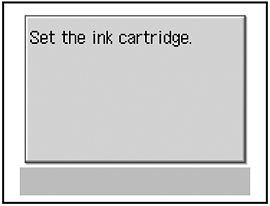
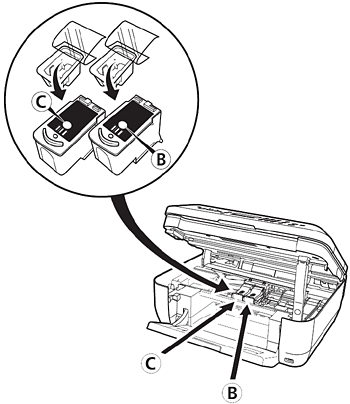
Install the FINE Cartridges
Caution
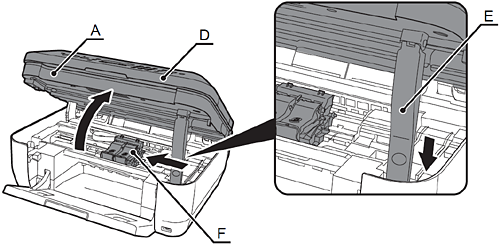
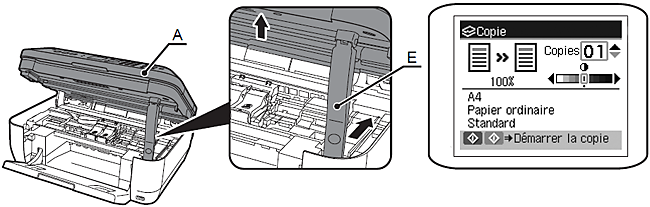
1.Lift the Scanning Unit (Cover) (A) until it locks into place.
The Scanning Unit Support (E) is fixed automatically.
The FINE Cartridge Holder (F) comes out. (This is where you install the cartridges.)
Close the Document Cover (D) and lift it with the Scanning Unit (Cover).
Caution
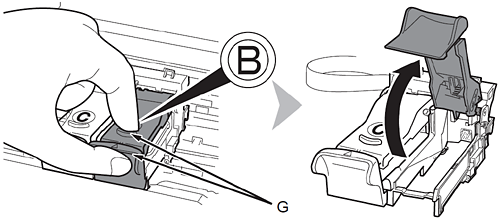
2.Open the Ink Cartridge Locking Cover 
Pinch (G) firmly and pull up the cover.
3.Remove the Black FINE Cartridge
4.Pull the orange protective tape (H) in the direction of the arrow and remove it gently.
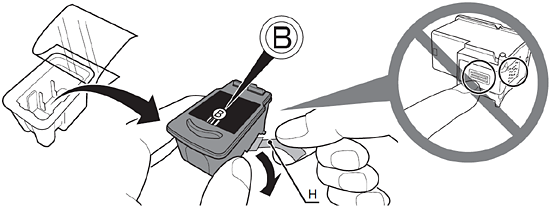
Caution
5.Place the Black FINE Cartridge
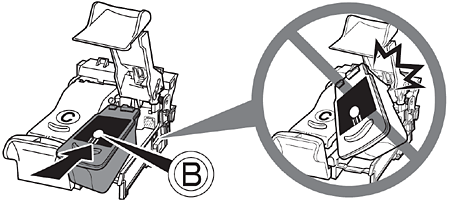
Caution
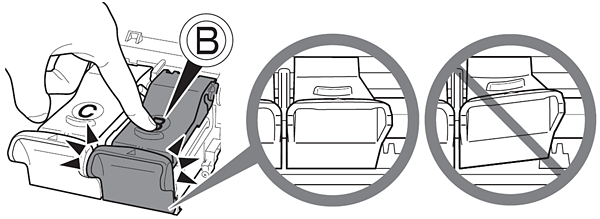
6.Push down
View the Ink Cartridge Cover
Insert the Color FINE Cartridge 
7.Lift the Scanning Unit (Cover) (A) slightly and fold the Scanning Unit Support (E), then gently close the Scanning Unit (Cover) (A).
Caution
Set Up for Fax Reception
If you are not using the machine as a fax
-⋗ [ Install the Software ]
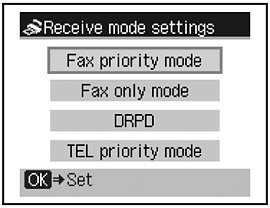
Select a receive mode according to your needs to receive faxes easily.
When using as a fax only:
When you want to receive only faxes (FAX only mode)
When a call arrives:
You cannot answer the call.
The machine does not ring.
Faxes are received automatically.
When using as both a fax and telephone:
When you want to switch the line between fax and telephone automatically (FAX priority mode)
When a call arrives:
The machine rings.
Pick up the handset, then press the Stop button to answer the call.
The machine does not ring.
Faxes are received automatically.
When you receive more voice calls than faxes (TEL priority mode)
When a call arrives:
Pick up the handset to answer the call.
If you pick up the handset and hear the fax tone, the machine will switch to the fax automatically and receive the fax.
If you use a call ring pattern detection service (DRPD/Network Switch)
When a call arrives:
The telephone continues to ring.
Pick up the handset to answer the call.
Faxes are received automatically when the machine detects the fax ring pattern.
Caution
Caution
This service may not be available depending on the country or region of use.
1.Press the FAX button (A), then press the Menu button (B).
The FAX settings screen is displayed.
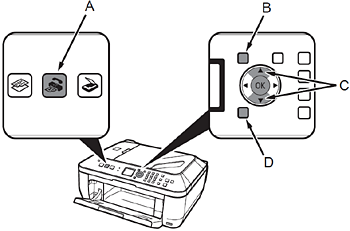
2.Press the OK button.
The Receive mode set. screen is displayed.

3.Use the
The selected receive mode is displayed.
Loading Paper
1.Open the Paper Support (A).
2.Move the Paper Guides (B) to both edges.
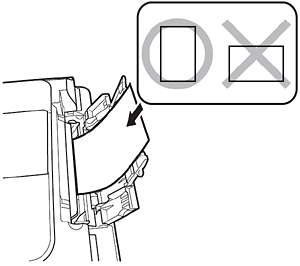
3.Load paper in the center.
Load paper in portrait orientation with the printing side facing up.
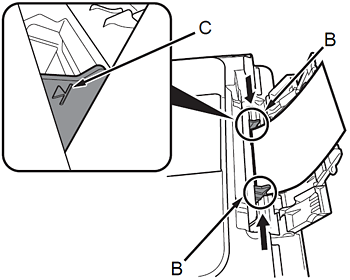
4.Slide the left and right Paper Guides (B) against both edges of the paper.
Confirm that the loaded paper does not exceed the line (C).
Caution
For details on media sizes and types you can use, refer to [ Loading Paper ]