

If ruled lines are printed misaligned, adjust the Print Head position.
Print head alignment is performed automatically. However, you can align the Print Head manually, if the results of automatic print head alignment are not satisfactory.
Automatic Print Head Alignment
For automatic print head alignment, follow the procedure below.
Caution
Aligning the Print Head Without a Computer
in the computer, align the print head in this way.
1. With the printer on, load two sheets of A4 or Letter-sized plain paper in the Auto Sheet Feeder.
2. Gently press the 
3. Hold down the RESUME/CANCEL button until the POWER lamp flashes blue four times, and then release it immediately. Two pattern sheets are printed. Do not open the Top Cover while printing.

1. With the printer on, load two sheets of A4 or Letter-sized plain paper in the Auto
Sheet Feeder.
Caution
If other than A4 or Letter-sized paper is loaded, you cannot print the print head alignment patterns. Be sure to use A4 or Letter-sized plain paper.
2. Gently press the 
3. Open the printer properties dialog box.
4. Print the pattern.
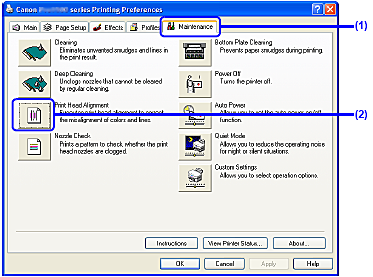
(1) Click the Maintenance tab.
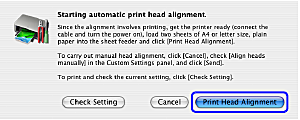
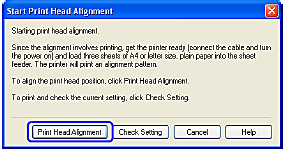
(2) Click Print Head Alignment.
(3) Confirm the displayed message and click Print Head Alignment.
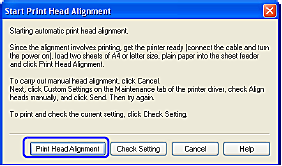
Two pattern sheets are printed. It takes about seven minutes to finish printing. Do not open the Top Cover while printing.
Print head alignment is automatically adjusted by printing the patterns. The printer is now ready to use.
Caution

1. With the printer on, load two sheets of A4 or Letter-sized plain paper in the Auto
Sheet Feeder.
Caution
If other than A4 or Letter-sized paper is loaded, you cannot print the print head alignment patterns. Be sure to use A4 or Letter-sized plain paper.
2. Gently press the 
3. Open the Canon IJ Printer Utility dialog box.
4. Print the pattern.
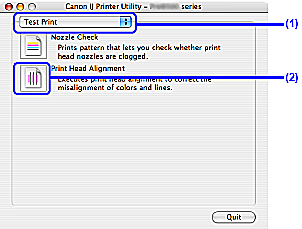
(1) Select Test Print from the pop-up menu.
(2) Click Print Head Alignment.
(3) Confirm the displayed message and click Print Head Alignment.
Two pattern sheets are printed. It takes about seven minutes to finish printing. Do not open the Top Cover while printing.
Print head alignment is automatically adjusted by printing the patterns. The printer is now ready to use.

Caution
Manual Print Head Alignment
If the results of automatic print head alignment are not satisfactory, follow the procedure below to perform manual print head alignment to precisely align the Print Head.
Caution
1. With the printer on, load three sheets of A4 or Letter-sized plain paper in the Auto Sheet Feeder.
Caution
If other than A4 or Letter-sized paper is loaded, you cannot print the print head alignment patterns. Be sure to use A4 or Letter-sized plain paper.
2. Gently press the 
3. Open the printer properties dialog box.
4. Click the Maintenance tab and click Custom Settings.
5. Select the Align heads manually check box, and then click Send.
6. When the confirmation message is displayed, click OK.
7. Print the pattern.
(1) Click Print Head Alignment in the Maintenance tab.
(2) Click Print Head Alignment.
A pattern sheet is printed. Do not open the Top Cover while printing.
Caution
Clicking Check Setting prints the current settings and finishes the print head alignment.
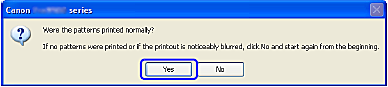
(3) After the pattern is printed, click Yes.
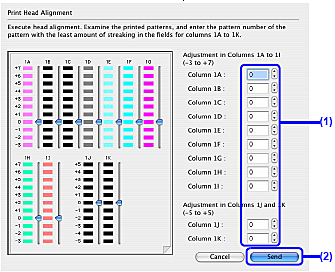
8. Align the Print Head.
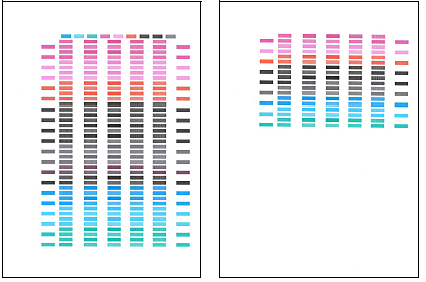
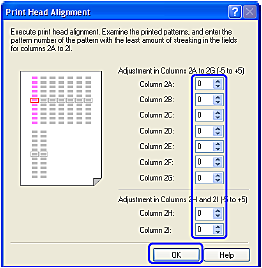
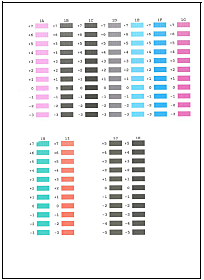
(1) Look at the printout. From the patterns, select the patterns with the least amount of streaking and enter their numbers.
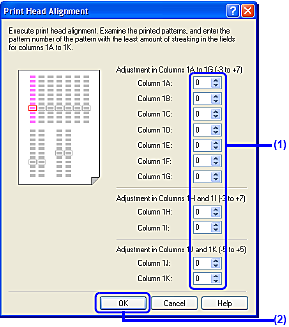
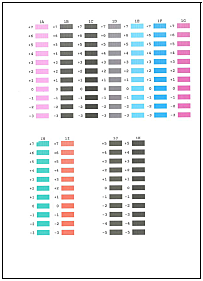
Caution
If it is difficult to pick the best pattern each from Columns 1J and 1K, pick the setting that produces the least noticeable vertical white stripes.

(2) Click OK.
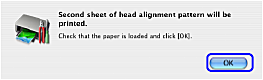
(3) Ensure that paper is loaded in the Auto Sheet Feeder, and then click OK.
A pattern sheet is printed. Do not open the Top Cover while printing.
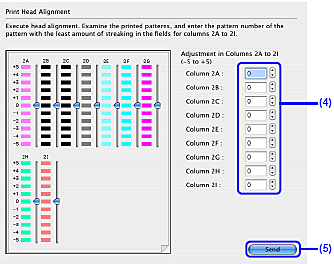
(4) In the same way, select the best patterns for each column, enter their numbers, then click OK.
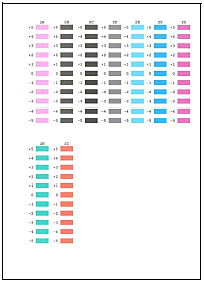
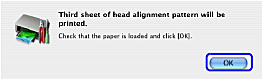
(5) Ensure that paper is loaded in the Auto Sheet Feeder, and then click OK.
A pattern sheet is printed. Do not open the Top Cover while printing.
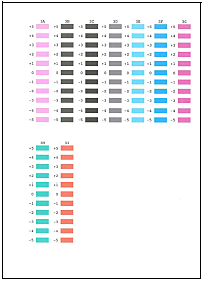
(6) In the same way, select the best patterns for each column, enter their numbers, then click OK.

9. When the confirmation message is displayed, click OK.
Caution
When turning off the power to the printer, be sure to press the POWER button on the printer. Otherwise, the settings made here will not be saved.
1. With the printer on, load three sheets of A4 or Letter-sized plain paper in the Auto Sheet Feeder.
Caution
If other than A4 or Letter-sized paper is loaded, you cannot print the print head alignment patterns. Be sure to use A4 or Letter-sized plain paper.
2. Gently press the 
3. Open the Canon IJ Printer Utility dialog box.
4. Print the pattern.
(1) Select Custom Settings from the pop-up menu.
(2) Select the Align heads manually check box, and then click Send.
(3) When the confirmation message is displayed, click OK.
(4) Select Test Print from the pop-up menu.
(5) Click Print Head Alignment.
5. When the confirmation message is displayed, click Print Head Alignment.
A pattern sheet is printed. Do not open the Top Cover while printing.
Clicking Check Setting prints the current settings and finishes the print head alignment.
6. Align the Print Head.
(1) Look at the printout. From the patterns, select the patterns with the least amount of streaking and enter their numbers.
Caution
If it is difficult to pick the best pattern each from Columns 1J and 1K, pick the setting that produces the least noticeable vertical white stripes.

(2) Click Send.
(3) Ensure that paper is loaded in the Auto Sheet Feeder, and then click OK.
A pattern sheet is printed. Do not open the Top Cover while printing.
(4) In the same way, select the best patterns for each column and enter their numbers.

(5) Click Send.
(6) Ensure that paper is loaded in the Auto Sheet Feeder, and then click OK.
A pattern sheet is printed. Do not open the Top Cover while printing.
(7) In the same way, select the best patterns for each column and enter their numbers.


(8) Click Send.
Caution
When turning off the power to the printer, be sure to press the POWER button on the printer. Otherwise, the settings made here will not be saved.