Solution
Check the Included ItemsRemove the Protective Material
Connect the Telephone Line
Turn the Power On
Install the FINE Cartridges
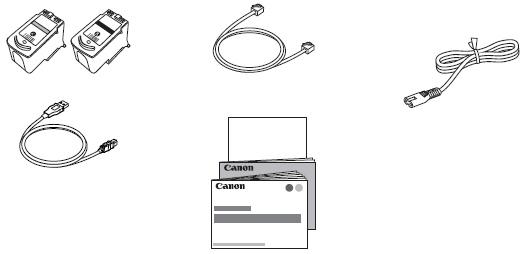
Check the Included Items
Check that all the items shown below are included in the box.
This cable can be used not only for wireless connection setup but also for USB connection.
Remove the Protective Material
1.
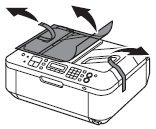
Remove all the protective materials and orange tape from the outside of the machine.
Caution
The tape and protective materials may differ in shape and position from what they actually are.
2.
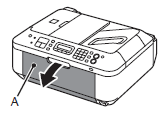
Open the Paper Output Tray (A).
3.
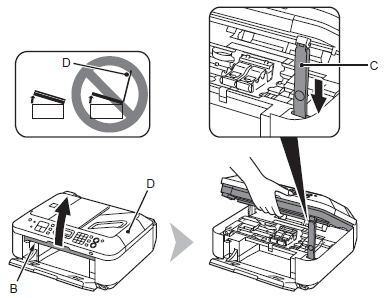
Lift the Scanning Unit (Cover) (B) and fix it with the Scanning Unit Support
(C).
Close the Document Cover (D) and lift it with the Scanning Unit (Cover).
4.
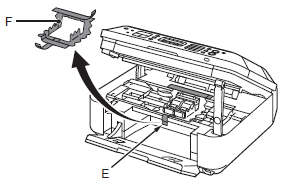
Remove the orange tape (E) carefully.
The protective material (F) is removed along with the orange tape.
5.
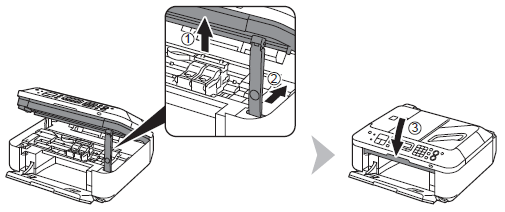
Lift the Scanning Unit (Cover) slightly (1) and fold the Scanning Unit Support (2), then gently close the Scanning Unit (Cover) (3).
Connect the Telephone Line
Do not turn the power on yet.
To use the machine as a fax, a telephone line needs to be connected.
This section describes the basic method of telephone line connection.
For other connection methods, refer to the on-screen manual: Basic Guide.
When not using as a fax:
-⋗ Go to "Turn the Power On".
When using as both a fax and telephone:
-⋗ 1.2
When using as a fax only:
-⋗ 1
Caution
If you cannot send faxes after installing the machine, check the telephone line type.
For details, refer to "Confirming the Telephone Line Connection" .
1.
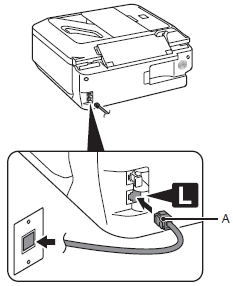
Connect the machine with a telephone line using the supplied telephone line cable (A).
When using as a fax only:
Go to "Turn the Power On".
2. Only when connecting a telephone:
Remove the Cap (B) (1), then connect a telephone with the telephone line cable (2).
Caution
Turn the Power On
Caution
1.
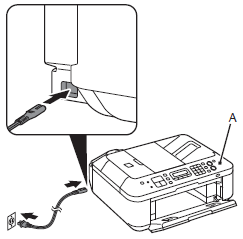
Insert the power cord into the connector on the left side of the machine and into the wall outlet.
Caution
2.
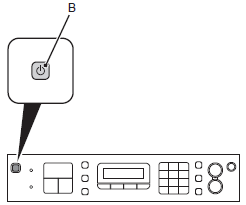
Press the ON button (B) to turn on the machine.
3.
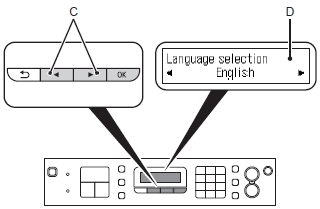
Use the 

4.
Select the country or region of use, then press the OK button.
Caution
If an unintended language is displayed on the LCD, press the Back button (E) to return to the Language selection screen.
Caution
The Country select screen may not be displayed depending on the country or region of purchase.
5.
Make sure that the above screen is displayed and go to the next step.
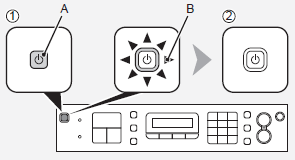
Be sure to follow the procedure below.
1. Press the ON button (A) to turn off the machine.
2. Make sure that the lamp (B) of the ON button is not lit.
Operating noise may continue for up to 25 seconds until the machine turns off.
Caution
The specification of the power cord differs for each country or region.
Caution
Removing the power plug while the lamp of the ON button lights up or flashes may cause drying and clogging of the FINE Cartridges, resulting in poor printing.
If your machine is used as fax
Install the FINE Cartridges

1.
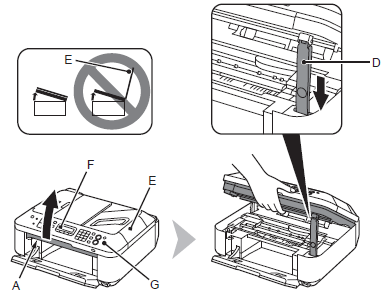
Lift the Scanning Unit (Cover) (A) and fix it with the Scanning Unit Support (D).
Close the Document Cover (E) and lift it with the Scanning Unit (Cover).
Caution
2.
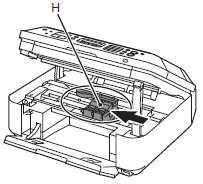
Make sure that the FINE Cartridge Holder (H) moves to the installation position.
3.
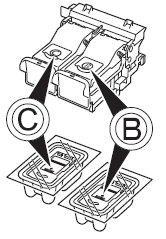
Follow the next procedure to insert the Black 


4.
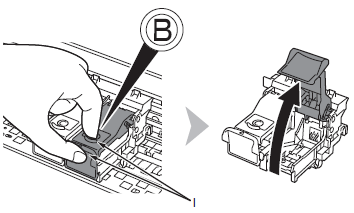
Open the Ink Cartridge Locking Cover 
Pinch (I) firmly and pull up the cover.
5.
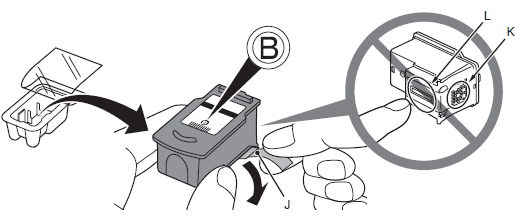
Remove the Black FINE Cartridge 
Caution
6. Pull the orange protective tape (J) in the direction of the arrow and remove it carefully.
7.
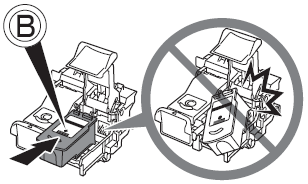
Place the Black FINE Cartridge 

Caution
 into the right slot
  , and the Color FINE Cartridge
  into the left slot
  .
.8.
Push down 
View the Ink Cartridge Locking Cover 
9.
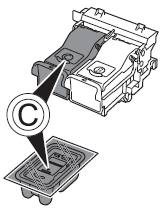
Insert the Color FINE Cartridge 

10.
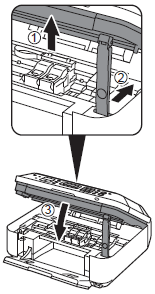
Lift the Scanning Unit (Cover) slightly (1) and fold the Scanning Unit Support (2), then gently close the Scanning Unit (Cover) (3).
Caution
Do not touch the buttons or LCD on the Operation Panel. May result in unintended operation.
11.
Make sure that the LCD changes as shown in the illustration and go to the next step.
Caution
Caution
The LCD will turn off if the machine is not operated for about 5 minutes. To restore the display, press any button except the ON button.


