With your camera, you can resize an image to make the pixel count lower and save it as a new image. Resizing an image is possible only with JPEG L / M / S1 / S2 images.
Caution
How to resize images
1. Set the power switch to ⋖ON⋗.
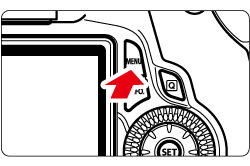
2. Press the ⋖MENU⋗ button to display the menu.
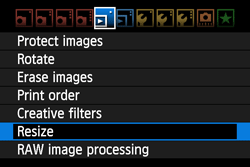
3. Under the [ 
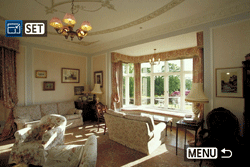
4. Turn the ⋖Quick Control Dial⋗ to select the image you want to resize.
By pressing the ⋖ 

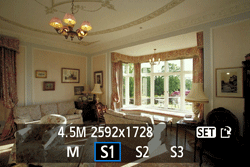
5. Press the ⋖SET⋗ button to display the image sizes. Press the ⋖Multi-controller⋗ key to select the desired image size, then press the ⋖SET⋗ button.
Caution
The target sizes ( M / S1 / S2 / S3 ) in this window will be smaller than the original size. For example, if the original image size is S1, you can select S2 or S3.
6. Select [OK] to save the image, and then press the ⋖SET⋗ button.
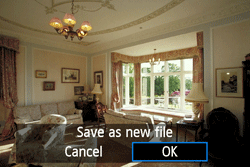
7. Note the destination folder and image file number, then select [OK].
To resize another image, press the ⋖MENU⋗ button to return to the image selection screen, and then repeat steps 4 to 7.

8. To exit and return to the menu, press the ⋖MENU⋗ button.
About Image Sizes
The [8.0M 3456x2304] image size displayed in step 5 has a 3:2 aspect ratio. The image size according to aspect ratios is shown in the table below. For asterisked image-recording quality, the pixel count does not exactly match the aspect ratio. The image will be slightly cropped.
| < Quality > | < Aspect Ratio and Pixel Count > | |||
| 3:2 | 4:3 | 16:9 | 1:1 | |
 | 3456x2304 (8.0 megapixels) | 3072x2304 (7.0 megapixels) | 3456x1944 (6.7 megapixels) | 2304x2304 (5.3 megapixels) |
 | 2592x1728 (4.5 megapixels) | 2304x1728 (4.0 megapixels) | 2592x1456* (3.8 megapixels) | 1728x1728 (3.0 megapixels) |
 | 1920x1280 (2.5 megapixels) | 1696x1280* (2.2 megapixels) | 1920x1080 (2.1 megapixels) | 1280x1280 (1.6 megapixels) |
 | 720x480 (350,000 pixels) | 640x480 (310,000 pixels) | 720x400* (290,000 pixels) | 480x480 (230,000 pixels) |


