Solution
These instructions show how to add text to images before saving them using the supplied [ImageBrowser EX] software.
Caution
The operations described here assume that the ImageBrowser EX software from the supplied CD-ROM (EOS DIGITAL Solution Disk) has been installed, and has been updated over the Internet.
If [ImageBrowser EX] was not included on the supplied CD-ROM, or if a CD-ROM was not included with your camera, you can download and install the [ImageBrowser EX] updater from the downloads section of the Canon Web site. Please note that you will need to have your camera ready when you do the installation.
In this section, Windows 7 is used as an example. Depending on the operating system you are using, on-screen displays and operations may differ slightly.
Text cannot be added to RAW images.
1. Double-click the icon on your desktop to start [ImageBrowser EX].

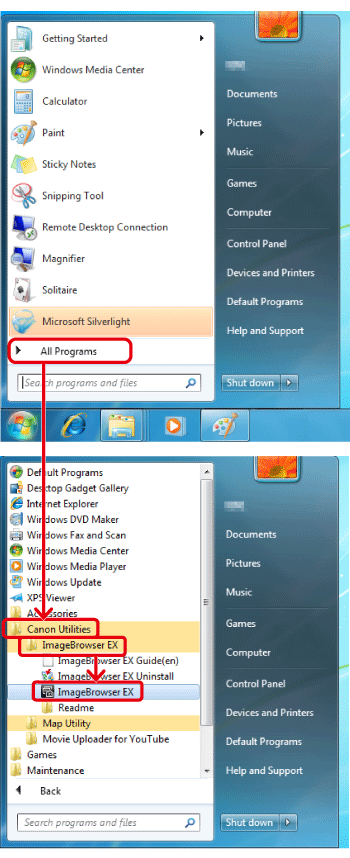
If you do not find a shortcut icon for [ImageBrowser EX] on your desktop, start [ImageBrowser EX] by clicking [Start](  ) ⋗ [All Programs] or [Programs] ⋗ [Canon Utilities] ⋗ [ImageBrowser EX], in that order.
Caution
On a Mac, click the [ImageBrowser EX] icon on the [Dock]. If no [ImageBrowser EX] icon is found on the [Dock], click [Go] on the menu bar, select [Applications], and then open [Canon Utility] ⋗ [ImageBrowser EX], and then select and start [ImageBrowser EX].
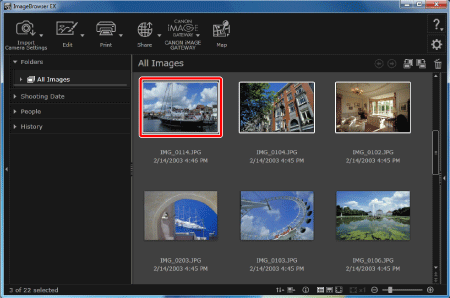
2. Once ImageBrowser EX starts, click the images to which you want to add text to select them.
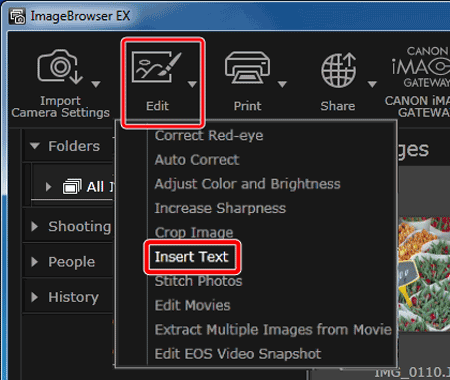
3. Click [Edit], and then select [Insert Text].
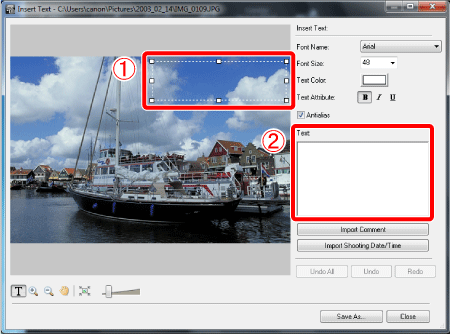
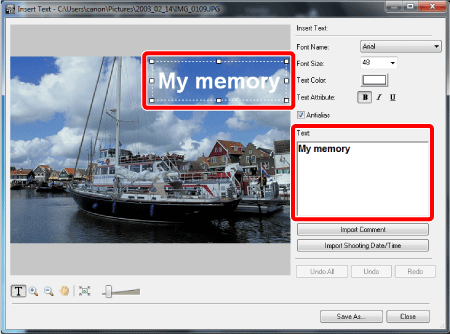
4. The [Insert Text] window will appear.
 Click the location where you want to add the text, and then
  enter the text.
You can move the text input range by dragging it.
You can change the size of the text input range by dragging any of its four corners or sides.
5. If you enter text, it will be displayed on the preview screen. Change the size and font of the text as necessary.
Caution
For smoother text edges, select the [Antialias] check box. Text will blend into the background better.
If you select [Import Comment] or [Import Shooting Date/Time], the comments or shooting date/time will be automatically imported into the text area.
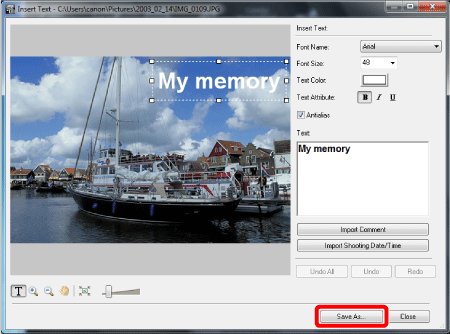
6. Click the [Save As...] button to save the file as a separate image.
7. Set the file name and the destination folder settings, and then file the [Save] button.
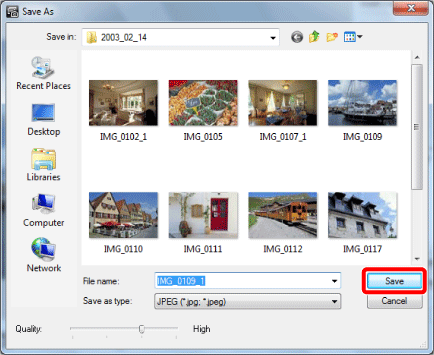
This completes the process of adding text to images before saving them.


