


This camera can record images in JPEG and RAW formats.
| JPEG images | Processed in the camera for optimal image quality and compressed to reduce file size. However, the compression process is irreversible, and images cannot be restored to their original, unprocessed state. Image processing may also cause some loss of image quality. |
| RAW Images | "Raw" (unprocessed) data, recorded with essentially no loss of image quality from the camera’s image processing. The data cannot be used in this state for viewing on a computer or printing. You must first use the software (Digital Photo Professional, to convert images to ordinary JPEG or TIFF files. Images can be adjusted with minimal loss of image quality. |
Caution
- [Custom] (


*Options vary depending on the assigned shooting mode.
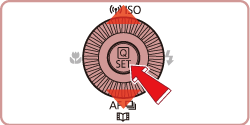
1. Press the power button to turn the camera on.
2. Press the [ 


*If the default settings have not been changed 

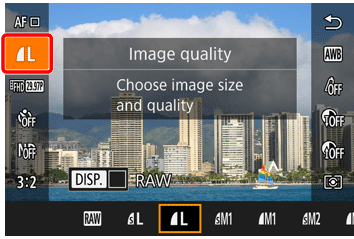
3. To save images in RAW only, press the [ 


To save JPEG and RAW files together, select JPEG and then press the [DISP.] button to append [RAW] with a [ 

Caution
Using the Menu
1. Press the [MENU ] button, choose [Image quality] on the [ 

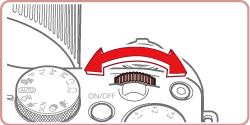
2. Turn the [ 
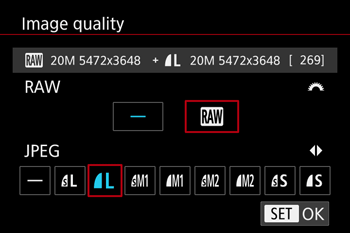
3. Press the [
4. When finished, press the [
Caution
You cannot set both the [RAW] and [JPEG] image setting to [–] at the same time.