The destination folder for saving images imported with CameraWindow may vary depending on your computer. The default folder can be changed to another of your choice.
Caution
Caution
The following two types of USB cables are available for compact digital cameras:
*For more information about the type of USB cable that can be used with your camera, please refer to the camera’s instruction manual.
Default Destination Folder
By default, images imported using CameraWindow are stored in the following location in new folders created based on shooting date.
| OS | Destination Folder | |
| Windows | Windows 10 (desktop mode only), Windows 8.1, Windows 8, or Windows 7 SP1 | On the C drive in `Users' > 'XXXXX' (user login name) > 'My Pictures' or 'Pictures' |
| Macintosh | On the startup disk (Macintosh HD, for example) in 'Users' > 'XXXXX' (user login name) > 'Pictures' | |
Caution
Changing the Destination Folder
You can change the destination folder for saving images imported with CameraWindow.
To change the destination folder, proceed according to the following steps.
1. Connect the ⋖DIGITAL⋗ terminal of the camera to the computer's USB port using a USB cable (camera end: Mini-B).
2. Start CameraWindow.
If the camera is off, turn on the camera and make it ready to communicate with the computer.
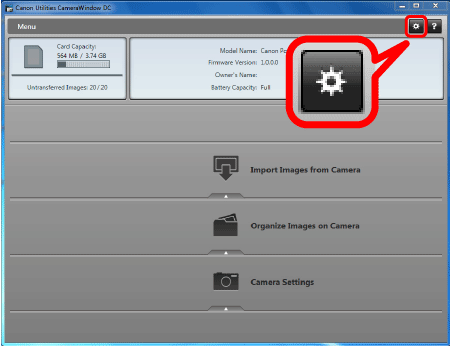
3. Click the [ 

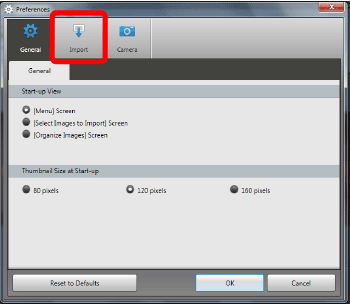
4. On the preferences screen, click the [Import] tab.

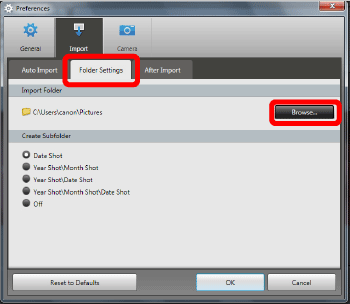
5. On the [Folder Settings] tab, click [Browse], and then specify the destination on the next screen.

6. Click [OK] to save the changes.
7. Imported images will be saved to the specified destination folder.
This completes the steps for changing the destination folder.


