

Use from Additional Computers
Caution
To use from additional computers
1. Insert the Setup CD-ROM into the computer from which you want to use the machine.
2. Follow the on-screen instructions to install the software.
Other settings are not required.
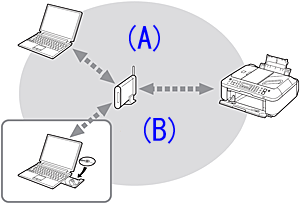
(A) Computer from which the machine can be used currently
(B) Additional computers on the same network
It enables the computer to use the machine.
Caution
Software Installation
The procedure is not necessary if the software was installed using the network setup cable.
To use the machine by connecting it to a computer, software including the drivers needs to be copied (installed) to the computer's hard disk. The installation process takes about 20 minutes. (The installation time varies depending on the computer environment or the number of application software to be installed.)
Caution
Easy-WebPrint EX
Easy-WebPrint EX is Web print software that is installed on the computer when installing the supplied software. Safari 4 or later (Mac OS X v.10.5 or later) is required to use this software. An Internet connection is required for installation.
1.

Make sure that any of the lamps on the mode buttons (A) lights and that the Wi-Fi lamp (B) lights blue.
Caution
2.
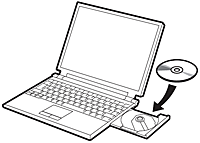
Turn on the computer, then insert the Setup CD-ROM into the CD-ROM drive.
3.


Double-click the Setup icon of the CD-ROM folder to proceed to the following screen. Enter your administrator name and password, then click OK.

If the CD-ROM folder does not open automatically, double-click the CD-ROM icon on the desktop.

If you do not know your administrator name or password, click the help button, then follow the on-screen instructions.
4.
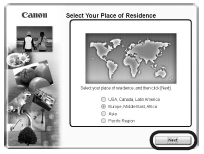
Select your place of residence, then click Next.
Caution
If the Select Language screen appears, select a language, then click Next.
5.
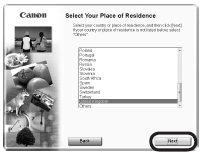
Select a country or region, then click Next.
6.
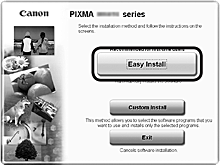
Click Easy Install.
The drivers, application software, and on-screen manuals are installed.
Caution
7.
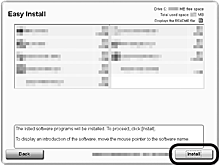
Click Install.
8.
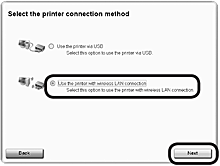
Select Use the printer with wireless LAN connection, then click Next.
Follow any on-screen instructions to proceed with the software installation.
9.
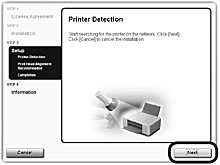
When the Printer Detection screen appears, click Next.
Caution
- Follow on-screen instructions and proceed with the installation. Click Exit on the installation complete screen, then start again from 3 and be sure to select Use the printer with wireless LAN connection in 8.
10.
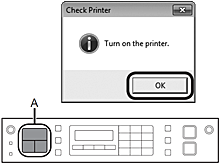
Make sure that any of the lamps on the mode buttons (A) lights, then click OK.
11.
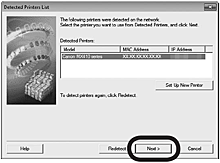
When the Detected Printers List dialog box appears, select Canon MX410 series, then click Next.
Caution
12.
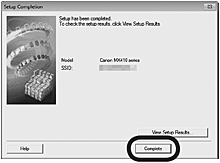
When the Setup Completion screen appears, click Complete or OK.
Registration
This section describes how to register the machine on a Macintosh computer.
Caution
- The machine is turned on.
- The firewall function of any security software is turned off.
- The computer is connected to the access point.
1.
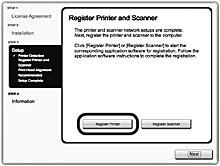
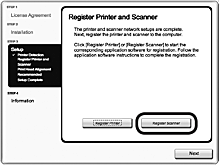
When the Register Printer and Scanner screen appears, click Register Printer.
Mac OS X
v.10.6.x,v.10.5.x -⋗ Go to 2-A
v.10.4.11 -⋗ Go to 2-B
2-A Mac OS X v.10.6.x/v.10.5.x
Mac OS X v.10.4.11 -⋗ Go to 2-B
(1)
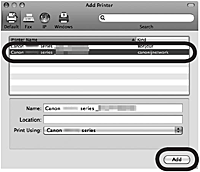
Select Canon MX410 series canonijnetwork and click Add.
-⋗ Go to 3
2-B Mac OS X v.10.4.11
(1)
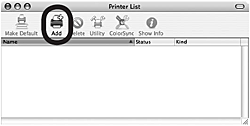
When the Printer List windowappears, click Add.
Caution
(2)
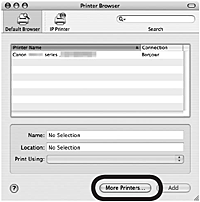
Click More Printers in the Printer Browser window.
(3)
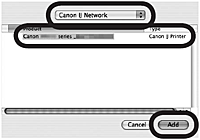
Select Canon IJ Network in the pop-up menu, select Canon MX410 series in the list of printers, then click Add.
(4)
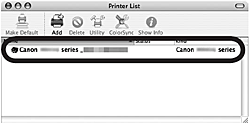
Make sure that Canon MX410 series is added to the list of printers.
-⋗ Go to 3
3.
When the Register Printer and Scanner screen appears, click Register Scanner.
4.

Select Canon MX410 series on the Canon IJ Network Scanner Selector EX screen, then click OK.
5.
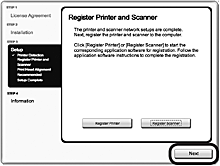
Click Next on the Register Printer and Scanner screen.
Information
1.
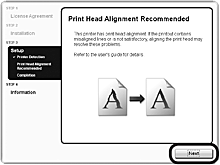
Click Next.
Follow any on-screen instructions to proceed with the software installation.
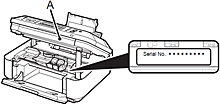
- Important Information for the Installation
If the serial number is not displayed on the registration screen, input the number found inside the machine.
Caution
Caution
If the Extended Survey Program screen appears
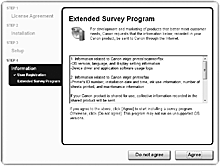
If you can agree to Extended Survey Program, click Agree.
If you click Do not agree, the Extended Survey Program will not be installed.
(This has no effect on the machine's functionality.)
2.
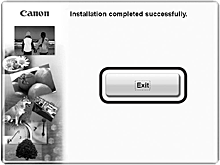
Click Exit to complete the installation.
It is necessary to restart the computer before scanning using the Operation Panel on the machine for the first time.
3.
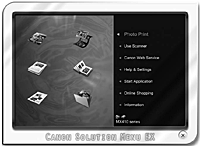
Solution Menu EX starts when clicking OK in the Canon Solution Menu EX dialog.
Remove the Setup CD-ROM and keep it in a safe place.
Caution