


This camcorder is equipped with an optical axis shift and a focal length guide function for use in a dual camera setup for 3D recording.
Using Optical Axis Shift
This function aids in a dual camera setup for 3D recording by allowing you to adjust the position of the image stabilization lens.
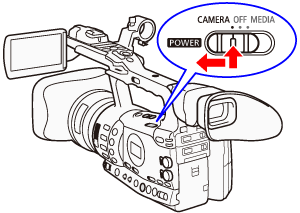
1. Hold down the button on the ⋖POWER⋗ switch and move it to ⋖CAMERA⋗.
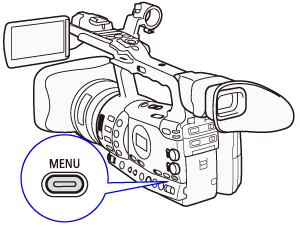
2. Press the ⋖MENU⋗ button.
3. Select optical axis shift.
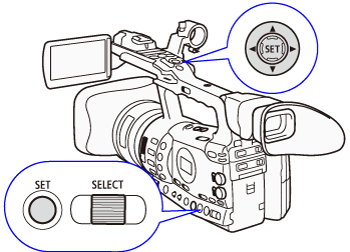
Push the joystick up/down or turn the ⋖SELECT⋗ dial to select the desired submenu, and then press ⋖SET⋗.
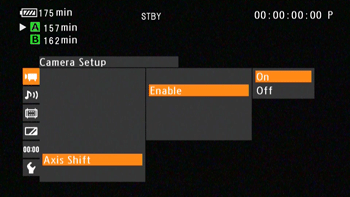
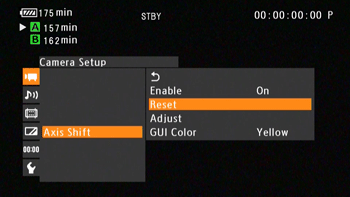
3-1. Select [Camera Setup] ⋗ [Axis Shift] ⋗ [Enable].
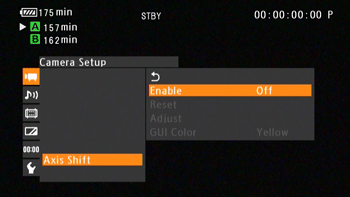
3-2. Select [On], and then press ⋖SET⋗.
3-3. 
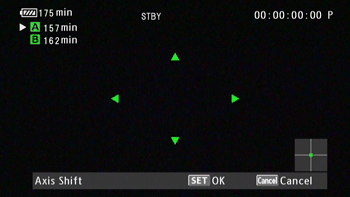
4. Open the optical axis [Adjust] screen.
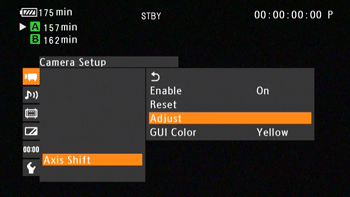
4-1. Select [Camera Setup] ⋗ [Axis Shift] ⋗ [Adjust].
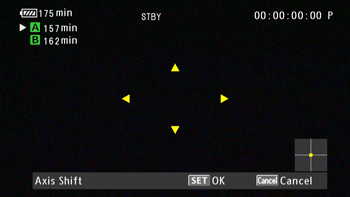
4-2. Four directional icons appear on the screen.
Use the joystick or wireless controller to adjust the picture.
Caution
4-3. Press ⋖SET⋗ when finished.
Caution
Caution
Using the Focal Length Guide
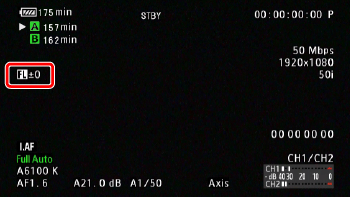
The focal length guide aids you when using two camcorders for 3D recording. The guide appears as a numerical value and has a range of 195 steps. You can set the guide to 0 at any point in the zoom range to help precisely calibrate both camcorders.
1. Set up two camcorders.
2. Set up the standard zoom position for the focal length guide.
2-1. Press the ⋖MENU⋗ button.
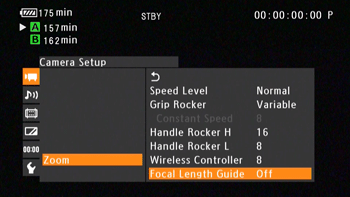
2-2. Select [Camera Setup] ⋗ [Zoom] ⋗ [Focal Length Guide].
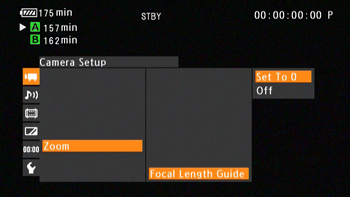
2-3. Select [Set To 0] and then press ⋖SET⋗.
2- 4. Press ⋖MENU⋗.
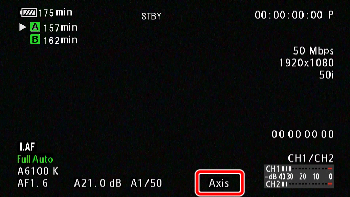
The focal length guide appears on the left side of the screen as [ 
Caution
To turn off the indicator, select [Off] in step 2-3, and then press ⋖SET⋗.
3. Adjust the zoom position.
Caution