

Solution
Getting StartedStep 1: Confirming the Android™ OS version
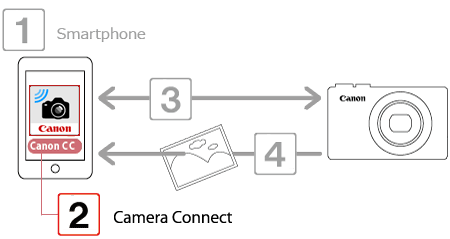
Step 2: Connecting the Android™ smartphone to an access point and installing Camera Connect
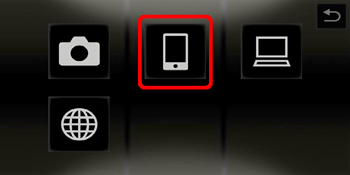
Step 3: Connecting the camera to the Android™ smartphone in infrastructure mode
Step 4: Sending images to the Android™ smartphone
The camera cannot be connected via Wi-Fi using Camera Connect
If a Wi-Fi connection to the camera cannot be made using Camera Connect, please refer to The camera cannot be connected via Wi-Fi using Camera Connect
Caution
In the following explanation, Android™ smartphone setting procedures are indicated by the 

Getting Started
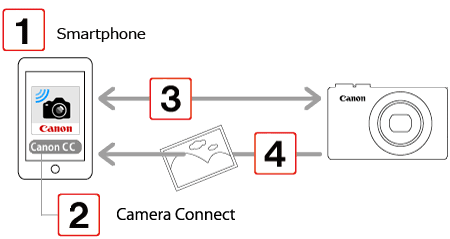
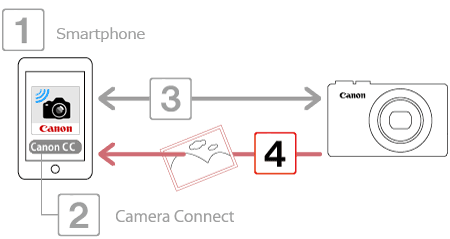
The procedure for using the Wi-Fi function to send images from a camera to an Android™ smartphone is explained in the following 4 steps. To use Wi-Fi, an access point base unit (wireless LAN router, etc.) connected to a computer is required. Additionally, the Camera Connect application must be installed on the Android™ smartphone.
Please proceed in order from step 1.


Caution
A router is a device that creates a network (LAN) structure for connecting multiple computers. A router that contains an internal wireless function is called a wireless (LAN) router.
Caution
・This camera can only be connected using an access point. Ad-hoc connections are not possible.
・1 to 1 connections may be possible when connecting to smartphones equipped with tethering functions.
*Separate contracts and additional settings may be necessary when using tethering functions depending on the smartphone model.
*Extremely high service charges may be incurred depending on the details of your smartphone contract. As tethering-related charges vary, we strongly recommend that your review you contract carefully before attempting to use tethering functions.
Step 1: Confirming the Android™ OS version
 )
)  [About device] [Android version].
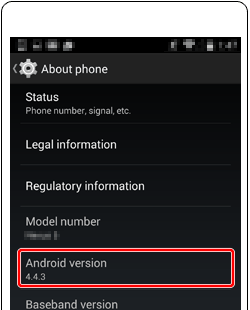
Caution
| Device | Supported OS version |
| Smartphone / Tablet | 4.0-4.4 / 5.0-5.1 / 6.0 |
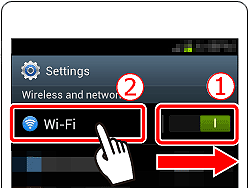
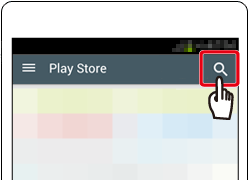
Step 2: Connecting the Android™ smartphone to an access point and installing Camera Connect
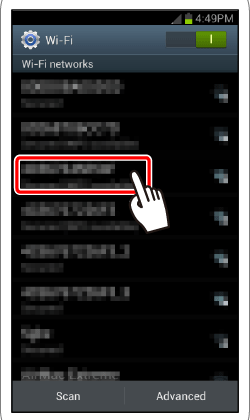
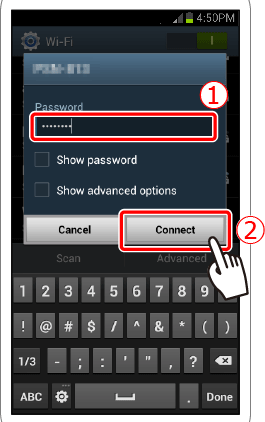
Please connect the Android™ smartphone to the access point. If the Android™ smartphone is already connected to the access point, please proceed to Step 8: Installing Camera Connect The basic connection method is explained in the following section. For more information on the access point’s name, security key, or for more details on making connections, please refer to the Instruction Manual for your access point or Android™ smartphone.
Caution


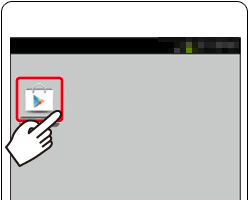
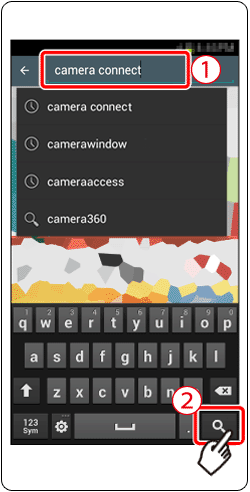
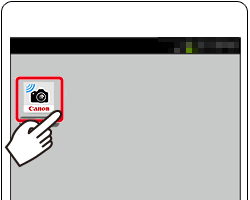
Download and install Camera Connect from Google Play™.
If Camera Connect is already installed on the Android™ device, please proceed to Step 3: Connecting the camera to the Android™ smartphone in infrastructure mode.
Caution
・The Camera Connect application is free, but separate connection charges for accessing Google Play™ may be applicable.
・A Google account is necessary to download Camera Connect.
・It is not possible to download Camera Connect to smartphones not equipped with GooglePlay™.
・Downloading the application via a cellular network may take longer than downloading via Wi-Fi.


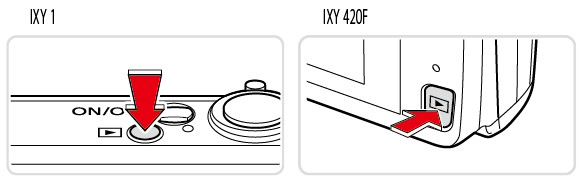
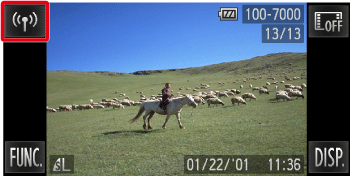
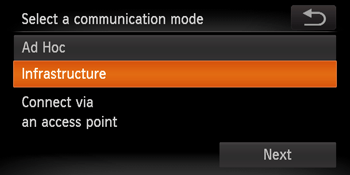
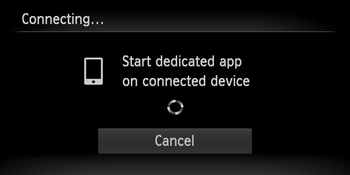
Step 3: Connecting the camera to the Android™ smartphone in infrastructure mode
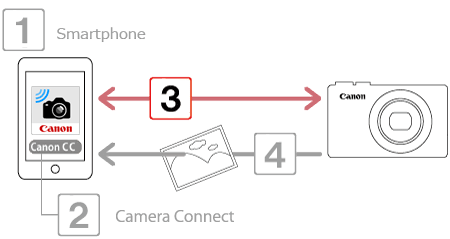
Please connect the Android™ to the camera in infrastructure mode using an access point.


Caution
When setting up Wi-Fi for the first time, the camera nickname registration screen will be displayed.
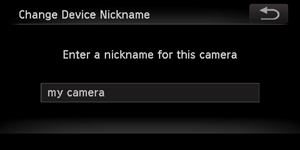
This nickname will be displayed on the screen of target devices when connecting to other devices via Wi-Fi.
Touch within the frame and then enter a nickname (up to 16 letters and numbers) with the displayed keyboard.
([my camera] has been entered in the example image above.)

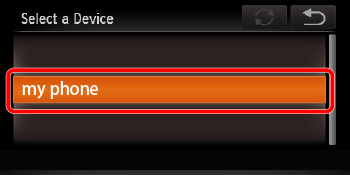
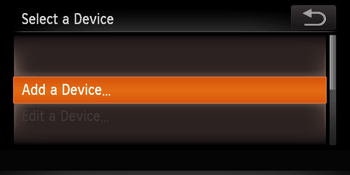
Choose the access point you wish to connect to from the list.
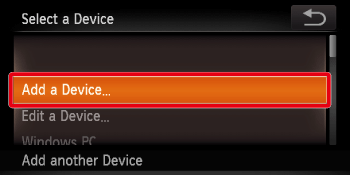
Caution
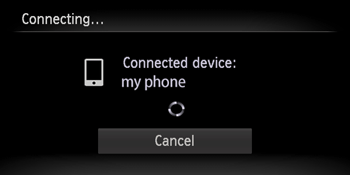
Once an Android™ smartphone is added, the smartphone name will be displayed on the screen in step 4. To connect to the Android™ smartphone again, simply choose the smartphone name from the list.


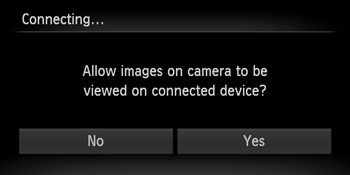
Touch [Yes] to send images from the camera to the Android™ smartphone.

Caution
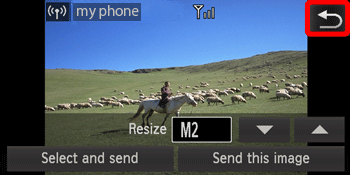
Step 4: Sending images to the Android™ smartphone
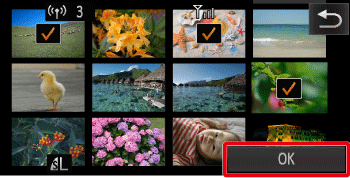
 ) will be displayed on selected images. ) will disappear.
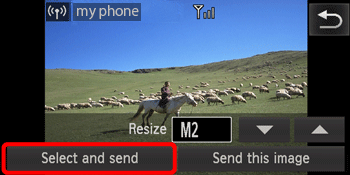
 After you finish choosing images, touch [OK].
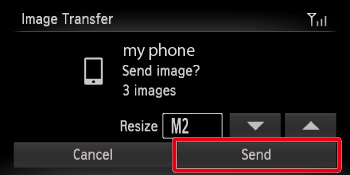
To resize the image to a smaller resolution, touch (


The camera cannot be connected via Wi-Fi using Camera Connect
The information registered to the smartphone for CameraWindow cannot be used for Camera Connect. Therefore, it will be necessary to re-register connection information for Camera Connect.
The procedures for making connections with Camera Connect are explained below.
Caution
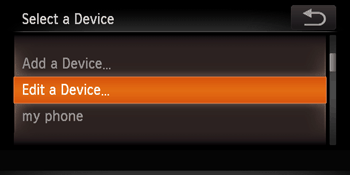
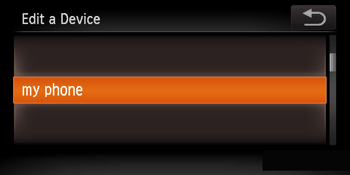
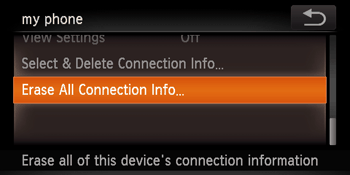
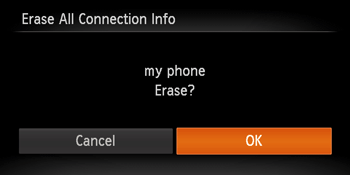
When you have registered multiple smartphones to the camera, the display reverts to the screen in step 5 if connection settings are erased. In this case, touch the 
*Android™, and Google Play™ are trademarks of Google Inc.