Solution
A Date Stamp can be added to images using the supplied [ImageBrowser EX] image management and editing software.
Images appended with Date Stamps will be saved as separate files.
Caution
- If [ImageBrowser EX] is included on the DIGITAL CAMERA Solution Disk that came with your camera, please install the software using the DIGITAL CAMERA Solution Disk.
- If [ImageBrowser EX] was not included on the supplied CD, you can download and install the [ImageBrowser EX] updater from the download page of the Canon Web site.
- If a CD did not come bundled with your camera, please download the [Digital Camara Software] from the Canon Web site and use it to install the [ImageBrowser EX] software.
Please note that you will need to have your camera ready when you perform the installation.
Caution
The procedure for adding Date Stamps to images using [ImageBrowser EX] is shown below.
1. Import your images into the computer.
For more information on importing images, refer to:
Saving Images to a Computer (CameraWindow 8.7-8.10)
ImageBrowser EX 1.1.0 (or later) - Importing images using a memory card reader
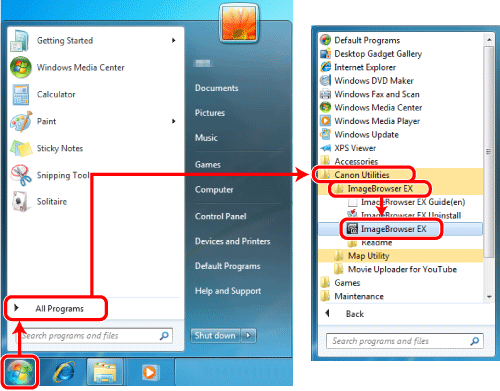
2. Double-click the icon on your desktop to start [ImageBrowser EX].

If you do not find a shortcut icon for [ImageBrowser EX] on your desktop, start [ImageBrowser EX] by clicking [Start] (
Caution
On a Mac, click the [ImageBrowser EX] icon on the [Dock]. If no [ImageBrowser EX] icon is found on the [Dock], click [Go] on the menu bar, select [Applications], and then open [Canon Utility] ⋗ [ImageBrowser EX], and then select and start [ImageBrowser EX].
3. Image Browser EX will start. Click the desired images.
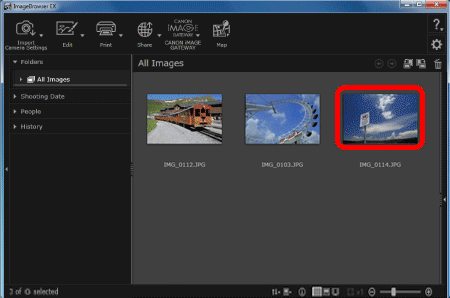
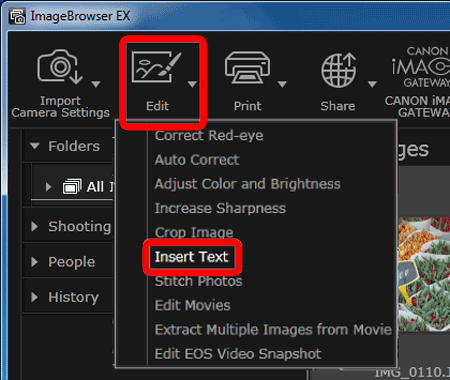
4. Click [Edit], and then select [Insert Text].
5. 5. The [Insert Text] window will appear.


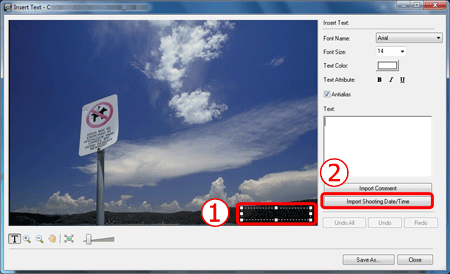
6. The shooting date for the image will be displayed.
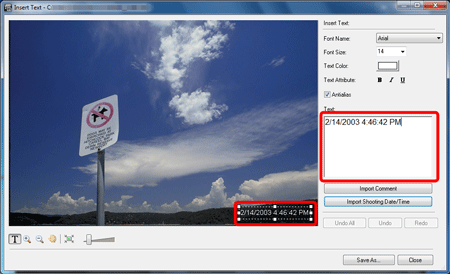
Caution
For smoother text edges, select the [Antialias] check box. Text will blend into the background better.
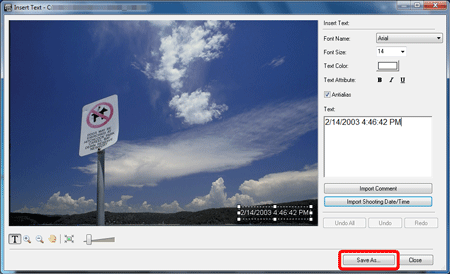
7. Click the [Save As...] button.
8. Set the file name and the destination folder settings, and then file the [Save] button.
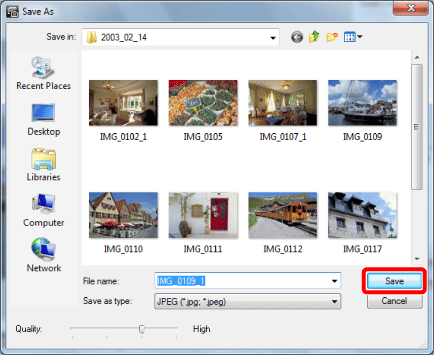
9. The image appended with the Date Stamp will be saved.


