

Solution
The camera can add the shooting date to images, in the lower-right corner.
For a list of shooting modes in which the [Date Stamp] setting can be configured, please refer to the table below.
Caution
Caution
 ], or [
  ]. ([Date Stamp] is set to [OFF] in these modes.)
 ) shooting mode.
 The procedure for adding a date stamp to images during shooting is explained below.
1. Press the ⋖Power⋗ button to turn the camera on.
2. Press the ⋖MENU⋗ button.
3. 

Press the Up button of the Down button to select 


4. Press the Left button or the Right button to choose [Date] or [Date & Time].
Press the ⋖MENU⋗ button when finished.
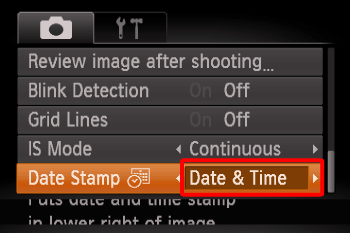
4. When [Date Stamp] is set to [Date] or [Date & Time], [ 
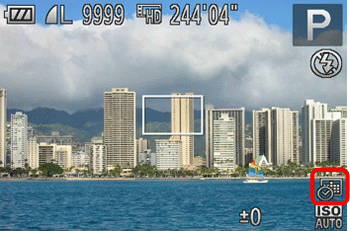
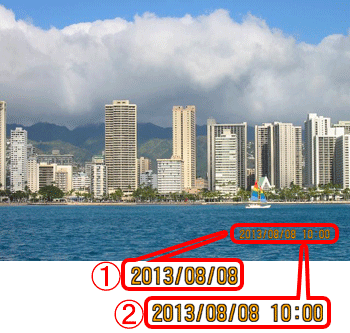
5. The [Date Stamp] will be added to the images as shown below:
Caution
It is not possible to edit the displayed date, color, style, or position of date stamps.


| Models | Shooting Modes | |||||||||||||||
| M | Av | Tv | P | LIVE | AUTO |  |  | SCN |  | |||||||
 |  |  |  |  | ||||||||||||
 |  |  | ||||||||||||||
| PowerShot G16* | | | | | - | | | - | | | | | | | | - |
| PowerShot S120* | | | | | - | | | - | | | | | | | | - |
| PowerShot S200 | | | | | | | - | - | | | | | - | | | - |
| PowerShot SX510 HS | | | | | | | - | | | - | - | | - | | | |
| PowerShot SX170 IS | | | | | | | - | | | - | - | | - | | | |
*In C, C1, and C2 mode, [Date Stamp] setting availability varies depending on the assigned shooting mode.