


Solution
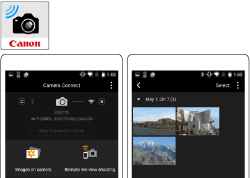
Getting StartedPreparation: Installing Camera Connect on a Smartphone
Step 1: Basic Camera Settings
Step 2-A: Connecting via Bluetooth
Step 2-B: Connecting via NFC
Step 2-C: Connecting with the Wi-Fi Button
Step 3-A: Sending Images to a Bluetooth-compatible Smartphone
Step 3-B: Viewing and Saving Images with a Smartphone
Additional Information: Using the Virtual Keyboard
Getting Started
You can save images from the camera to a smartphone using the following methods.
- Connecting via Bluetooth*
When you connect the camera to a Bluetooth-compatible smartphone via Bluetooth, you can establish a Wi-Fi connection by operating only the camera or the smartphone.
Note that pairing between the camera and smartphone is required to connect the camera to a smartphone via Bluetooth. Pairing will be done as part of the Bluetooth connection procedure.
*This camera is Bluetooth 4.1 (Bluetooth low energy technology) compliant. To connect, your smartphone must be compatible with Bluetooth low energy technology.
- Connecting via NFC
NFC-compatible smartphones can be connected via Wi-Fi by touching them to the camera.
- Connecting with the ⋖ 
You can establish a Wi-Fi connection by displaying the Wi-Fi function menu with the ⋖
In some steps below, the example screen images are shown for both EOS 77D (on the left) and EOS Rebel T7i/EOS 800D (on the right).
Caution
Preparation: Installing Camera Connect on a Smartphone
To communicate with a smartphone, the dedicated smartphone application Camera Connect (free of charge) is necessary.
Caution
Step 1: Basic Camera Settings
Configure necessary settings before using the wireless LAN functions of the camera.
1. Turn on the camera.
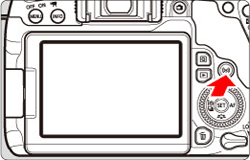
2. Press the ⋖
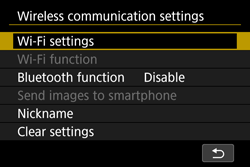
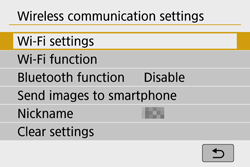
3. Select [Wi-Fi settings].
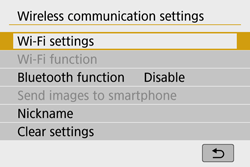
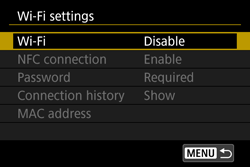
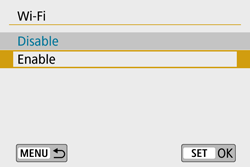
4. Select [Wi-Fi].
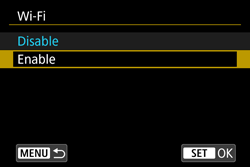
5. Select [Enable].
6. When the screen below appears, press ⋖ 
7. Enter the nickname. You can enter any characters between 1 to 8 characters in length.
When you finish entering, press the ⋖MENU⋗ button.
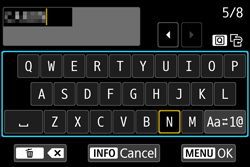
*For more information on using the keyboard, please refer to "Additional Information: Using the Virtual Keyboard".
Caution
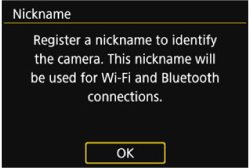
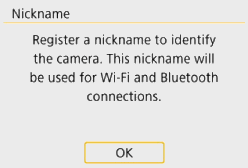
When making Wi-Fi settings for the first time, a screen will appear for you to register a nickname for the camera (for identification).
This nickname will be displayed on the screen of target devices when connecting to other devices via Wi-Fi. Be sure to set a nickname as otherwise you cannot go to the wireless LAN settings screen.
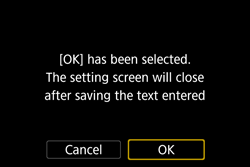
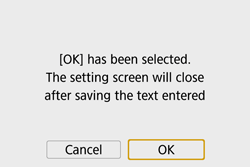
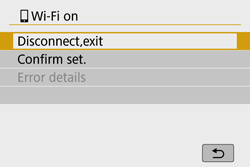
8. When the following screen appears, select [OK], and then press ⋖
To return to the screen that appears when the ⋖
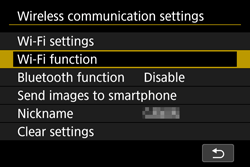
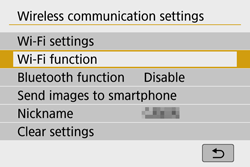
9. The [Wireless communication settings] screen will appear.
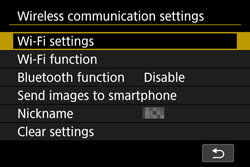
This concludes the explanation for basic camera settings.
Depending on the connection method, choose one of the following and proceed to:
Step 2-A: Connecting via Bluetooth
Caution
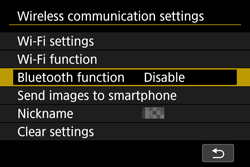
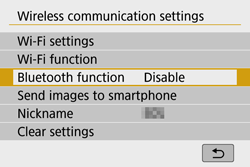
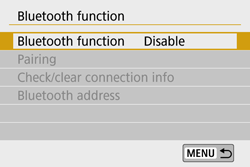
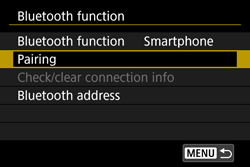
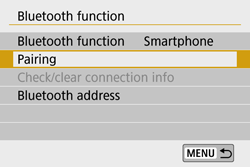
2-A-1. Select [Bluetooth function].
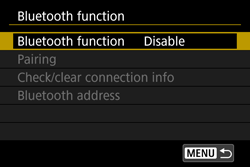
2-A-2. Select [Bluetooth function].
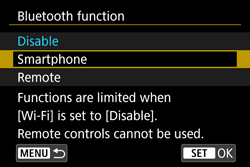
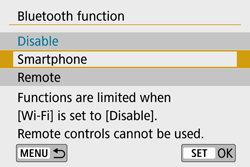
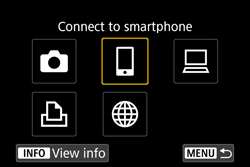
2-A-3. Select [Smartphone].
Caution
In the case of EOS 77D, ⋖ 
2-A-4. Select [Pairing].
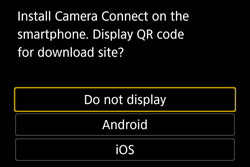
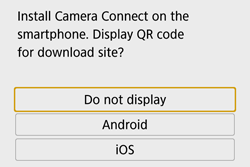
2-A-5. Select [Do not display].


Pairing will start.
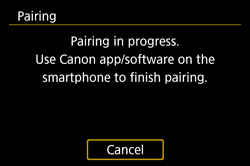
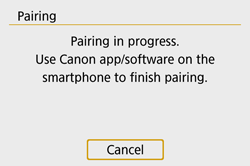
2-A-6. Activate the smartphone’s Bluetooth function, then start Camera Connect.

2-A-7. Select the camera to pair with.

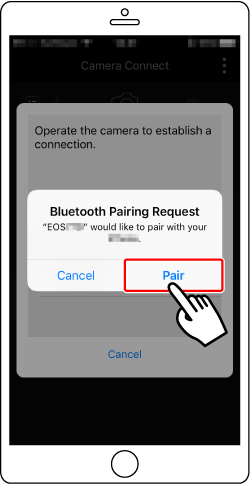
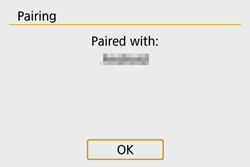
2-A-8. Select [OK].

2-A-9. Press ⋖
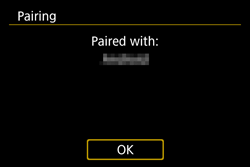
Pairing will complete and the camera will be connected to the smartphone via Bluetooth.
Proceed to "Step 3-A: Sending Images to a Bluetooth-compatible Smartphone".
Step 2-B: Connecting via NFC
Caution
 mark, then touch again.
NFC Function Cautions
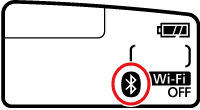
2-B-1. Enable the NFC function on the camera and smartphone.
2-B-2. Touch a smartphone to the camera.
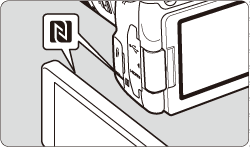
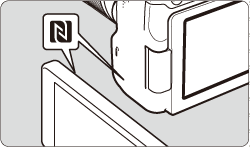
 ⋗ button to end the playback. mark on the smartphone to that on the camera so that they come into contact with each other.
Caution
mark are NFC-compatible. mark. In such a case, check the NFC antenna position by referring to the smartphone’s instruction manual.When a message indicating the connection is being established is displayed on the camera’s LCD monitor, move the smartphone away from the camera.
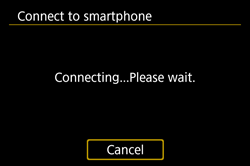
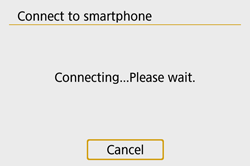
Camera Connect starts on the smartphone and establishes a connection.
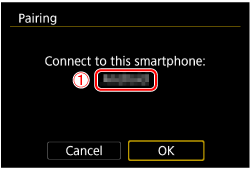
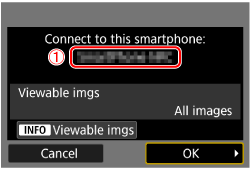
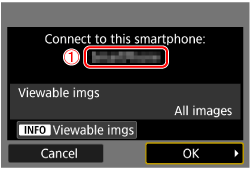
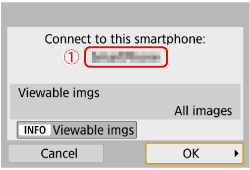
2-B-3. When a connection is established, the screen below will appear on the camera’s LCD monitor.
Select [OK] and press ⋖
2-B-4. After a message is displayed, the [ 
Caution
If the camera screen switches to another one during the smartphone operation procedures, press the ⋖
Proceed to "Step 3-B: Viewing and Saving Images with a Smartphone".
Step 2-C: Connecting with the Wi-Fi Button
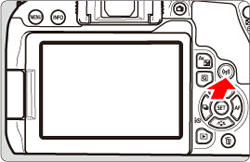
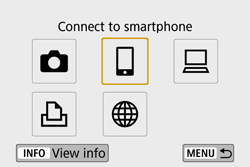
2-C-1. Select [Wi-Fi function].
2-C-2. Select [
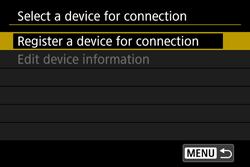
2-C-3. Select [Register a device for connection].
2-C-4. Select [Do not display].
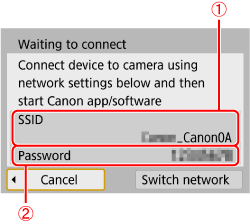
2-C-5. Check the SSID and password.
) and password (  ) displayed on the camera’s LCD monitor.
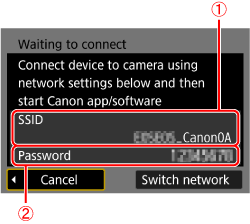
Caution
"_Canon0A" is displayed at the end of the SSID.
2-C-6. Operate the smartphone to establish a Wi-Fi connection.
) checked in step 2-C-5. ) checked in step 2-C-5.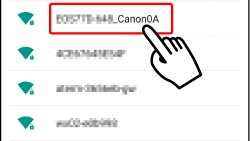
2-C-7. When the [Waiting to connect] screen is displayed on the camera’s LCD monitor, start Camera Connect on the smartphone.
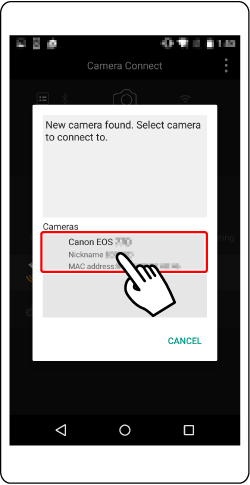
2-C-8. Select and tap on the camera to connect to via Wi-Fi from [Cameras] on Camera Connect.
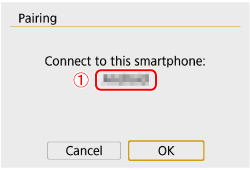
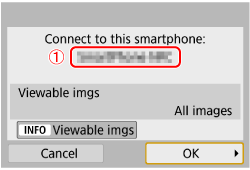
2-C-9. When a connection is established, the screen below will appear on the camera’s LCD monitor.
Select [OK] and press ⋖
2-C-10. After a message is displayed, the [
Caution
If the camera screen switches to another one during the smartphone operation procedures, press the ⋖
Proceed to "Step 3-B: Viewing and Saving Images with a Smartphone".
Step 3-A: Sending Images to a Bluetooth-compatible Smartphone
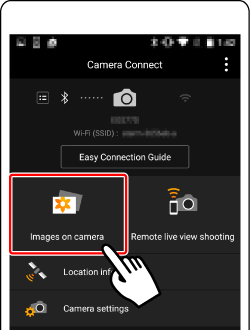
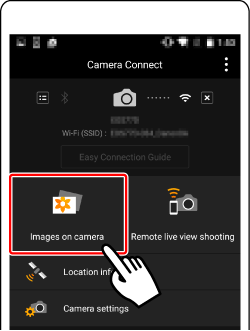
3-A-1. Touch [Images on camera] in Camera Connect.
3-A-2. The [
Caution
If the camera screen switches to another one during the smartphone operation procedures, press the ⋖
3-A-3. Operate the smartphone to send images stored in the camera to the smartphone.
When a list of images in the camera appears on the smartphone, tap [Select] on the upper right of screen.
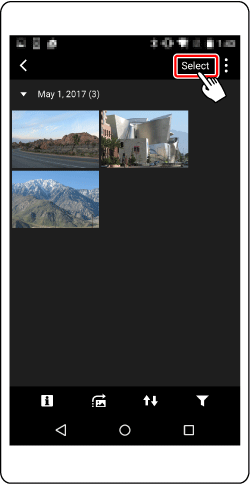
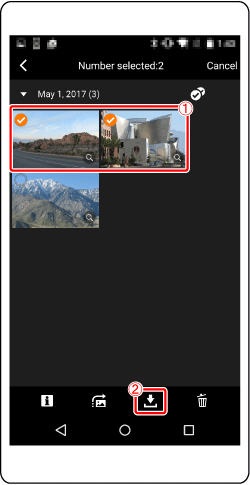
3-A-4. When the selection screen appears, choose the desired images ( 
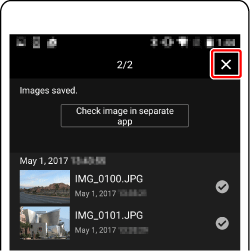
3-A-5. After the images have been sent, touch [ 


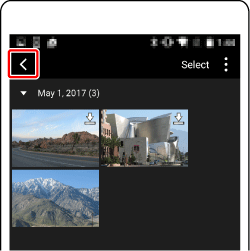
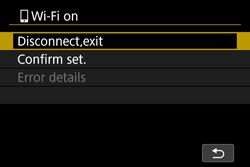
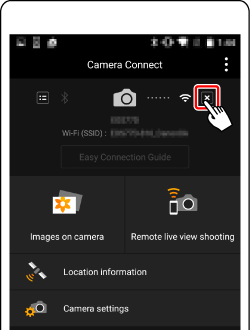
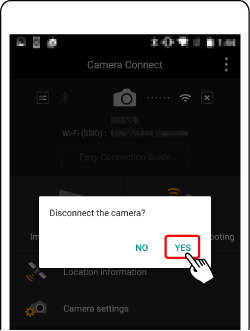
3-A-6. To end the connection, touch the [ 
Caution
- On the smartphone’s Camera Connect screen, tap on [
- On the camera’s [
- Bluetooth connected

- Wi-Fi connected

Caution
Caution
Step 3-B: Viewing and Saving Images with a Smartphone
3-B-1. Touch [Images on camera] in Camera Connect.
3-B-2. Use the smartphone to import images from the camera to the smartphone.
When a list of images in the camera appears on the smartphone, tap [Select] on the upper right of the screen.
3-B-3. When the selection screen appears, choose the desired images (
3-B-4. After the images have been saved, touch [
3-B-5. To end the connection, touch the [
*Android™, and Google Play™ are trademarks of Google Inc.
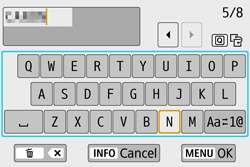
Additional Information: Using the Virtual Keyboard
The following section describes how to set the camera’s nickname using the virtual keyboard.
The nickname can be changed later from the [Wireless communication settings] screen.
| Changing the entry area | Press the <  > button to toggle between the top and bottom entry areas. > button to toggle between the top and bottom entry areas. |
| Moving the cursor | Press the <  > < > <  > keys in the top area to move the cursor. > keys in the top area to move the cursor. |
| Entering text | In the bottom area, press the <  > < > <  > or < > < > keys to select a character, then press < > to enter it. > or < > < > keys to select a character, then press < > to enter it.You can check how many characters you have entered and how many more can be entered by referring to [*/*] on the upper right of the screen. |
| Changing the entry mode* | Select [  ] at the bottom right of the bottom entry area. Each time you press < >, the entry mode will change as follows: Lower case > Numerals / Symbols 1 > Numerals / Symbols 2 > Upper case. ] at the bottom right of the bottom entry area. Each time you press < >, the entry mode will change as follows: Lower case > Numerals / Symbols 1 > Numerals / Symbols 2 > Upper case.* When [Touch control: Disable] is set, you can enter all characters on one screen. |
| Deleting a character | Press the <  > button to delete one character. > button to delete one character. |
| Finishing the text entry | Press the < MENU > button to confirm what you have entered and exit. If a confirmation dialog is displayed, select [OK] to exit. |
| Canceling the text entry | Press the < INFO > button to cancel text entry and exit. If a confirmation dialog is displayed, select [OK] to exit. |