Solution
Manual Exposure : [ M ]Aperture Priority AE : [ Av ]
Shutter Priority AE : [ Tv ]
Program AE : [ P ]
Auto : [ AUTO ]
Special Scene : [ SCN ]
This camcorder offers various shooting modes to help bring your creative intent to life. After you select a mode, you can adjust related settings, such as the shutter speed, using the control dial. You can also use the FUNC. menu or Browser Remote application.
Manual Exposure : [ M ]
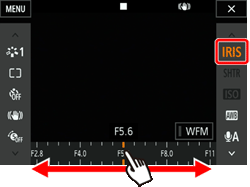
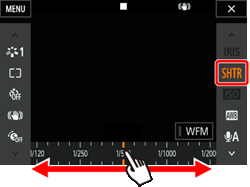
This mode gives you the most freedom over shooting settings as you can adjust the aperture, shutter speed (in terms of either fractions of a second or shutter angle) or ISO speed / gain*. You can adjust settings using the control dial by following the procedure below. You can also adjust settings using the FUNC. menu or Browser Remote application.
* The gain can be adjusted only for clips, not photos
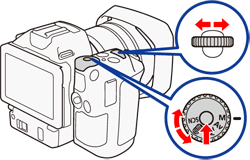
1. Set the shooting mode dial to [ M ].
•The aperture, shutter speed/angle or ISO speed/gain value will be highlighted in orange. To change which value is highlighted, continue to step 2. To adjust the highlighted value, skip to step 6.

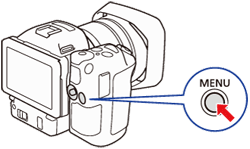
2. Press the [ MENU ] button.
3. Touch [ 
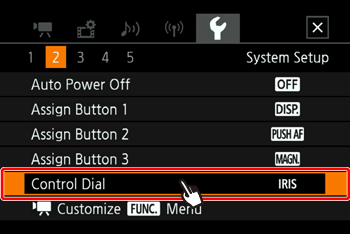
4. Select the desired function to assign to the control dial.
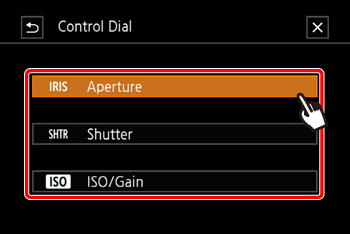
5. Touch [ 
Caution
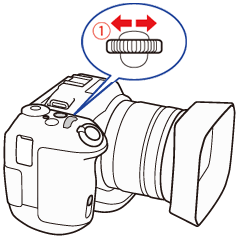
6. Turn the control dial (
Aperture Priority AE : [ Av ]
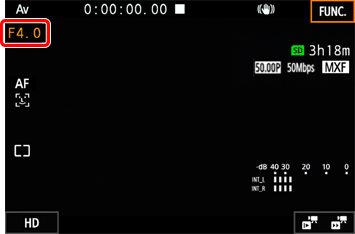
In this mode, after you adjust the aperture value with the control dial, the camcorder automatically sets the appropriate shutter speed to obtain the optimal exposure for the subject. Adjusting the aperture is useful in changing the depth of field, which can allow you to blur the background and make the subject stand out more.
1. Set the shooting mode dial to [ Av ].

Caution
2. Turn the control dial to adjust the aperture value.
•Available aperture settings
| Aperture | |
| Clips (1/4-stop increments) | F2.8, F3.2, F3.4, F3.7, F4.0, F4.4, F4.8, F5.2, F5.6, F6.2, F6.7, F7.3, F8.0, F8.7, F9.5, F10, F11 |
| Photos (1/3-stop increments) | F2.8, F3.2, F3.5, F4.0, F4.5, F5.0, F5.6, F6.3, F7.1, F8.0, F9.0, F10, F11 |
Caution
 ].
].Caution
Shutter Priority AE : [ Tv ]
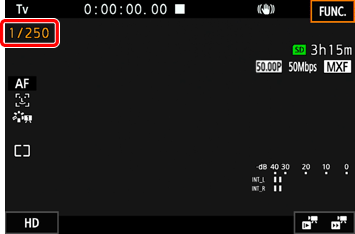
In this mode, after you adjust the shutter speed, the camcorder automatically sets the appropriate aperture to obtain the optimal exposure for the subject. The shutter speed affects how moving objects are captured - you can make fast-moving subjects, such as a waterfall, appear to be motionless or impart a sense of movement to them.
1. Set the shooting mode dial to [ Tv ].

Caution
2. Turn the control dial to adjust the shutter speed.
•Available shutter speed settings
| Shutter speed mode | Frame rate | Shutter speed | |
| Clips | Speed*1 (1/4-stop increments) | All available frame rates | 1/2, 1/3, 1/4, 1/5, 1/6, 1/7, 1/8, 1/10, 1/12, 1/14, 1/17, 1/20, 1/25, 1/29, 1/30, 1/33, 1/40, 1/50, 1/60, 1/75, 1/90, 1/100, 1/120, 1/150, 1/180, 1/210, 1/250, 1/300, 1/350, 1/400, 1/500, 1/600, 1/700, 1/800, 1/1000, 1/1200, 1/1400, 1/1600, 1/2000 |
| Photos (1/3-stop increments) | 0"5*2, 0"4*2, 0"3*2, 1/4, 1/5, 1/6, 1/8, 1/10, 1/13, 1/15, 1/20, 1/25, 1/30, 1/40, 1/50, 1/60, 1/80, 1/100, 1/125, 1/160, 1/200, 1/250, 1/320, 1/400, 1/500, 1/640, 1/800, 1/1000, 1/1250, 1/1600, 1/2000 | ||
*2 : These values represent 0.5 seconds, 0.4 seconds and 0.3 seconds, respectively.

Caution
You can also adjust the shutter speed using the [ 
Caution
Program AE : [ P ]
The camcorder automatically sets the aperture, shutter speed, gain (for clips) and ISO speed to obtain the optimal exposure for the subject.

Auto : [ AUTO ]
Use this mode to let the camcorder select various settings. This is the perfect mode for those times when you do not want to take the time to adjust settings.

Special Scene : [ SCN ]
You can select the Special Scene mode that best matches your shooting situation. Some shooting situations can be tricky, such as when the subject is lit with just a spotlight, so you may find setting the appropriate Special Scene mode to be convenient.
1. Set the shooting mode dial to [ SCN ].

2. Touch [ 
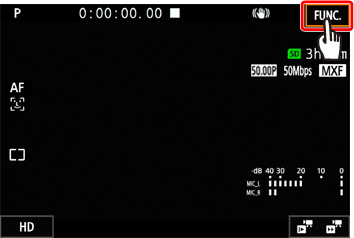
3. Touch [ 
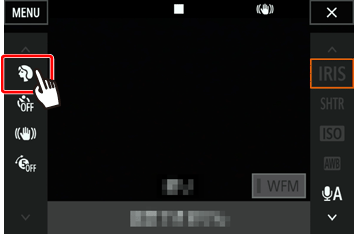
4. Select the desired.
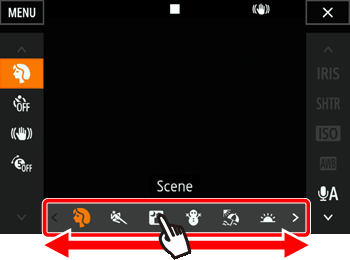
5. Touch [ 
•Options
 : Portrait : Portrait | The camcorder uses a large aperture, to achieve a sharp focus on the subject while blurring the background. |
 : Sports : Sports | To record scenes with lots of movement, such as sports events. |
 : Night Scene : Night Scene | To record nightscapes with lower noise. |
 : Snow : Snow | To record in bright ski resorts without the subject being underexposed. |
 : Beach : Beach | To record on a sunny beach without the subject being underexposed. |
 : Sunset : Sunset | To record sunsets in vibrant colors. |
 : Low Light : Low Light | To record in low-light situations. |
 : Spotlight : Spotlight | To record spotlit scenes. |
 : Fireworks : Fireworks | To record fireworks. |
Caution
 : Portrait ] / [
  : Sports ] / [
  : Snow ] / [
  : Beach ]
- The picture may not appear smooth during playback.
 : Snow ] / [
  : Beach ]
- The subject may become overexposed on cloudy days or in shaded places. Check the image on the screen.
 : Low Light ]
- Moving subjects may leave a trailing afterimage.
- Picture quality may not be as good as in other modes.
- White points may appear on the screen.
- Autofocus may not work as well as in other modes. In such case, adjust the focus manually.
 : Low Light ] / [
  : Fireworks ]
- To avoid camcorder blur (blur due to the camcorder moving) we recommend using a tripod.


