Issue
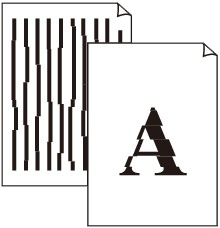
When the lines on the print results are misaligned, check the items below.
Cause and solution
Check 1: Perform Print Head Alignment
If printed lines are misaligned or print results are otherwise unsatisfactory, adjust the print head position.
Aligning Print Head on the Machine
If ruled lines are printed misaligned or print results are otherwise unsatisfactory, adjust the print head position.
1. Make sure that the machine is turned on, then load a sheet of A4 or Letter-sized plain paper in the Rear Tray.
2. Open the Paper Output Tray, then open the Output Tray Extension.
Set the Paper Thickness Lever to the left
3. Print the Print Head Alignment Sheet.
(1) Press the Maintenance button repeatedly until P appears.

Caution
If you select L, the machine exits the process after printing the current head position adjustment values.
(2) Press the Black or Color button.
The Print Head Alignment Sheet is printed.
4. Adjust the print head position.
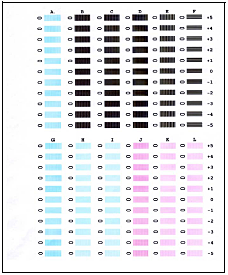
(1) Check the printed patterns and fill in the corresponding circle (
black ink pen to select the number of the pattern in column A that has the least noticeable streaks.
Caution
If it is difficult to pick the best pattern, pick the setting that produces the least noticeable white streaks.
(A) Less noticeable vertical white streaks
(B) More noticeable vertical white streaks
(C) Less noticeable horizontal white streaks
(D) More noticeable horizontal white streaks
(2) Repeat the procedure until you finish selecting the pattern number for column L.
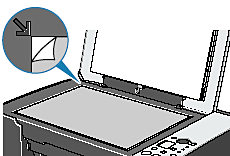
(3) Place the Print Head Alignment Sheet face-down on the Platen Glass.
When placing the Print Head Alignment Sheet, place the front side down and align the upper left corner of it with the alignment mark as shown in the figure below.
(4) Make sure that U is displayed on the LED, then press the Black or Color button.
The Print Head Alignment Sheet is scanned and the print head is aligned automatically.

Caution
Aligning Print Head on the Computer
1. Make sure that the machine is on, and then load two sheets of A4 or Letter-sized
plain paper in the Rear Tray.
2. Open the Paper Output Tray, then open the Output Tray Extension.
Set the Paper Thickness Lever to the left.
3. Print the print head alignment pattern.
(1) Open the printer properties dialog box.
(2) Click the Maintenance tab and then Print Head Alignment.
(3) Confirm the displayed message and click Align Print Head.
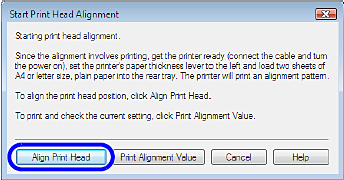
The print head alignment pattern is printed.
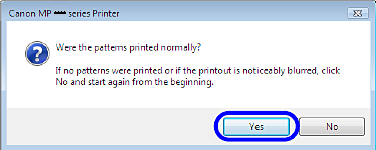
(4) After the pattern is printed, click Yes.
4. Adjust the print head position.
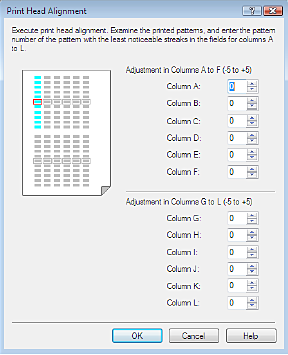
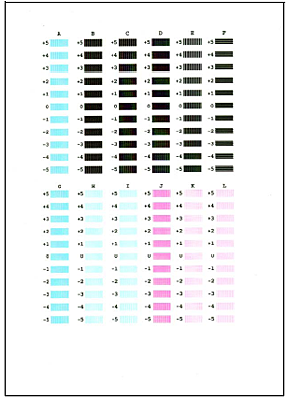
(1) Check the printed patterns and select the number of the pattern in column A that has the least noticeable streaks.
Caution
(A) Less noticeable vertical white streaks
(B) More noticeable vertical white streaks
(C) Less noticeable horizontal white streaks
(D) More noticeable horizontal white streaks
(2) Repeat the procedure until you finish inputting the pattern number for column L, then click OK.
(3) When the confirmation message is displayed, click OK.
The second pattern is printed.
(4) Check the printed patterns and select the number of the pattern in column M that has the least noticeable horizontal stripes.
In the same way in step (1), select the number.
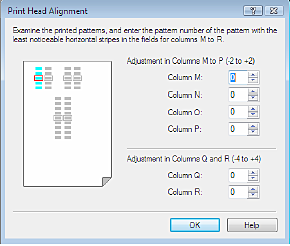
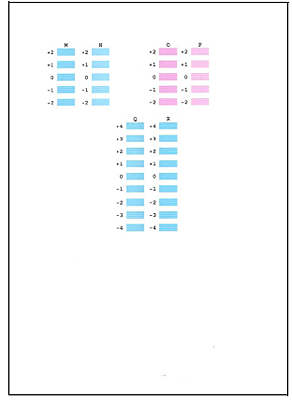
(5) Repeat the procedure until you finish inputting the pattern number for column R, then click OK.
(6) When the confirmation message is displayed, click OK.
1. Make sure that the machine is on, and then load two sheets of A4 or Letter-sized plain paper in the Rear Tray.
2. Open the Paper Output Tray, then open the Output Tray Extension.
3. Print the print head alignment pattern.
(1) Open the Canon IJ Printer Utility dialog box.
(2) Select Test Print in the pop-up menu.
(3) Click Print Head Alignment.
(4) Confirm the displayed message and click Align Print Head.
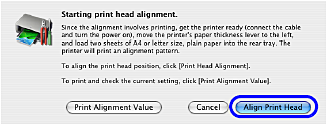
The print head alignment pattern is printed.
4. Adjust the print head position.
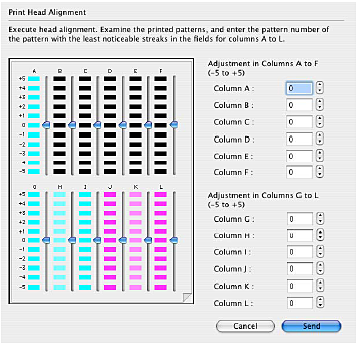
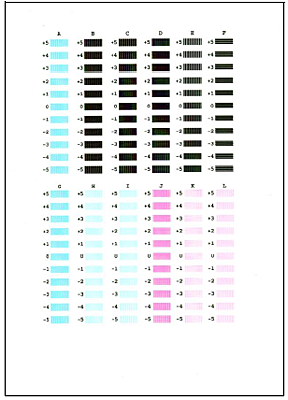
(1) Check the printed patterns and select the number of the pattern in column A that has the least noticeable streaks.
Caution
(A) Less noticeable vertical white streaks
(B) More noticeable vertical white streaks
(C) Less noticeable horizontal white streaks
(D) More noticeable horizontal white streaks
(2) Repeat the procedure until you finish inputting the pattern number for column L, then click Send.
(3) Confirm the displayed message and click OK.
The second pattern is printed.
(4) Check the printed patterns and select the number of the pattern in column M that has the least noticeable horizontal stripes.
In the same way in step (1), select the number.
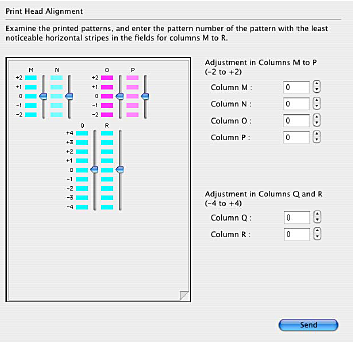
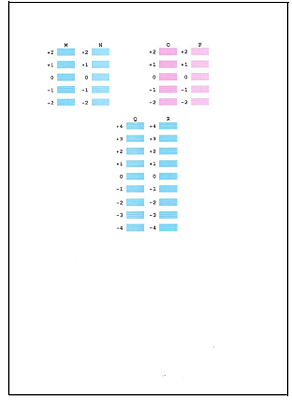
(5) Repeat the procedure until you finish inputting the pattern number for column R, then click Send.
Cause and solution
Check 2: Upgrade the print quality
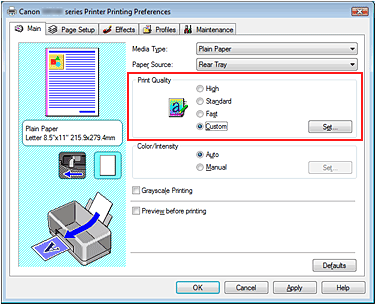
1. Open the printer driver setup window.
2. Select Custom for Print Quality on the Main tab, and click Set....
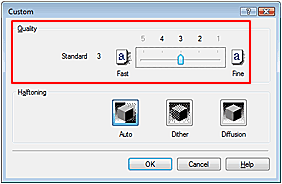
The Custom dialog box opens.
3. Using the slide bar in [Quality], upgrade print quality.
4. Click OK on the Main tab.
Execute printing, and the print results will be output with the quality level you selected.
Caution
Cause and solution
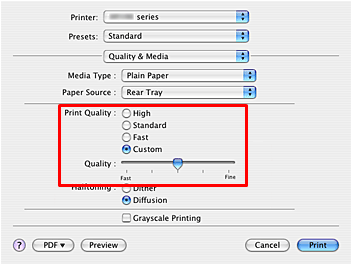
1. Select Quality & Media from the pop-up menu on the Print Dialog.
2. Select Custom for Print Quality.
3. Using the slide bar in [Quality], upgrade print quality.
4. Click Print.
Execute printing, and the print results will be output with the quality level you selected.
Caution


