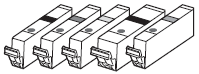
Check the Included Items
Caution
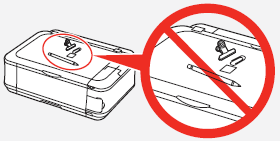
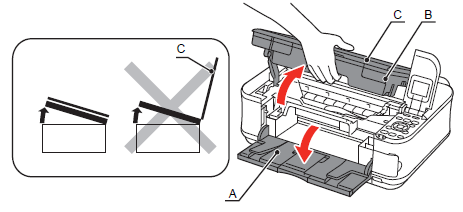
Before turning on the machine, remove all orange tapes and protective sheets.
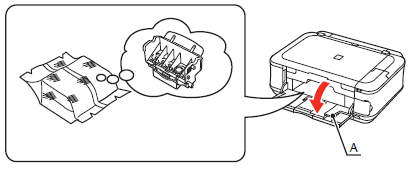
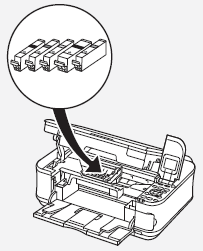
The Print Head is placed inside of the Paper Output Tray (A).
Open the Paper Output Tray with your hands, and take out the Print Head.
Caution
A USB cable (A-B type) is necessary to connect the machine with your computer.
Caution
Choosing a Location
Turn the Power On
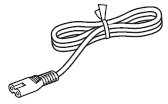
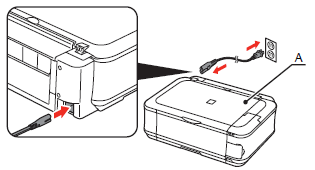
1. Plug the power cord into the back left of the machine, then connect the other end to the wall outlet.
Caution
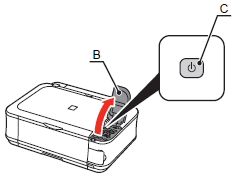
2. Open the Operation Unit (B) and press the ON button (C) to turn on the machine.
Caution
The machine may make some operating noises. This is normal operation.
3. Use the 


Caution
If an unintended language is displayed on the LCD, press the Back button (F) to return to the Language selection screen.
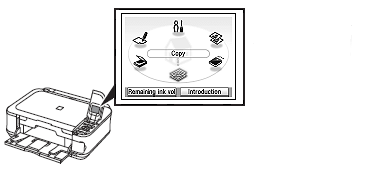
4. Make sure that the following screen is displayed.

Install the Print Head
Caution
Handle the Print Head carefully. Do not drop or apply excessive pressure to it.
1. Open the Paper Output Tray (A), then lift the Scanning Unit (Cover) (B) until it stops.
Close the Document Cover (C) and lift it with the Scanning Unit (Cover).
Caution
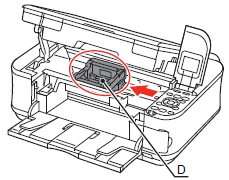
2. Make sure that the Print Head Holder (D) moves to the installation position.
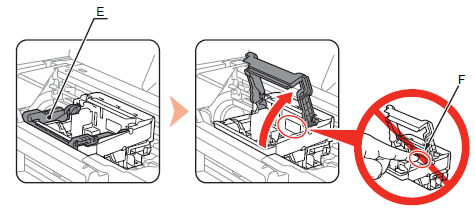
3. Firmly raise the Print Head Lock Lever (E) of the Print Head Holder until it stops.
Caution
Do not touch the inside of the Print Head Holder (F). The machine may not print properly if you touch it.
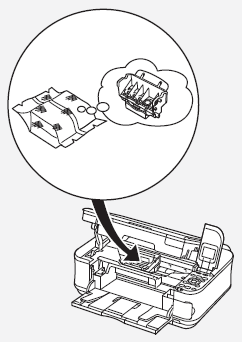
4. Remove the Print Head from the silver package.
Caution
5. Remove the orange protective cap.
6. Tilt the Print Head forward and set it in place as shown.
Caution
7. Lower the Print Head Lock Lever completely.
Caution
Install the Ink Tanks
Caution
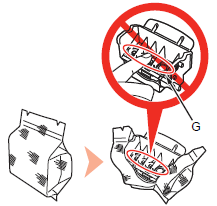
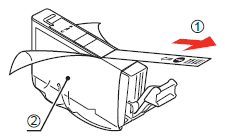
1. Pull the orange tape (1) in the direction of the arrow to peel off the protective film and remove the film (2) completely.
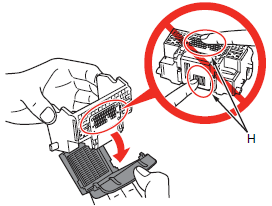
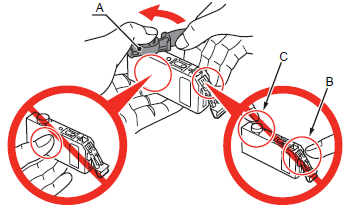
2. While pressing down with your left thumb, twist off the orange protective cap (A)
located on the bottom of the ink tank.
Caution
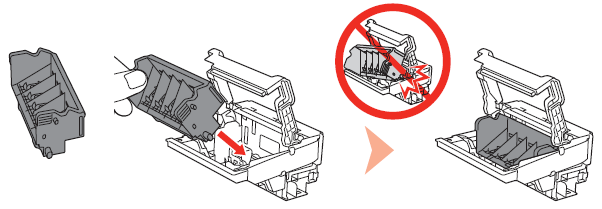
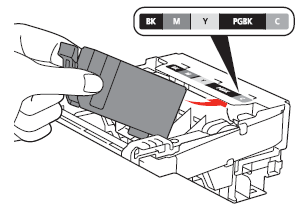
3. Tilt the ink tank, then insert it under the label and against the back end of the slot.
Make sure that the color of the label matches the ink tank.
Caution
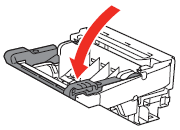
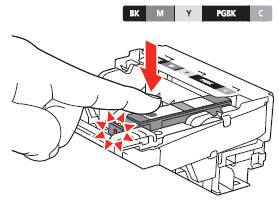
4. Press the PUSH mark on the ink tank firmly until it clicks.
When the installation is completed properly, the Ink lamp lights red.
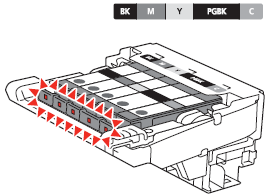
5. Install all the other ink tanks in the same way.
Install all the ink tanks.
Make sure all the Ink lamps light red.
Caution
6. Lift the Scanning Unit (Cover) (D) slightly, then gently close it.

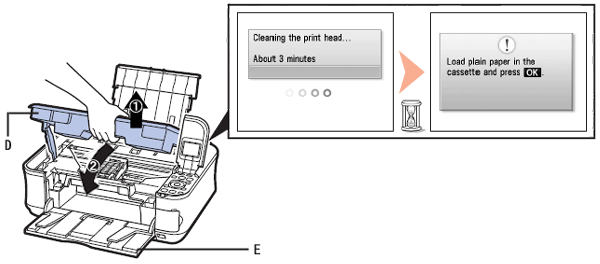
Caution
If an error message is displayed on the LCD, make sure that the Print Head and the ink tanks are correctly installed.
7. Load a sheet of A4 or Letter-sized plain paper into the Cassette (E), then press the OK button.
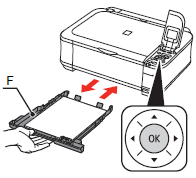
Caution
8. Press the OK button.
Caution
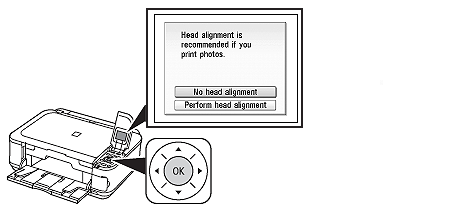
 or
or  button to select Perform head alignment, then press the OK button.
9. The standby screen is displayed.