Solution
Caution
[ZoomBrowser EX] from the supplied Solution Disk must be installed on your computer for this operation.
Operations for Windows Vista are explained here. Images displayed or operation might differ slightly in Windows XP.
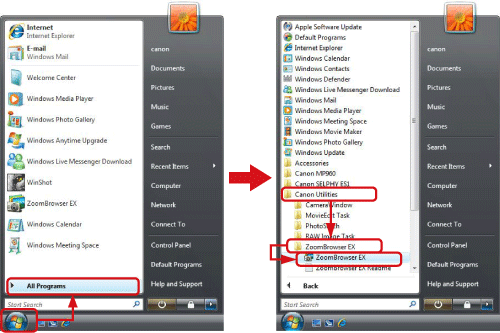
1. Double-click the shortcut icon [ZoomBrowser EX] on your desktop to start ZoomBrowser EX.

If you cannot find the shortcut icon [ZoomBrowser EX] on your desktop, click [Start] ( ) [All Programs] or [Program] ⋗ [Canon Utilities] ⋗ [ZoomBrowser EX] and select [ZoomBrowser EX] to start ZoomBrowser EX.
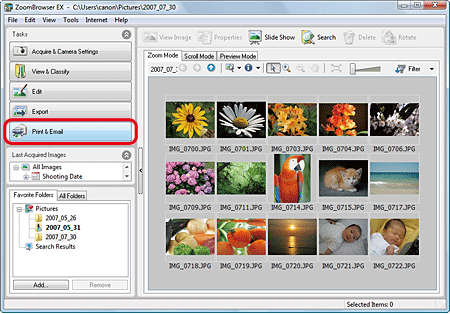
2. When ZoomBrowser EX starts, click [Print & Email].
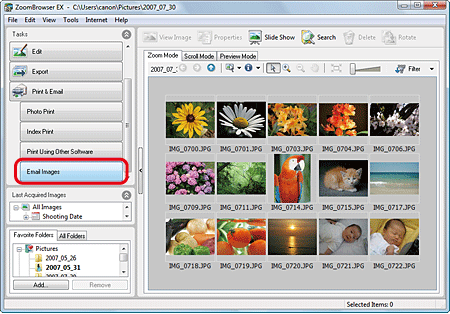
3. Click [Email Images].
4. The following screen is displayed.
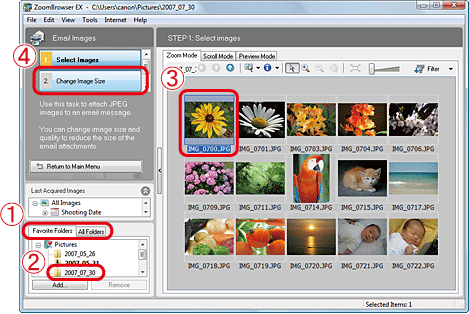
 Click the [Favorite Folders] tab or the [All Folders] tab.
 Select the folder in which the image you want to send is saved. (Generally images are saved in the [Pictures] or [My Pictures] folder.)
 Click the image you want to send. If you select images while holding down the [Ctrl] key, you can select multiple images.
 Click [Change Image Size].
5. The following screen is displayed.
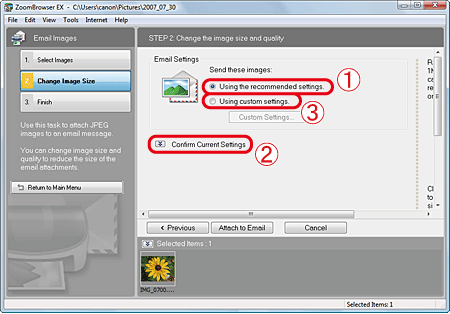
 Select [Using the recommended settings].
 If you click [Confirm Current Settings], you can check the current image size, image quality, and the total file size. Proceed to Step 8 if settings are correct.
If you want to change the image size or image quality, select  [Using custom settings], and proceed to Step 6.
6. Click [Custom Settings].
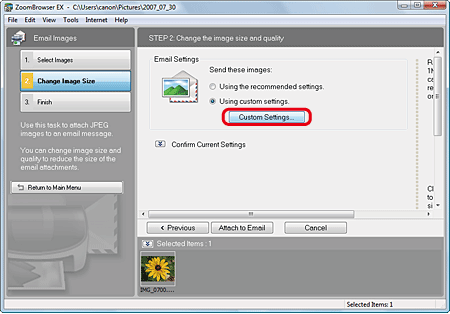
7. The following screen is displayed.
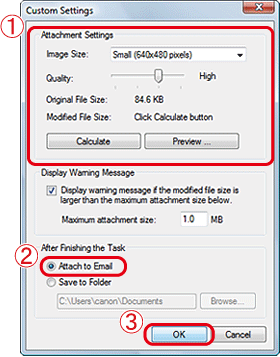
 You can change [Image Size] and [Quality] in the [Attachment Settings] section.
 Select [Attach to Email].
 Click [OK].
8. Click [Finish].
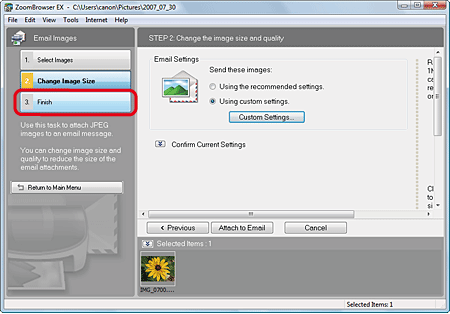
9. Your e-mail application will start.
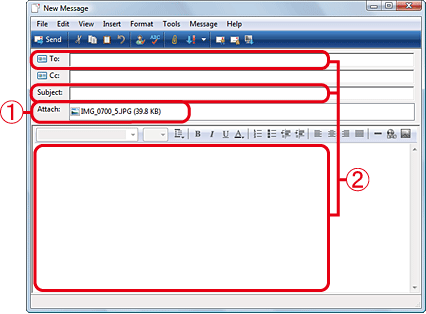
 Check that the image you want to send is attached.
 Enter the necessary information (Address, Subject, and Title), and send the email.
For questions regarding software operation, please see the Help for your email software.


