The CD-R Tray (supplied) allows the printing of images on printable DVD/CDs.
This section describes how to print scanned photos or images on printable DVD/CDs.
Caution
We recommend that you test print on an unneeded printable DVD/CD first.
Printing on DVD/CDs
Choose either of the method below according to your purpose.
To print from DVD/CD label
You can print the label side of the DVD/CD on a printable DVD/CD by loading it on the Platen Glass.
-⋗ [ Printing from DVD/CD Label ]
To print a DVD/CD label from photo data on a memory card
You can print photo data on a memory card on a printable DVD/CD by loading the memory card on the Card Slot.
-⋗ [ Printing from a Memory Card ]
To print a DVD/CD label from photo data on a USB flash drive
You can print photo data on a USB flash drive on a printable DVD/CD by loading the USB flash drive on the Direct Print Port.
-⋗ [ Printing from a USB Flash Drive ]
To print a DVD/CD label from a printed photo
You can print a printed photo on a printable DVD/CD by loading it on the Platen Glass.
-⋗ [ Printing from Printed Photo ]
To print a DVD/CD label from film
You can print an image on a film (35 mm negative/positive (strip/slide)) on a printable DVD/CD by loading it on the Platen Glass.
-⋗ [ Printing from Film ]
To print a DVD/CD label by using the supplied application
CD-LabelPrint is bundled application software that allows you to edit and modify data before printing. Install it on your computer to use it.
-⋗ [ Printing with CD-LabelPrint from the Computer ]
Printing from DVD/CD Label
Copy the label of an existing DVD/CD and print it on a printable DVD/CD.
Caution
You cannot print on 8 cm DVD/CDs.
Do not attach the CD-R Tray until the message asking you to load the DVD/CD is displayed. Doing so can damage the machine.
Caution
If printing is misaligned, adjust the printing position.
1. Make sure that the machine is turned on.
2.Select  DVD/CD label print on the HOME screen, then press the OK button.
3. Select  From DVD/CD label, then press the OK button.
The print area setting screen is displayed.
5. Press the OK button.
Caution
Measure the outer and inner diameters of the printing surface of the printable DVD/CD and make sure you set a value smaller than the measured value for the outer diameter, and a value larger than the measured value for the inner diameter.
For information on printable discs, contact their manufacturers.
6. Use the 
 button to select Recommended DVD/CD or Other DVD/CD, then press the OK button.
Caution
If your medium is the recommended DVD or CD, specify Recommended DVD/CD for the suitable density printing. If not, specify Other DVD/CD.
7. Load the copy source DVD/CD on the Platen Glass, then press the OK button.
Caution
Be sure to load the copy source DVD/CD with its label side down on the center of the Platen Glass. If you load it near the edge of the Platen Glass, part of the image may be cut off.
8. Check the print settings, then press the OK button.
The message for preparation is displayed.
Caution
Press the Black button for black & white copying.
To change print settings, press the Back button repeatedly until the screen for the setting item to change appears, then change the setting.
Caution
Do not see the light source directly while copying is in progress.
9. Set the printable DVD/CD.
Press the left Function button to see how to set the printable DVD/CD.
10. Press the Color button.
Caution
If you press the Black button in step 8, black & white copying will start even if you press the Color button.
To cancel copying, press the Stop button.
After printing, allow the printing surface of the disc to dry naturally. Do not use hairdryers or expose the disc to direct sunlight to dry the ink. Do not touch the printing surface until the ink has dried.
To keep the print quality at an optimal level, it is recommended to stop printing discs once every ten discs when printing more than ten discs continuously. To stop the printing operation, detach the CD-R Tray from the machine, then close the Inner Cover. After approximately three minutes have elapsed, open the Inner Cover, attach the CD-R Tray to the machine, then resume printing.
Printing from a Memory Card
Print an image on a memory card onto a printable DVD/CD.
Caution
You cannot print on 8 cm DVD/CDs.
Do not attach the CD-R Tray until the message asking you to load the DVD/CD is displayed. Doing so can damage the machine.
Caution
If printing is misaligned, adjust the printing position.
1. Make sure that the machine is turned on.
2.Select DVD/CD label print on the HOME screen, then press the OK button.
3. Select  From photo data, then press the OK button.
4. Confirm the message, then insert the memory card into the Card Slot.
The print area setting screen is displayed.
Caution
If the USB flash drive is inserted in the Direct Print Port, remove the USB flash drive, then insert the memory card into the Card Slot.
6. Press the OK button.
Caution
Measure the outer and inner diameters of the printing surface of the printable DVD/CD and make sure you set a value smaller than the measured value for the outer diameter, and a value larger than the measured value for the inner diameter.
For information on printable discs, contact their manufacturers.
7. Use the button to select Recommended DVD/CD or Other DVD/CD, then press the OK button.
Caution
If your medium is the recommended DVD or CD, specify Recommended DVD/CD for the suitable density printing. If not, specify Other DVD/CD.
8. Use the 
 button to select the photo to print, then press the OK button.
9. Confirm the print image on the DVD/CD, then press the OK button.
Caution
Other options
- Printing a Specified Area (Trimming)
- Searching for Photos with the Shooting Date (Search)
10. Check the print settings, then press the OK button.
The message for preparation is displayed.
Caution
To change print settings, press the Back button repeatedly until the screen for the setting item to change appears, then change the setting.
11. Set the printable DVD/CD.
Press the left Function button to see how to set the printable DVD/CD.
12. Press the Color button.
Caution
Printing will not start if you press the Black button.
To cancel copying, press the Stop button.
After printing, allow the printing surface of the disc to dry naturally. Do not use hairdryers or expose the disc to direct sunlight to dry the ink. Do not touch the printing surface until the ink has dried.
To keep the print quality at an optimal level, it is recommended to stop printing discs once every ten discs when printing more than ten discs continuously. To stop the printing operation, detach the CD-R Tray from the machine, then close the Inner Cover. After approximately three minutes have elapsed, open the Inner Cover, attach the CD-R Tray to the machine, then resume printing.
Printing from a USB Flash Drive
Print an image on a USB flash drive onto a printable DVD/CD.
Caution
You cannot print on 8 cm DVD/CDs.
Do not attach the CD-R Tray until the message asking you to load the DVD/CD is displayed. Doing so can damage the machine.
Caution
If printing is misaligned, adjust the printing position.
1. Make sure that the machine is turned on.
2. Select  DVD/CD label print on the HOME screen, then press the OK button.
3. Select From photo data, then press the OK button.
4. Confirm the message, then insert the USB flash drive into the Direct Print Port.
The print area setting screen is displayed.
Caution
If the memory card is inserted in the Card Slot, remove the memory card, then insert the USB flash drive into the Direct Print Port.
6. Press the OK button.
Caution
Measure the outer and inner diameters of the printing surface of the printable DVD/CD and make sure you set a value smaller than the measured value for the outer diameter, and a value larger than the measured value for the inner diameter.
For information on printable discs, contact their manufacturers.
7. Use the button to select Recommended DVD/CD or Other DVD/CD, then press the OK button.
Caution
If your medium is the recommended DVD or CD, specify Recommended DVD/CD for the suitable density printing. If not, specify Other DVD/CD.
8. Use the button to select the photo to print, then press the OK button.
9. Confirm the print image on the DVD/CD, then press the OK button.
Caution
Other options
- Printing a Specified Area (Trimming)
- Searching for Photos with the Shooting Date (Search)
10. Check the print settings, then press the OK button.
The message for preparation is displayed.
Caution
To change print settings, press the Back button repeatedly until the screen for the setting item to change appears, then change the setting.
11. Set the printable DVD/CD.
Press the left Function button to see how to set the printable DVD/CD.
12. Press the Color button.
Caution
Printing will not start if you press the Black button.
To cancel copying, press the Stop button.
After printing, allow the printing surface of the disc to dry naturally. Do not use hairdryers or expose the disc to direct sunlight to dry the ink. Do not touch the printing surface until the ink has dried.
To keep the print quality at an optimal level, it is recommended to stop printing discs once every ten discs when printing more than ten discs continuously. To stop the printing operation, detach the CD-R Tray from the machine, then close the Inner Cover. After approximately three minutes have elapsed, open the Inner Cover, attach the CD-R Tray to the machine, then resume printing.
Printing from Printed Photo
Print an image on a printed photo onto a printable DVD/CD.
Caution
You cannot print on 8 cm DVD/CDs.
Do not attach the CD-R Tray until the message asking you to load the DVD/CD is displayed. Doing so can damage the machine.
Caution
If printing is misaligned, adjust the printing position.
1. Make sure that the machine is turned on.
2. Select DVD/CD label print on the HOME screen, then press the OK button.
3. Select  From printed photo, then press the OK button.
The print area setting screen is displayed.
5. Press the OK button.
Caution
Measure the outer and inner diameters of the printing surface of the printable DVD/CD and make sure you set a value smaller than the measured value for the outer diameter, and a value larger than the measured value for the inner diameter.
For information on printable discs, contact their manufacturers.
6. Use the button to select Recommended DVD/CD or Other DVD/CD, then press the OK button.
Caution
If your medium is the recommended DVD or CD, specify Recommended DVD/CD for the suitable density printing. If not, specify Other DVD/CD.
7. Load the photos on the Platen Glass.
Press the OK button to scan the photos.
Caution
Do not see the light source directly while scanning is in progress.
8. Use the button to select the photo to print, then press the OK button.
Caution
If

appears on the preview screen, the photos may be not scanned properly. Press the Back button, then repeat the procedure from step 7.
9. Confirm the print image on the DVD/CD, then press the OK button.
10. Check the print settings, then press the OK button.
The message for preparation is displayed.
Caution
Press the Black button for black & white copying.
To change print settings, press the Back button repeatedly until the screen for the setting item to change appears, then change the setting.
11. Set the printable DVD/CD.
Press the left Function button to see how to set the printable DVD/CD.
12. Press the Color button.
Caution
If you press the Black button in step 10, black & white copying will start even if you press the Color button.
To cancel copying, press the Stop button.
After printing, allow the printing surface of the disc to dry naturally. Do not use hairdryers or expose the disc to direct sunlight to dry the ink. Do not touch the printing surface until the ink has dried.
To keep the print quality at an optimal level, it is recommended to stop printing discs once every ten discs when printing more than ten discs continuously. To stop the printing operation, detach the CD-R Tray from the machine, then close the Inner Cover. After approximately three minutes have elapsed, open the Inner Cover, attach the CD-R Tray to the machine, then resume printing.
Printing from Film
Print an image on a film (35 mm negative/positive (strip/slide)) onto a printable DVD/CD.
Caution
You cannot print on 8 cm DVD/CDs.
Do not attach the CD-R Tray until the message asking you to load the DVD/CD is displayed. Doing so can damage the machine.
Caution
If printing is misaligned, adjust the printing position.
1. Make sure that the machine is turned on.
2. Select DVD/CD label print on the HOME screen, then press the OK button.
3. Select  From film, then press the OK button.
The print area setting screen is displayed.
5. Press the OK button.
Caution
Measure the outer and inner diameters of the printing surface of the printable DVD/CD and make sure you set a value smaller than the measured value for the outer diameter, and a value larger than the measured value for the inner diameter.
For information on printable discs, contact their manufacturers.
6. Use the button to select Recommended DVD/CD or Other DVD/CD, then press the OK button.
Caution
If your medium is the recommended DVD or CD, specify Recommended DVD/CD for the suitable density printing. If not, specify Other DVD/CD.
7. Select the type of film.
Caution
You can select Color negative film, B&W negative film, Color positive film, or Mount (for slides).
8. Load the film on the Platen Glass.
Press the left Function button to see how to load the film.
Press the Color button to scan the film.
Caution
Do not see the light source directly while scanning is in progress.
9. Use the button to select the photo to print, then press the OK button.
Caution
If
appears on the preview screen, the photos may be not scanned properly. Press the Back button, then repeat the procedure from step 8.
10. Confirm the print image on the DVD/CD, then press the OK button.
11. Check the print settings, then press the OK button.
The message for preparation is displayed.
Caution
Press the Black button for black & white copying.
To change print settings, press the Back button repeatedly until the screen for the setting item to change is displayed, then change the setting.
12. Set the printable DVD/CD.
Press the left Function button to see how to set the printable DVD/CD.
13. Press the Color button.
Caution
If you press the Black button in step 11, black & white copying will start even if you press the Color button.
To cancel copying, press the Stop button.
After printing, allow the printing surface of the disc to dry naturally. Do not use hairdryers or expose the disc to direct sunlight to dry the ink. Do not touch the printing surface until the ink has dried.
To keep the print quality at an optimal level, it is recommended to stop printing discs once every ten discs when printing more than ten discs continuously. To stop the printing operation, detach the CD-R Tray from the machine, then close the Inner Cover. After approximately three minutes have elapsed, open the Inner Cover, attach the CD-R Tray to the machine, then resume printing.
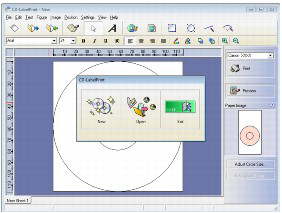
Printing with CD-LabelPrint from the Computer
CD-LabelPrint is bundled application software that allows you to edit and modify data before printing. Install it on your computer to use it. To install this software, insert the Setup CD-ROM into the computer's disc drive, then perform Custom Install and select CD-LabelPrint.
For details on how to print with CD-LabelPrint, refer to its manual.
If you are using a Windows computer, click Start ⋗ All Programs (or Programs in Windows 2000) ⋗ CD-LabelPrint ⋗ Manual.
If you are using a Macintosh, open the Applications folder in the location where the MP Drivers have been installed ⋗ CD-LabelPrint folder ⋗ Manual folder ⋗ double-click Manual.htm.