

Solution
When using the printer in locations where there is no power outlet (outdoors, etc.), attach the battery (i.e. battery pack installed in the battery attachment) to the printer. Before using the battery pack and battery attachment, read "Safety Precautions" thoroughly.
1. Turn off the printer and disconnect the AC adapter and USB cable from the printer.
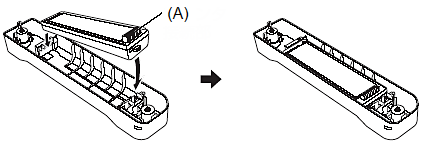
2. Load the battery pack in the battery attachment.
Load the battery pack in the battery attachment with the printer connector facing upward, and then push down on the battery pack until it clicks.
(A) Printer connector
Caution
If the printer connector of the battery pack is dirty, the printer may not operate. Keep the printer connector clean. If it becomes dirty, wipe it clean with a soft, dry cloth.
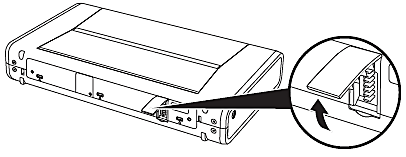
3. Remove the battery connector covers on the printer.
Caution
You can store the battery connector cover in the battery attachment.
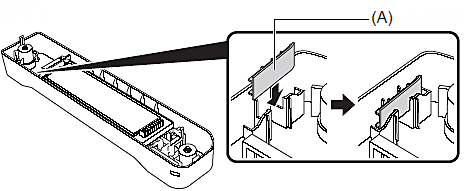
(A) Battery connector cover
4. Attach the battery to the printer.
(1) Align the printer connector of the battery pack with the battery connector of the printer, and then insert the both left and right protrusions on the battery attachment as illustrated below.
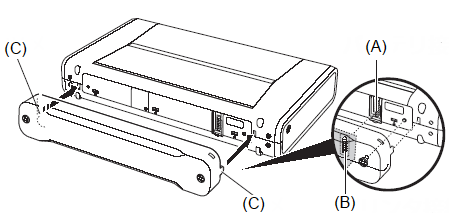
(A) Battery connector
(B) Printer connector
(C) Protrusion
(2) Secure the battery to the printer by tightening two locking screws.
Tighten the screws securely using a coin or a screwdriver.
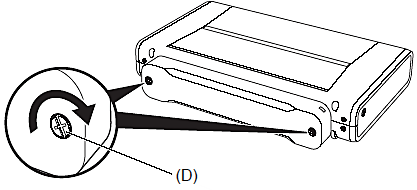
(D) Locking screw
Caution
When the battery pack is not used for a long period of time (6 months or longer), remove the battery from the printer.