

Solution
For the Paper DrawerRegistering the Default Paper Settings for the Multi-purpose Tray
Setting a Custom Paper Size
Whenever you change the paper size and type loaded in the drawer and the tray, follow the procedure in this section to adjust the paper size and type settings.
Caution
If the setting is different from the size of the loaded paper
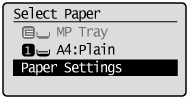
For the Paper Drawer
1. Press [ 
2. Select ⋖Paper Settings⋗ using [ 

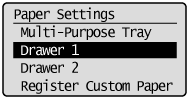
3. Select ⋖ Drawer 1⋗ or ⋖ Drawer 2⋗ using [
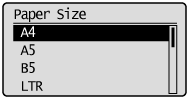
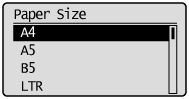
4. Select a paper size using [
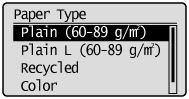
5. Select the paper type using [
6. Press [
Registering the Default Paper Settings for the Multi-purpose Tray
If you want to always load the same paper in the multi-purpose tray, register the default paper using the following procedure.
Caution
If the default paper is registered
1. Press [
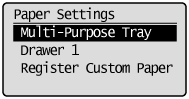
2. Select ⋖Paper Settings⋗ using [
3. Select ⋖Multi-Purpose Tray⋗ using [
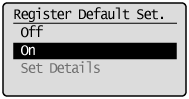
4. Select ⋖On⋗ using [
5. Select ⋖Paper Settings⋗ using [
6. Select ⋖Multi-Purpose Tray⋗ using [

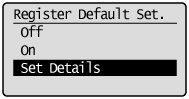
7. Select ⋖Set Details⋗ using [
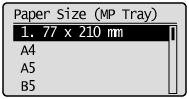
8. Select a paper size using [
* To register a custom paper, see Setting a Custom Paper Size.
* The registered custom paper is listed at the top. Select it with [

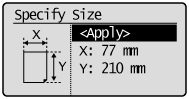
Specifies the size of ⋖X⋗ direction and ⋖Y⋗ direction of the custom paper.
Specify the paper size in portrait orientation (⋖Y⋗
(1) Select the direction using [
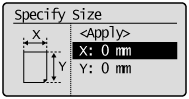
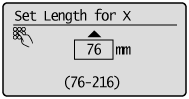
(2) Specify the size using [
You can also enter values using the numeric keys.
(3) Select ⋖Apply⋗ using [
9. Select the paper type using [
10. Press [
Setting a Custom Paper Size
You can register sizes and types of frequently used paper.
- When ⋖Register Default Set.⋗ is ⋖Off⋗ (default)
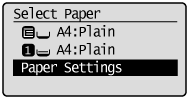
The screen to be displayed when paper is loaded in the multi-purpose tray
- When ⋖Register Default Set.⋗ is ⋖Off⋗
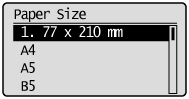
Paper Size Setting Screen
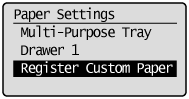
1. Press [
2. Select ⋖Paper Settings⋗ using [
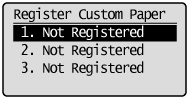
3. Select ⋖Register Custom Paper⋗ using [
4. Select ⋖Not Registered⋗ using [
When selecting the registered custom paper, you can edit and delete the custom paper.
5. Specifies the size of ⋖X⋗ direction and ⋖Y⋗ direction.
* Specify the paper size in portrait orientation (⋖Y⋗
(1) Select the direction using [
(2) Specify the size using [
You can also enter values using the numeric keys.
(3) Select ⋖Apply⋗ using [
6. Select the paper type using [
7. Press [