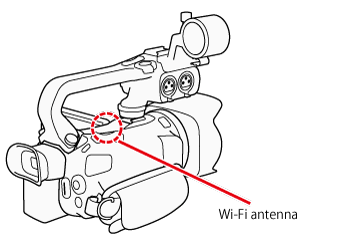
Solution
Setting the Camcorder's PasswordOperating the Camcorder Remotely
Wi-Fi Remote Onscreen Controls and Displays
Remote Operation Using Wi-Fi Remote
You can operate the camcorder remotely via Wi-Fi Remote, a Web browser application that can be accessed using the Web browser*1 of devices compatible with Wi-Fi networks*2. The Wi-Fi Remote application lets you monitor the image through live view, start and stop recording, and remotely control the shooting mode, exposure, white balance, aperture, gain, shutter speed, focus and zoom.
*1 A Web browser that has JavaScript and cookies enabled is required.
*2 For details about compatible devices, operating systems, Web browsers, etc. please visit your local Canon Web site.

Setting the Camcorder's Password
For Wi-Fi functions that require a smartphone or tablet device, you will need to set the camcorder's password. After you enter the password once, you will not need to enter it again (unless you reset or overwrite the camcorder's settings).
Caution
1. Set the power switch to ⋖CAMERA⋗.
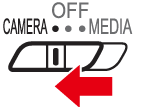
2. Touch [ 
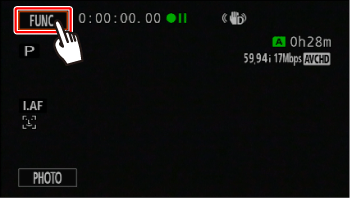
3. Touch [ 
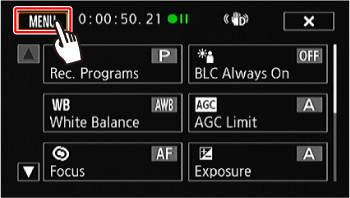
4. Touch [ 
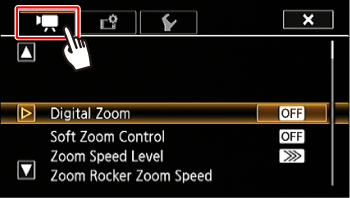
5. 

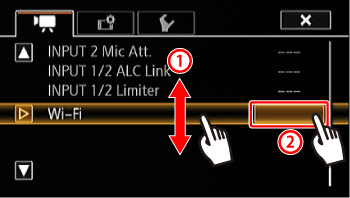
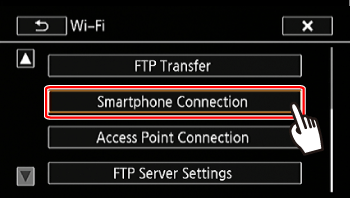
6. Touch [Smartphone Connection].
7. Touch the camcorder's password.
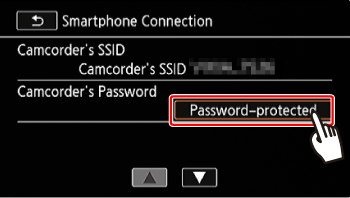
8. Enter an 8-character password and touch [OK].
Caution
After setting the camcorder's password, it will not be displayed on the screen for you to check. Please make a note of your password so that you do not forget it. To change the password, perform the procedure above again.
Caution
Using the virtual keyboard
When you need to enter text for various settings, touch the text field and a virtual keyboard will appear on the screen. You must use the touch screen to operate the virtual keyboard. The illustrations below explain the various keys you can use.


9. Touch [ 

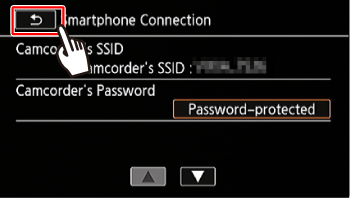
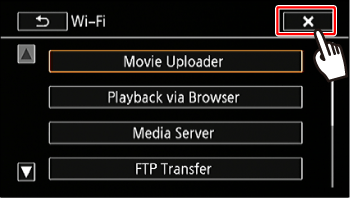
Operating the Camcorder Remotely
1. Camcorder: Touch [ 

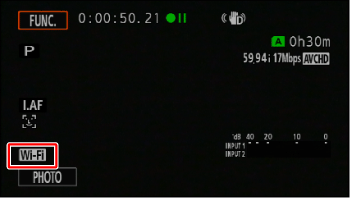
2. Camcorder: Touch [ Wi-Fi Remote ].
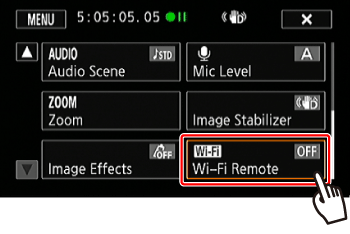
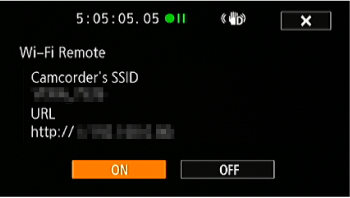
3. Camcorder: Touch [ ON ].
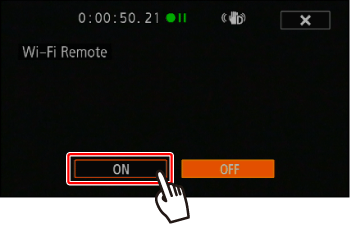
4. The camcorder’s SSID (network name) and the URL to be entered in the Web browser will appear and the camcorder will be ready to connect with the device.
5. Connect the camcorder with the device.
5-1. iOS/Android device: Activate Wi-Fi in the settings screen.
- The network names of detected access points will appear.
5-2. iOS/Android device: Touch the access point with the same SSID displayed in step 4.
5-3. iOS/Android device: Enter the camcorder’s password set previously.
- If you have performed this procedure before and you have not changed the camcorder's password, the connection will be established automatically.
6. iOS/Android device: Open the web browser and connect with the camcorder.
- The Wi-Fi Remote screen will appear.
- As long as you do not change the port settings, the URL is always the same so you may find it convenient to bookmark it.
7. Camcorder: Touch [ 
- When the connection has been established, [ 
8. iOS/Android device: Operate the controls on the screen while viewing the image from the camcorder.
9.Camcorder: Touch [FUNC.] ⋗ [Wi-Fi Remote] and then touch [Off] when finished.
Wi-Fi Remote Onscreen Controls and Displays
The Wi-Fi Remote application features advanced controls for devices with larger screens and basic controls for devices with smaller screens. For more details on each of the functions, refer to the camcorder's instruction manual.
Advanced controls
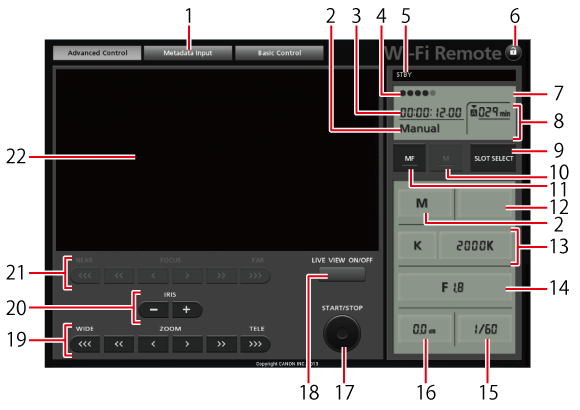
When the recording program is set to [AV Aperture-Pri. AE]:
| 1 | Screen selection tab: Switch between advanced controls and basic controls. | 12 | Exposure compensation value button |
| 2 | Recording program | 13 | White balance mode and setting buttons |
| 3 | Time code | 14 | Aperture button |
| 4 | Wi-Fi Remote connection status | 15 | Shutter speed |
| 5 | Operation | 16 | Gain |
| 6 | [  ] (key lock): Press to lock all the controls on the application's screens. When pressed, the icon turns orange and the entire screen becomes grayed out. ] (key lock): Press to lock all the controls on the application's screens. When pressed, the icon turns orange and the entire screen becomes grayed out. | 17 | START/STOP button |
| 7 | Remaining battery level | 18 | LIVE VIEW ON/OFF button |
| 8 | Memory card status/Remaining recording time: The currently selected memory card slot will be indicated with a [  ] mark above it. ] mark above it. | 19 | ZOOM (zoom adjustment) buttons |
| 9 | SLOT SELECT (memory card slot selection) button | 20 | IRIS (aperture adjustment) buttons |
| 10 | Exposure mode button | 21 | FOCUS (focus adjustment) buttons |
| 11 | MF (manual focus) button | 22 | Live view image area |
Basic controls
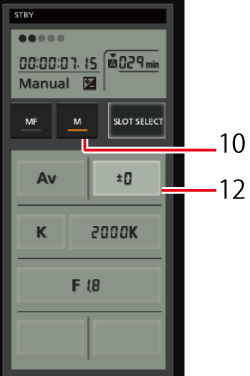
Use the basic controls when using the application on devices with smaller screens. With the basic controls, the following functions are available: turning live view on and off, starting and stopping recording, zoom and [ 
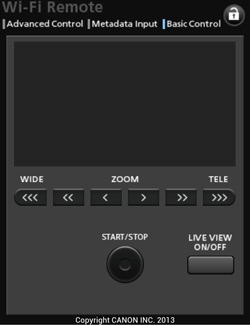
Remote Operation Using Wi-Fi Remote
・Recording movies
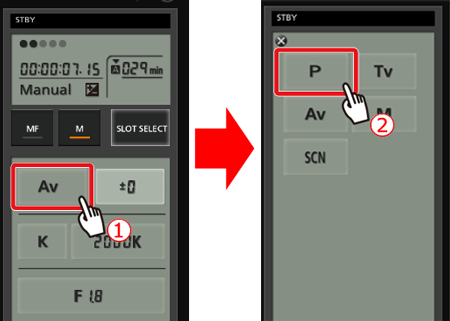
・Selecting the recording program
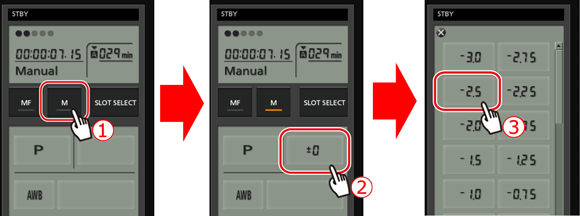
・Adjusting the exposure compensation value
・Adjusting the white balance
・Adjusting the aperture
・Adjusting the gain
・Adjusting the shutter speed
・Adjusting the focus
・Adjusting the zoom
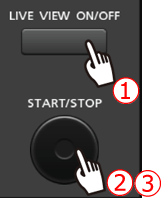
Recording movies


 REC], the center of the START/STOP button [
  ] lights up in red
Selecting the recording program


Adjusting the exposure compensation value
Touch 


Adjusting the white balance
Press the white balance mode button.
If you selected [ K ]:

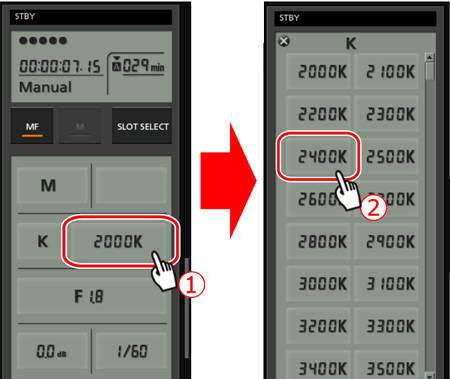
If you selected [ 


 ] will flash slowly.
During the procedure, [ 
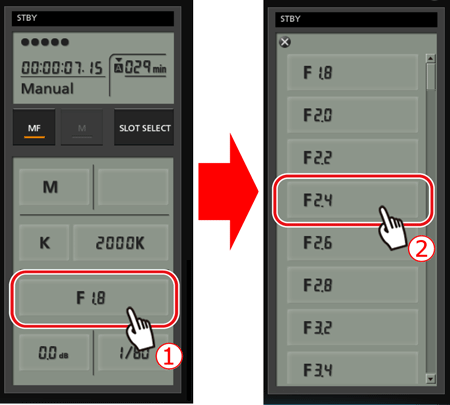
Adjusting the aperture


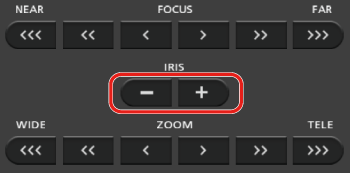
Making aperture adjustments with the IRIS button:]
[ - ] button: close the aperture in 1/4-stop increments.
[ + ] button: open the aperture in 1/4-stop increments.
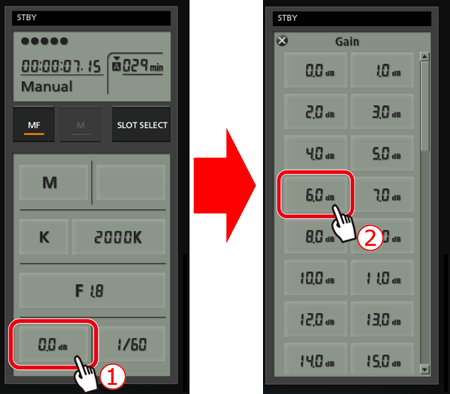
Adjusting the gain


Adjusting the shutter speed


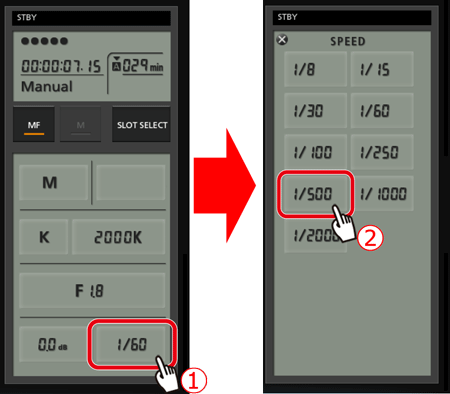
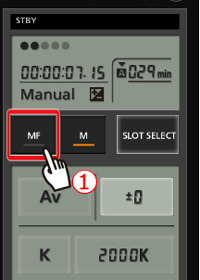
Adjusting the focus


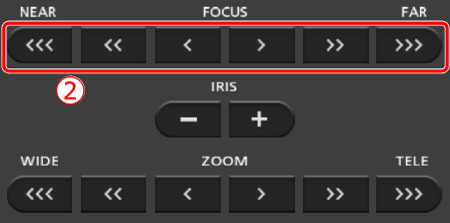
 ], [
], [  ], [
], [  ] to focus closer, or one of the controls on the [FAR] side [
  ], [
], [  ], [
], [  ] to focus farther away.
 ] / [
] / [  ] is the smallest, [
  ] / [
] / [  ] is medium, and [
  ] / [
] / [  ] is the largest.
Adjusting the zoom
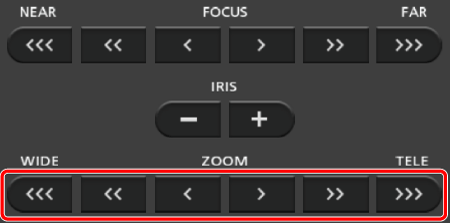
Press one of the zoom controls to adjust the zoom position as necessary.
 ], [
], [  ], [
], [  ] to zoom out, or one of the controls on the [TELE] side [
  ], [
], [  ], [
], [  ] to zoom in.
  ] / [
] / [  ] is the slowest, [
  ] / [
] / [  ] is medium, and [
  ] / [
] / [  ] is the fastest.
Caution
Caution
Caution
About the camcorder’s Wi-Fi standard
The specifications of the camcorder's Wi-Fi standard are as follows.
Wi-Fi protocol, operating frequency: IEEE 802.11b/g/n-compliant, 2.4 GHz
IEEE 802.11a/n-compliant, 5 GHz
Maximum data transfer rate: 11 Mbps (IEEE 802.11b)
54 Mbps (IEEE 802.11a/g)
150 Mbps (IEEE 802.11n)
These are theoretical values and actual data transfer rates may differ.


