Solution
Step 1: Connecting the Camera to a Printer via Wi-FiStep 2: Printing Images
Additional Information: Using the Virtual Keyboard
Connect the camera to a printer supporting PictBridge (Wireless LAN) via Wi-Fi to print images.
This section describes how to connect the camera directly to a printer via Wi-Fi.
Caution
 :
: 
 ⋗ or ⋖
  :
: 


 ⋗ modes or when Multi Shot Noise Reduction is set, the camera cannot be connected to a printer via Wi-Fi.
 Step 1: Connecting the Camera to a Printer via Wi-Fi
1. Turn on the camera and the printer.
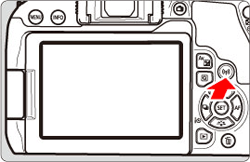
2. Press the camera’s ⋖ 
3. Select [Wi-Fi settings].
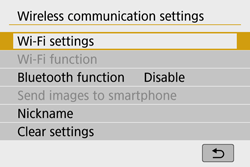
4. Select [Wi-Fi].
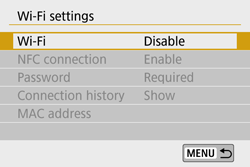
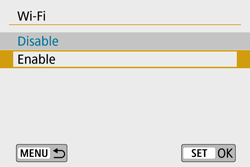
5. Select [Enable].
6. When the following screen appears, press ⋖ 
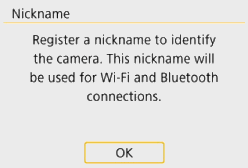
7. Enter the nickname. You can enter any characters between 1 to 8 characters in length.
When you finish entering, press the ⋖MENU⋗ button.
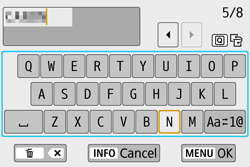
*For more information on using the keyboard, please refer to "Using the Virtual Keyboard".
Caution
Before setting up a connection, set the camera’s nickname (for identification).
When the camera is connected to another device via a wireless LAN, the nickname will be displayed on the device. Be sure to set a nickname as otherwise you cannot go to the wireless LAN settings screen.
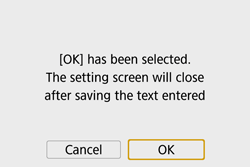
8. When the following screen appears, select [OK], then press ⋖ 
To return to the screen that appears when the ⋖ 
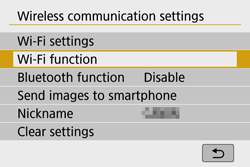
9. Select [Wi-Fi function].
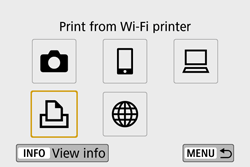
10. Select [ 
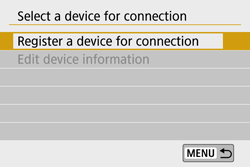
11. Select [Register a device for connection].
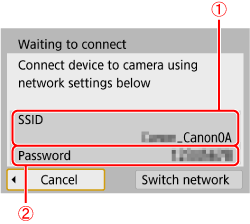
12. Check the SSID and password.
 ) and password (
  ) displayed on the camera’s LCD monitor.
Caution
"_Canon0A" is displayed at the end of the SSID.
13. Operate the printer to connect it to the camera via Wi-Fi.
 ).
). ).
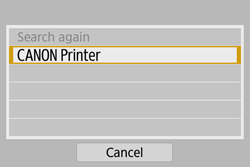
).14. When a list of detected printers appears, select the printer to connect to via Wi-Fi, then press ⋖ 
The processing screen is displayed.
When a Wi-Fi connection is established, an image on the card will appear.
The settings for connecting to a printer are now complete.
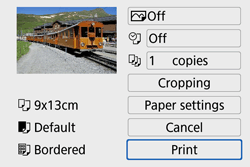
Step 2: Printing Images
1. Press the ⋖ 


By pressing the ⋖ 

2. Select [Print image].
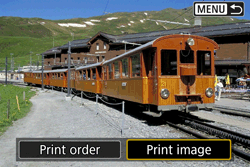
3. Select [Print].
4. Press the ⋖ 

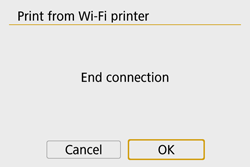
Caution
Caution
 ⋗ while [Stop] is displayed, then select [OK].
 - You changed the print order or deleted any of the print ordered images before resuming printing.
- When index is set, you changed the paper setting before resuming printing.
- The card’s remaining capacity was low when you paused printing.
Additional Information: Using the Virtual Keyboard
The following section describes how to set the camera’s nickname using the virtual keyboard.
The nickname can be changed later from the [Wireless communication settings] screen.

| Changing the entry area | Press the <  > button to toggle between the top and bottom entry areas. > button to toggle between the top and bottom entry areas. |
| Moving the cursor | Press the <  > < > <  > keys in the top area to move the cursor. > keys in the top area to move the cursor. |
| Entering text | In the bottom area, press the <  > < > <  > or < > or <  > < > <  > keys to select a character, then press < > keys to select a character, then press <  > to enter it. > to enter it.You can check how many characters you have entered and how many more can be entered by referring to [*/*] on the upper right of the screen. |
| Changing the entry mode* | Select [  ] at the bottom right of the bottom entry area. Each time you press < ] at the bottom right of the bottom entry area. Each time you press <  >, the entry mode will change as follows: Lower case > Numerals / Symbols 1 > Numerals / Symbols 2 > Upper case. >, the entry mode will change as follows: Lower case > Numerals / Symbols 1 > Numerals / Symbols 2 > Upper case.* When [Touch control: Disable] is set, you can enter all characters on one screen. |
| Deleting a character | Press the <  > button to delete one character. > button to delete one character. |
| Finishing the text entry | Press the < MENU > button to confirm what you have entered and exit. If a confirmation dialog is displayed, select [OK] to exit. |
| Canceling the text entry | Press the < INFO > button to cancel text entry and exit. If a confirmation dialog is displayed, select [OK] to exit. |


