

Solution
Load the paper that you usually use in the paper drawer. When you want to print on paper that is not loaded in the paper drawer, load the paper in the multi-purpose tray. ( Loading Paper in the Multi-Purpose Tray )
Caution
Make sure to load paper in landscape orientation
Caution
Follow the procedure below when loading paper into the optional Cassette Feeding Unit.
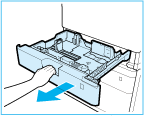
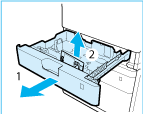
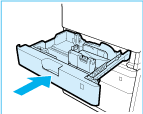
1. Grip the handle, and pull out the paper drawer until it stops.
2. When loading paper into the paper drawer for the first time, or when changing the paper size, adjust the position of the paper guides.
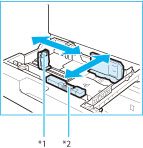
*1 Paper Guide on Left
*2 Paper Guide at Front
2-1. Slide the paper guide on the left while squeezing it on the top to align it with the mark for the desired paper size.
2-2. Slide the paper guide at the front while squeezing it on the top to align it with the mark for the desired paper size.

Slide the paper guides until they click into place. If the paper guides are not aligned correctly, the paper size will not correctly appear on the display. It is also necessary to adjust the paper guides correctly to avoid causing a paper jam, dirty prints, or making the inside of the machine dirty.

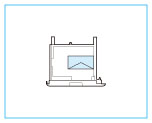
When using inch paper, remove the A4 feeder attachment attached to the paper drawer and store it in the storage space. When using A or B series paper, make sure to attach the A4 feeder attachment to the paper drawer. And then, select the paper series that you are going to use in ⋖Menu⋗ 
A/B Series
Inch Series
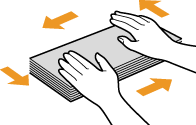
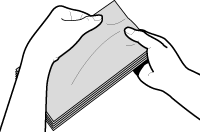
3. Prepare the paper to load.
Before loading paper, always fan the sheets several times, and align the edges to facilitate feeding.
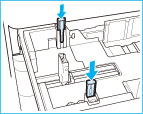
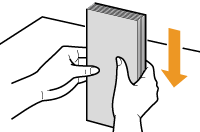
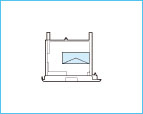
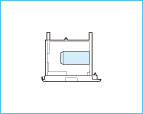
4. Load the paper stack into the paper drawer.
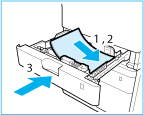
4-1. Make sure that the paper size setting of the paper drawer matches the size of the paper to load in the paper drawer.
4-2. Load the paper stack against the right wall of the paper drawer.
4-3. Gently push the paper drawer back into the machine.
 ), or if the paper drawer is not completely pushed into the machine. ).
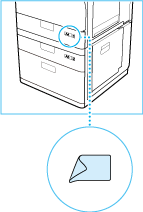
5. When loading paper into the paper drawer for the first time, or when changing the paper size, attach a paper size label to the paper drawer.
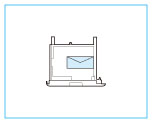
When not loading envelopes to a paper drawer, store the envelope feeder attachment in the storage area of the paper drawer. For information on storing the envelope feeder attachment, see "Getting Started".
The paper size labels included with the machine contain paper sizes not supported by the machine.
6. If the paper has been changed, register the type of the loaded paper.
Register the type of paper you loaded in the paper drawer in ⋖Paper Settings⋗. For more information, see [Specifying Paper Type in the Paper Drawer] in the [Specifying Paper Size and Type].
When changing the paper size or type


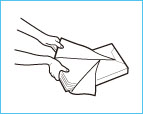
Follow the procedure below to prepare the envelopes before loading.
1. Close the flap of each envelope.
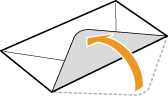
2. Flatten them to release any remaining air, and make sure that the edges are pressed tightly.
3. Loosen any stiff corners of the envelopes and flatten any curls.
4. Align the edges of the envelope on a flat surface.
Attach the Envelope Feeder Attachment before loading envelopes to a paper drawer.
When using the ISO-C5 envelopes, the Envelope Feeder Attachment does not need to be attached.
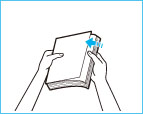
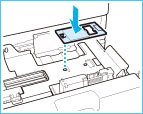
1. Open the paper drawer 1, and remove the envelope feeder attachment.
1-1. Grip the handle, and pull out the paper drawer until it stops.
1-2. Remove the envelope feeder attachment stored inside the paper drawer.
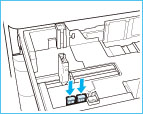
2. Attach the envelope feeder attachment by aligning the protruding areas of the envelope feeder attachment with the holes on the paper drawer.
3. Adjust the position of the paper guides.
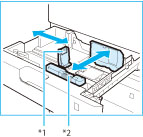
*1 Paper Guide on Left
*2 Paper Guide at Front
3-1. Slide the paper guide on the left while squeezing it on the top to align it with the mark for the desired paper size.
3-2. Slide the paper guide at the front while squeezing it on the top to align it with the mark for the desired paper size.
Slide the paper guide until they click into place. If the paper guides are not aligned correctly, the paper size will not correctly appear on the display. It is also necessary to adjust the paper guide correctly to avoid causing a paper jam, dirty prints, or making the inside of the machine dirty.
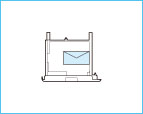
4. Load the envelopes into the drawer.
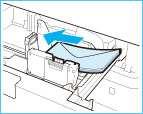
4-1. Load 10 envelopes at a time with the side you want to print on facing up.
4-2. While loading the envelopes, press down on the right side of the receptacle to lock them into place.
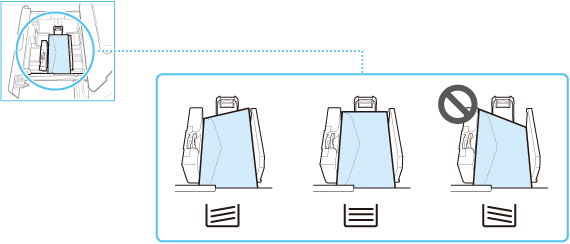
Align the leading edges of the envelopes, and make sure that they are held in place under the claws. Make sure that the flaps are positioned as shown in the illustrations below.
Monarch, COM10 No.10, DL, ISO-C5
Yougatanaga 3
Nagagata 3
 ).
). ).
).If envelopes are oriented normally when loaded but wrinkle when printed, load envelopes after rotating them 180 degrees, as shown below.
Monarch, COM10 No.10, DL, ISO-C5
Yougatanaga 3
5. Gently push the paper drawer back into the machine.
6. Register the type of envelope on the ⋖Paper Settings⋗ screen.
For instructions on registering the envelope type, see step 3 of "Specifying Paper Type in the Paper Drawer" in the "Specifying Paper Size and Type".