Solution
Checking the printer environmentPreparing the items required
Registering the printer to Print from E-mail
Using Print from E-mail
To use Print from E-mail by multiple users
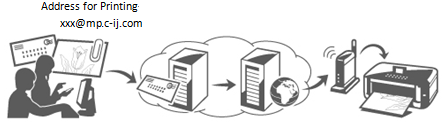
Using Print from E-mail, you can print documents or photos attached to an e-mail just by sending the e-mail to the special address for printing from your PC, smartphone, or other types of PDA.
To use Print from E-mail, follow the procedures explained below.
Checking the printer environment
To use Print from E-mail, the printer needs the following environment:
Caution
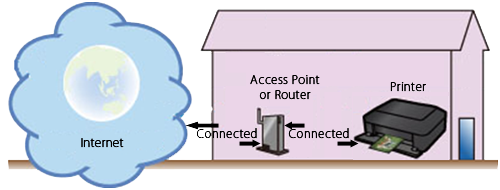
Connect the printer to an access point or router that is connected to the Internet, as shown below.
If the printer is unable to connect to the access point or router, refer to [ Wireless LAN connection of your printer to an access point ] and connect the printer to the access point.
* To use those services on the intranet, open Port 5222 (both on the PCs and the intranet).
Preparing the items required
To use Print from E-mail, you need to register the printer to Print from E-mail.
Prepare the following:
a) Your e-mail address
Your e-mail address will be used for the account information for Print from E-mail.
b) PC, smartphone, or other types of PDA
Using a PC, smartphone, or other types of PDA, you will register the printer to Print from E-mail.
Caution
The PC, smartphone, or other types of PDA must be connected to the Internet (including via the 3G line).
For your easy entry, use of a PC with the keyboard is recommended.
Registering the printer to Print from E-mail
Register your printer to Print from E-mail in three steps below.
When the printer is properly registered, you will receive the special address for printing.
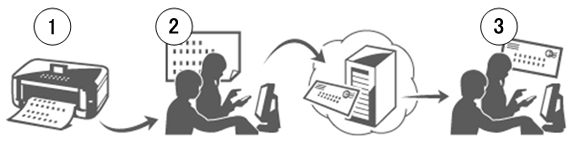
Step 1: Print the authentication URL (the URL for registration of the printer).
Step 2: Visit the printed URL, and enter your account information (your e-mail address, etc.).
Step 3: You will receive the e-mail to the entered address. Visit the URL given in the received mail, and register your printer. The address for printing and the login URL will be displayed in the registration screen.
Step 1: Print the authentication URL and PIN code.
(1) Power on the printer.
(2) Select [ Setup ].
(3) Select [ Web service setup ], and press [ OK ].
(4) Select [ Web service connection setup ], and press [ OK ].
(5) Select [ Print from E-mail setup ], and press [ OK ].
(6) Select [ Register printer ], and press [ OK ].
(7) At the following message, select [ Yes ], and press [ OK ].
(8) At the message for selecting the language for printing. In the next screen, select a desired language, and press [ OK ].
(9) At the message prompting you to print the authentication URL, set A4 paper in the cassette and press [ OK ].
The authentication URL and PIN code will be printed.
Caution
The printout will be used in the later process of registration.
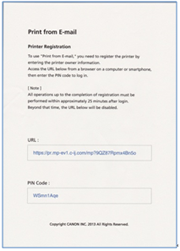
Caution
Access the printed URL and log in within 25 minutes.
(10) After the authentication URL is printed, tap [ Yes ].
(11) "Confirming the authentication process" will be displayed.
Proceed to Step 2.
Step 2: Visit the printed URL, and enter your account information (your e-mail address, etc.).
(1) Using a PC or other types of PDA, enter the printed URL.
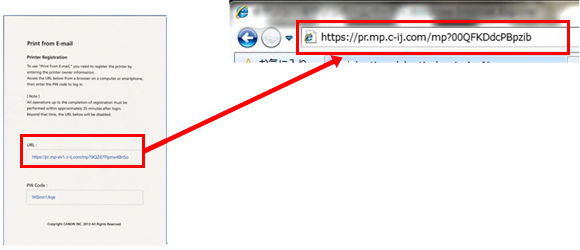
Caution
The URL is case-sensitive.
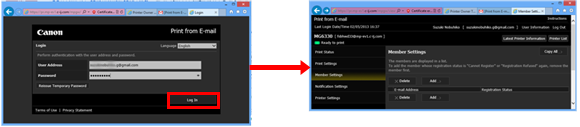
(2) At the following screen, enter the PIN code and click [ Log In ].
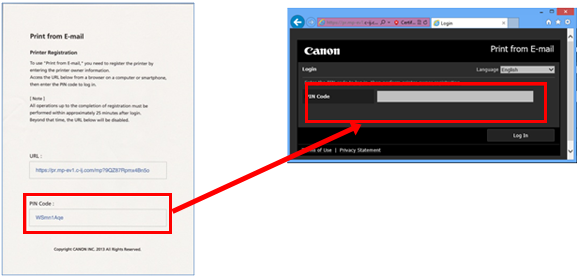
Caution
If the login screen is not displayed, check if the entered URL is correct (e.g. "http" is wrong while it should be "https.")
(3) In the use agreement window, select [ Agree ].
Caution
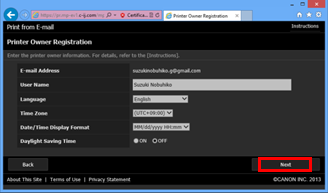
(4) At the following screen, enter your e-mail address and click [ Next ].
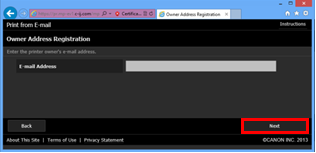
Caution
Caution
(5) At the following screen, enter the information in each box and click [ Next ].
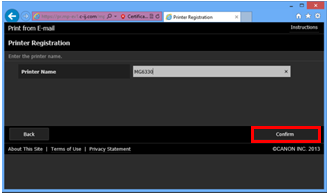
(6) In the [ Printer Registration ] window, enter the [ Printer Name ], and select [ Confirm ].
Caution
If you use multiple printers and you need to identify which printer is used, enter the specific printer name.
Caution
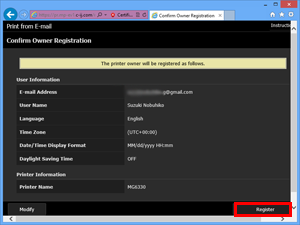
(7) Confirm the entered information and click [ Register ].
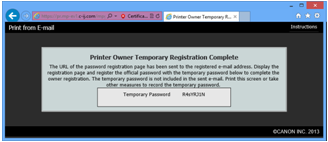
(8) The temporary password will be displayed. Write it down on paper or Notepad.
Caution
Registration (authentication) must be completed in 25 minutes.
Proceed to the next step promptly.
Step 3: Visit the URL given in the received mail and complete the registration.
(1) The mail shown below will be sent to your e-mail address you entered in Step 2. Click on the given URL.
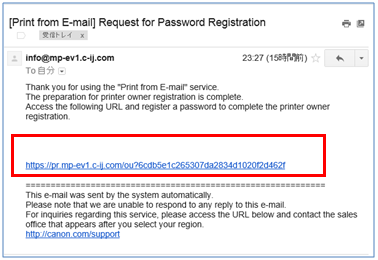
Caution
Depending on your mailer settings, the received mail may be automatically sorted into a box other than your inbox.
If the mail is not found in your inbox, check the other boxes.
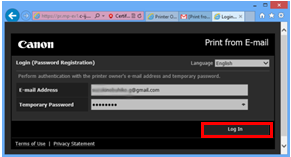
Caution
At the following screen, enter the temporary password given in Step 2, and click [ Log In ].
(2) At the following screen, enter your desired password and click [ Register ].
When the password setting process is completed, the printer's e-mail address and the service's URL are displayed, and the printer's registration process is completed.
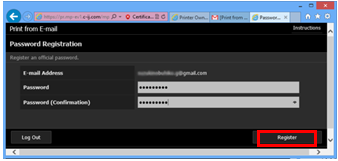
Caution
- Set a password that has 8 or more characters.
- The characters that you can use are single-byte uppercase letters, single-byte lowercase letters, and single-byte numbers.
- In the password, combine all of the different types of characters that can be used.
(3) The login URL and address for printing will be displayed as shown below.
You will use this address for printing in Print from E-mail.
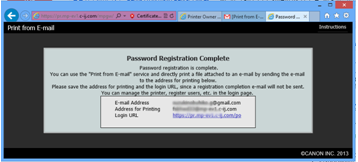
Caution
In the login URL page, you can operate the printer as well as register other users for Print from E-mail.
(4) Now you are ready for use of Print from E-mail.
Using Print from E-mail
(1) Prepare a file to be printed.
The file format, number of files, and file size that this printing function supports are provided below.
Supported File Formats
Caution
Supported Number of Files and File Sizes
Caution
(2) Using your PC, smartphone, or other types of PDA, attach the file(s) to an e-mail and send it to the address for printing.
(3) The attached file(s) will be printed.
To use Print from E-mail by multiple users
To use Print from E-mail, the user’s e-mail address must be registered to the address for printing.
The file sent from an unregistered e-mail will not be printed.
To add a user’s e-mail address, the registered user needs to log in the Member Settings page from the login page.