


Solution
Using the uninstaller to delete the softwareDeleting the software when using the uninstaller does not work
Reinstalling EOS Utility Ver.3.x from Downloaded EOS Digital Solution Disk Software
Please follow the procedure below to uninstall (delete) EOS Utility Ver. 3.x and then reinstall the software.
Caution
Please exit any open applications before uninstalling EOS Utility Ver. 3.x.
Using the uninstaller to delete the software
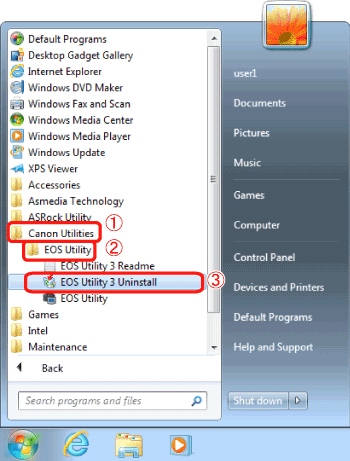
1. Click 


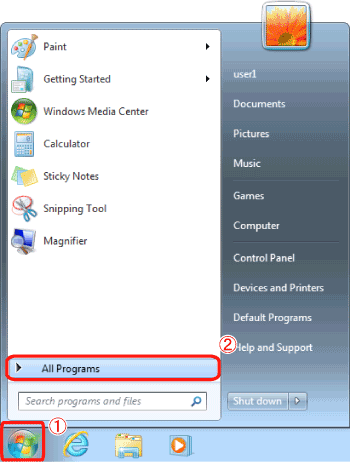
2. Click 
Caution
When the [User Account Control] dialog box appears, click [Yes].
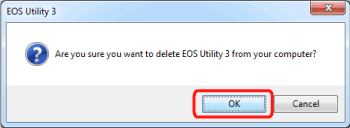
3. When the following dialog box appears, click [OK] to start uninstalling EOS Utility 3.
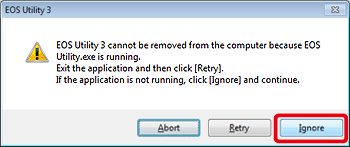
4. If the following screen is displayed, click [Ignore].
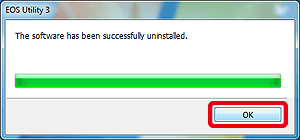
5. When uninstallation is finished, a dialogue box similar to the one in the example image below will be displayed.
Click [OK] to close the window.
This completes the process of deleting the software using the uninstaller.
To reinstall the software, please refer to the 'Reinstalling EOS Utility Ver.3.x from Downloaded EOS Digital Solution Disk Software' section below.
Deleting the software when using the uninstaller does not work
If the [The software has been successfully uninstalled.] message is not displayed after you have completed the steps listed in the previous section, please try performing the procedure explained below.
1. Click
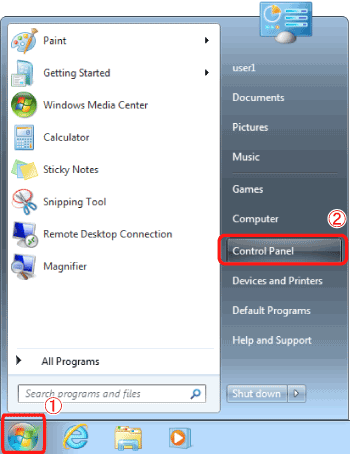
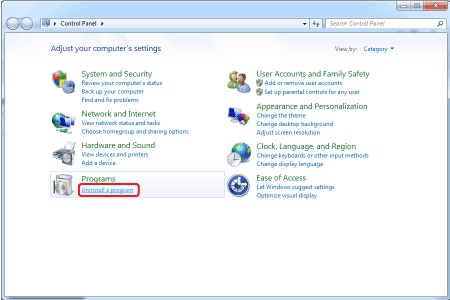
2. Click [Uninstall a program*] in the [Control Panel].
*If the display style is [Large Icons] or [Small Icons], click [Programs and Features].
3. Select
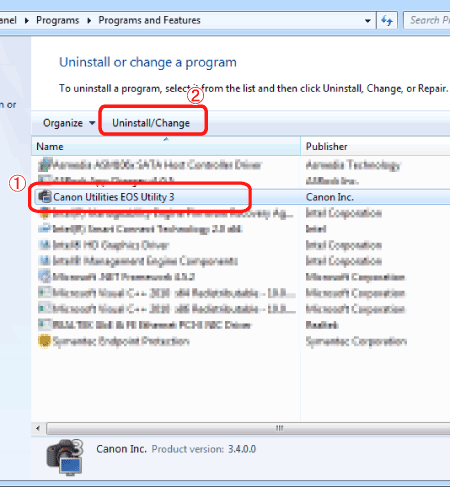
4. When the dialog box appearing in the example image below is displayed, click [OK] to start uninstalling [EOS Utility 3].
5. If the following message is displayed, click [Ignore].
6. When the uninstallation is finished, a dialogue box similar to the one in the example image below will be displayed.
Click [OK] to close the window.
This completes the procedure for deleting the software when using the uninstaller does not work.
Reinstalling EOS Utility Ver.3.x from Downloaded EOS Digital Solution Disk Software
1. After uninstalling EOS Utility Ver. 3.x using the procedure above, please restart your computer.
Caution
To prevent possible operational problems, make sure to restart your computer after uninstalling EOS Utility Ver. 3.x.
Reinstalling the software without restarting your computer first may cause operational problems to occur.
2. Right-click the downloaded file and select [Extract All].

Caution
3. Follow the instructions on the screen to unzip the files. Double-click [setup.exe] in the generated folder.

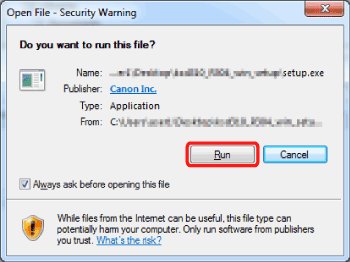
4. When the following screen is shown, click [Run].
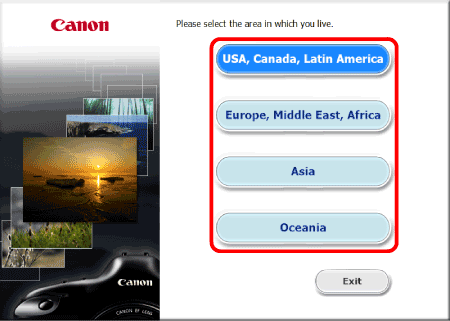
5. Select the area in which you live.
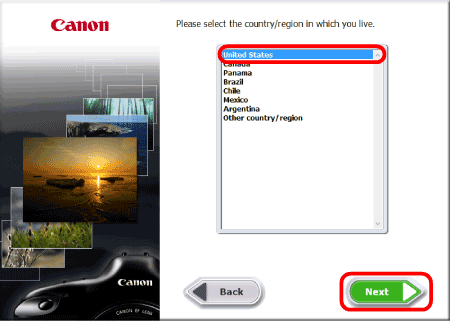
6. Select the country where you live, and then click [Next].
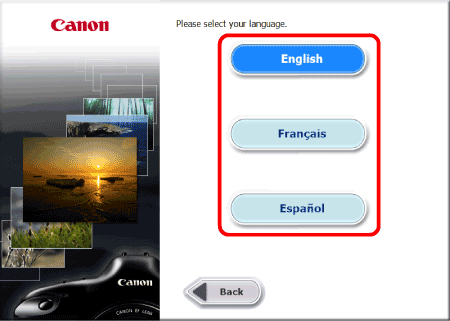
7. If a language setting screen appears, select the desired language from the options displayed.
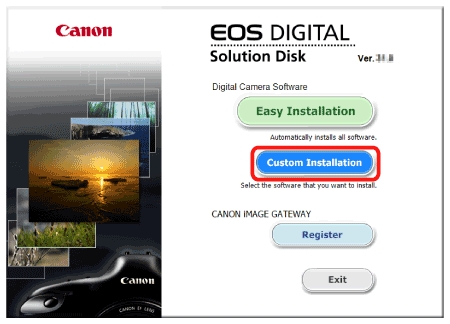
8. Click [Custom Installation].
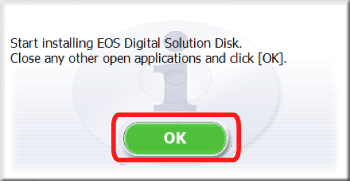
9. Click [OK] when the following window appears.
10. In the [Software to be installed] window, select 
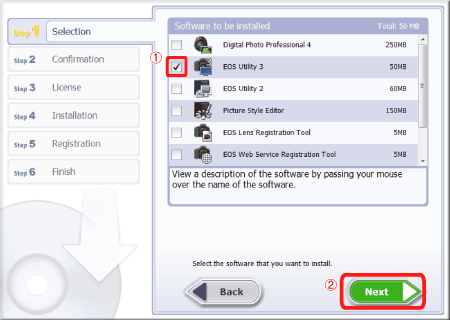
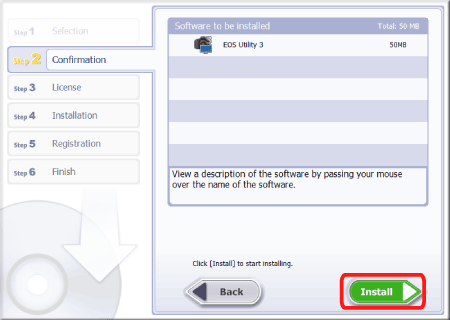
11. Confirm that [EOS Utility Ver.3] has been selected, then click [Install].
12. Click [Yes] to accept the License Agreement.
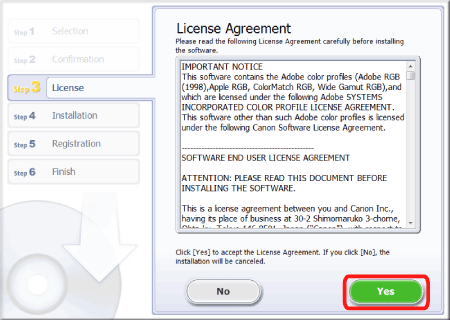
Caution

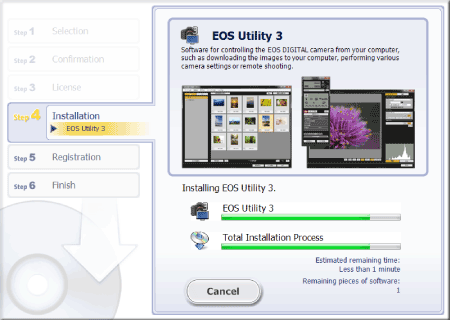
13. Installation starts.
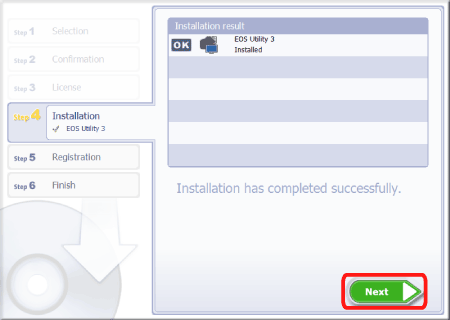
14. When the installation has completed, 'Installation has completed successfully' appears. Click [Next].
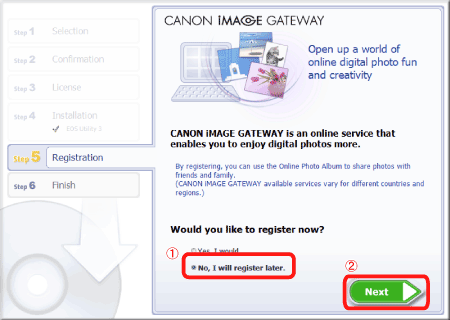
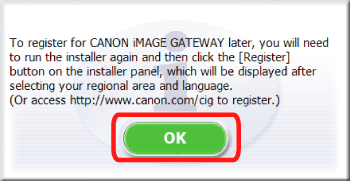
15. The following screen appears. In this example,
To register your camera on CANON iMAGE GATEWAY, select [Yes, I would.], and complete the registration procedure.
16. Click [OK].
17. Click [Finish].
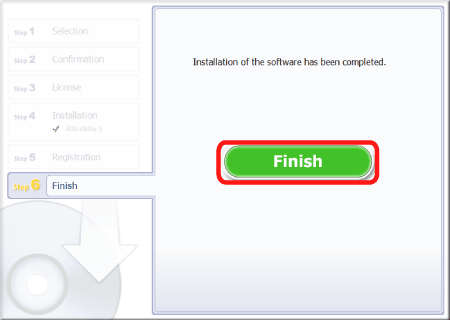
This completes the procedure for reinstalling EOS Utility Ver.3.x.